> ## Documentation Index
> Fetch the complete documentation index at: https://docs.brightdata.com/llms.txt
> Use this file to discover all available pages before exploring further.
# Webscraper.io 代理集成
> 了解如何将 Webscraper.io 与 Bright Data 代理集成。
### 您的代理访问信息
Bright Data 代理按“代理区域”(Proxy zones)进行分组。每个区域包含其对应的代理配置。
要获取代理区域的访问权限:
1. 登录 Bright Data 控制面板
2. 选择现有代理区域或新建一个代理区域
3. 点击新的区域名称,并选择 **概览(Overview)** 选项卡
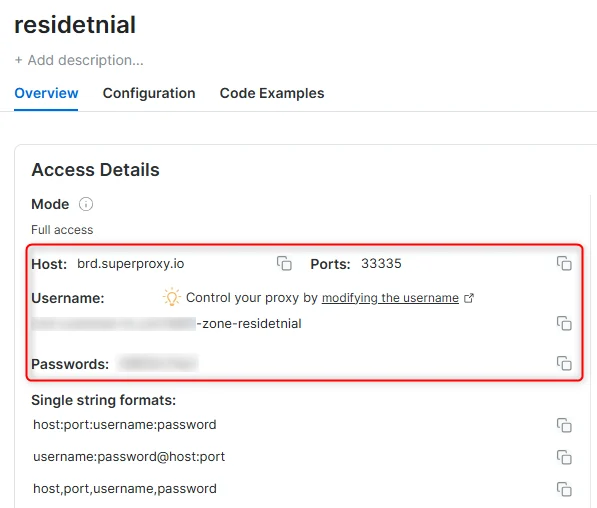
4. 在概览选项卡中,找到 **访问详情(Access details)**,并单击复制图标将代理访问信息复制到剪贴板
5. 您需要以下信息:代理主机(Proxy Host)、代理端口(Proxy Port)、代理区域用户名(Proxy Zone username)和代理区域密码(Proxy Zone password)
6. 点击复制图标,将文本复制到剪贴板,并粘贴到您的工具的代理配置中
### 访问详情示例
 ### 住宅代理访问
要使用 Bright Data 的 **住宅代理(Residential Proxies)**,您必须是经过 KYC 验证的企业账户。请与 Bright Data 合规团队完成 KYC 验证;不存在自动或无需 KYC 的访问方式。尚未完成 KYC 时,请使用 ISP 或数据中心代理。[了解更多...](/proxy-networks/residential/network-access)
### 目标是搜索引擎?
如果您的目标是 Google、Bing 或 Yandex 等搜索引擎,则需要使用专门的搜索引擎结果页(**SERP**)代理 API。请使用 Bright Data SERP API 来访问搜索引擎。\
[点击此处了解 Bright Data SERP 代理 API。](/scraping-automation/serp-api/introduction)
### 避免工具中的 `PROXY ERROR`
一些工具会使用搜索引擎作为代理测试目标:如果您的代理测试失败,这可能就是原因。请确保您的测试目标域名不是搜索引擎(此设置在工具配置中,而非 Bright Data 代理的控制范围内)。
Webscraper.io 扩展和 Webscraper.io Cloud 是您进行数据提取的理想工具。通过简单的点选操作,抓取器可在几分钟内收集网站数据。
使用 Webscraper.io Cloud,可完全自动化抓取任务,包括调度器、API、数据解析器、数据导出等功能。
## 开始使用 Webscraper.io
1. 通过 [Chrome 商店](https://chrome.google.com/webstore/detail/web-scraper/jnhgnonknehpejjnehehllkliplmbmhn?hl=en) 安装 Web Scraper 浏览器扩展
2. 注册 [Webscraper.io Cloud](https://cloud.webscraper.io/register?luminati)
3. 订阅 [Scale](https://cloud.webscraper.io/subscription-manager?luminati) 计划
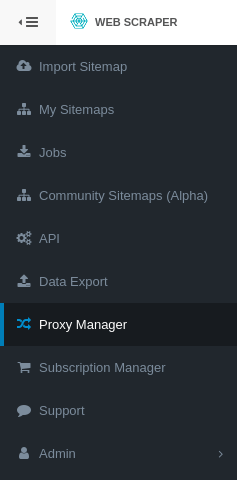
4. 打开左侧工具栏中的 “Proxy Manager”
### 住宅代理访问
要使用 Bright Data 的 **住宅代理(Residential Proxies)**,您必须是经过 KYC 验证的企业账户。请与 Bright Data 合规团队完成 KYC 验证;不存在自动或无需 KYC 的访问方式。尚未完成 KYC 时,请使用 ISP 或数据中心代理。[了解更多...](/proxy-networks/residential/network-access)
### 目标是搜索引擎?
如果您的目标是 Google、Bing 或 Yandex 等搜索引擎,则需要使用专门的搜索引擎结果页(**SERP**)代理 API。请使用 Bright Data SERP API 来访问搜索引擎。\
[点击此处了解 Bright Data SERP 代理 API。](/scraping-automation/serp-api/introduction)
### 避免工具中的 `PROXY ERROR`
一些工具会使用搜索引擎作为代理测试目标:如果您的代理测试失败,这可能就是原因。请确保您的测试目标域名不是搜索引擎(此设置在工具配置中,而非 Bright Data 代理的控制范围内)。
Webscraper.io 扩展和 Webscraper.io Cloud 是您进行数据提取的理想工具。通过简单的点选操作,抓取器可在几分钟内收集网站数据。
使用 Webscraper.io Cloud,可完全自动化抓取任务,包括调度器、API、数据解析器、数据导出等功能。
## 开始使用 Webscraper.io
1. 通过 [Chrome 商店](https://chrome.google.com/webstore/detail/web-scraper/jnhgnonknehpejjnehehllkliplmbmhn?hl=en) 安装 Web Scraper 浏览器扩展
2. 注册 [Webscraper.io Cloud](https://cloud.webscraper.io/register?luminati)
3. 订阅 [Scale](https://cloud.webscraper.io/subscription-manager?luminati) 计划
4. 打开左侧工具栏中的 “Proxy Manager”
 ## 在 Bright Data 创建代理
1. 登录您的 [Bright Data 控制面板](https://www.bright.cn/cp/zones) 并点击 **Add Zone**
2. 选择网络类型并按 **Add Zone**
3. 返回 Bright Data 控制面板,点击某个 Zone 名称
4. 记下该 Zone 的用户名和密码
5. 切换回 Web Scraper Cloud Proxy Manager
6. 选择 **Bright Data Proxy** 作为指定代理服务器
## 在 Bright Data 创建代理
1. 登录您的 [Bright Data 控制面板](https://www.bright.cn/cp/zones) 并点击 **Add Zone**
2. 选择网络类型并按 **Add Zone**
3. 返回 Bright Data 控制面板,点击某个 Zone 名称
4. 记下该 Zone 的用户名和密码
5. 切换回 Web Scraper Cloud Proxy Manager
6. 选择 **Bright Data Proxy** 作为指定代理服务器
 7. 输入自定义名称,以及 Bright Data 创建 Zone 的用户名和密码。\
如有需要,可通过下拉菜单选择国家以限制代理区域。
7. 输入自定义名称,以及 Bright Data 创建 Zone 的用户名和密码。\
如有需要,可通过下拉菜单选择国家以限制代理区域。
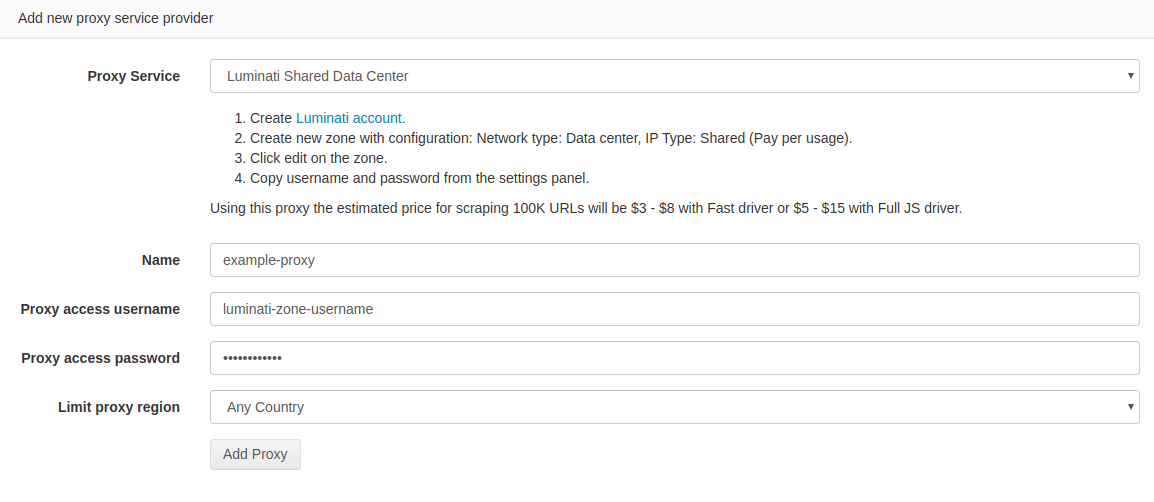 8. 点击 **Add Proxy**
9. 自定义代理现在会显示在下方列表中
8. 点击 **Add Proxy**
9. 自定义代理现在会显示在下方列表中
 10. 要在抓取任务中使用代理,请从左侧菜单进入 “My Sitemaps”
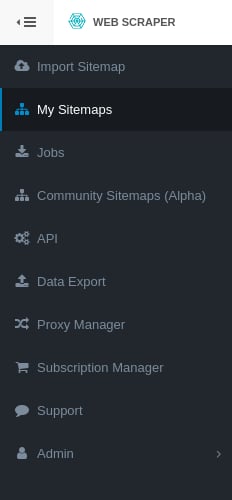 11. 点击要抓取的站点地图旁边的 **Details Page**
 12. 在 **Proxy** 下拉菜单中选择已创建的代理,然后点击 **Scrape**
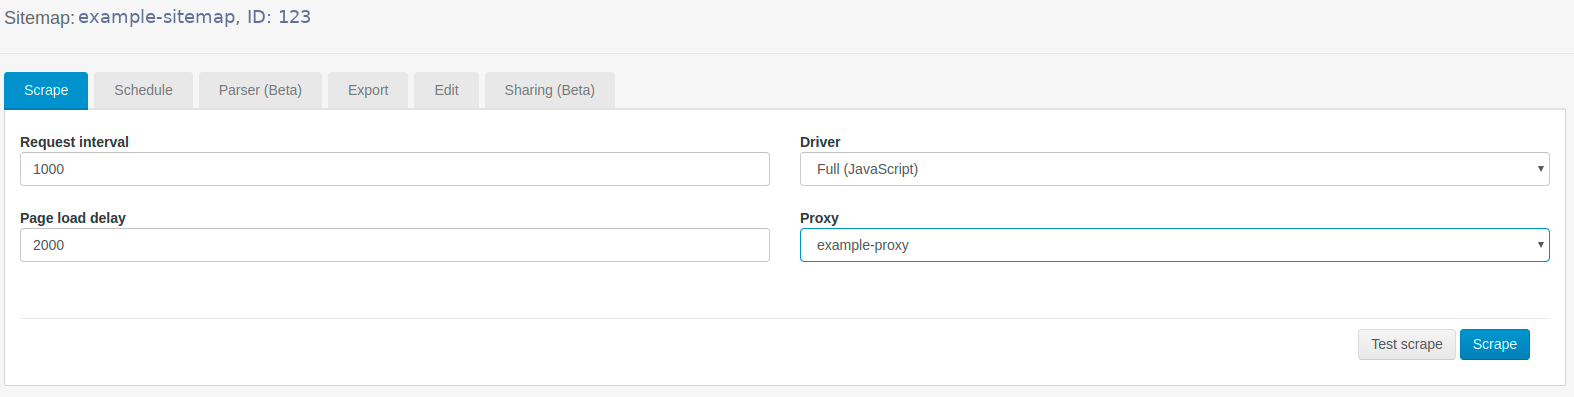 就这样 - Webscraper.io Cloud 将通过 Bright Data Proxy 运行您的抓取器。就是这么简单!
### Webscraper.io 并非 Bright Data 产品
注意:webscraper.io 不是 Bright Data Scrapers 工具 - 本文指的是外部 Webscraper.io 集成。
就这样 - Webscraper.io Cloud 将通过 Bright Data Proxy 运行您的抓取器。就是这么简单!
### Webscraper.io 并非 Bright Data 产品
注意:webscraper.io 不是 Bright Data Scrapers 工具 - 本文指的是外部 Webscraper.io 集成。