> ## Documentation Index
> Fetch the complete documentation index at: https://docs.brightdata.com/llms.txt
> Use this file to discover all available pages before exploring further.
# Build a scraper with the AI Agent
> Use Bright Data Scraper Studio's AI Agent to build a custom web scraper from a natural-language prompt in about 10 minutes, no coding required.
Bright Data Scraper Studio's AI Agent builds a custom web scraper from a natural-language description. Give it a target URL and describe the data you want; the agent generates an output schema, writes the scraper code, and hands you a runnable scraper you can trigger by API, manually, or on a schedule. This tutorial walks through the full flow.
**Time to complete:** about 10 minutes
Prefer the terminal? Use the [Bright Data CLI](/datasets/scraper-studio/build-with-the-cli) to build the same scraper from any shell or coding-agent embedded terminal (Claude Code, Cursor, Codex).
## Prerequisites
* A Bright Data account ([sign up free](https://brightdata.com/?hs_signup=1\&utm_source=docs))
* The URL of the website you want to scrape
## Build your first scraper with the AI Agent
In the Bright Data control panel, click **Scrapers** in the left menu and open **Scraper Studio**.
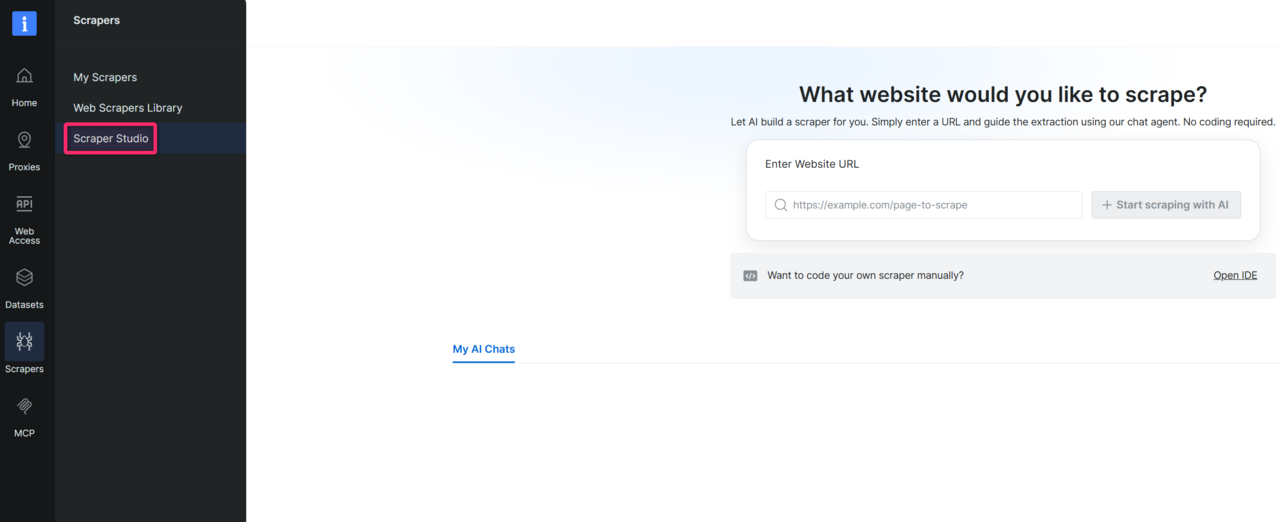 Paste the URL of the page you want to scrape into the chat input. Along with the URL, add any context that helps the AI build a more accurate scraper on the first try. The more context you provide, the better the generated code.
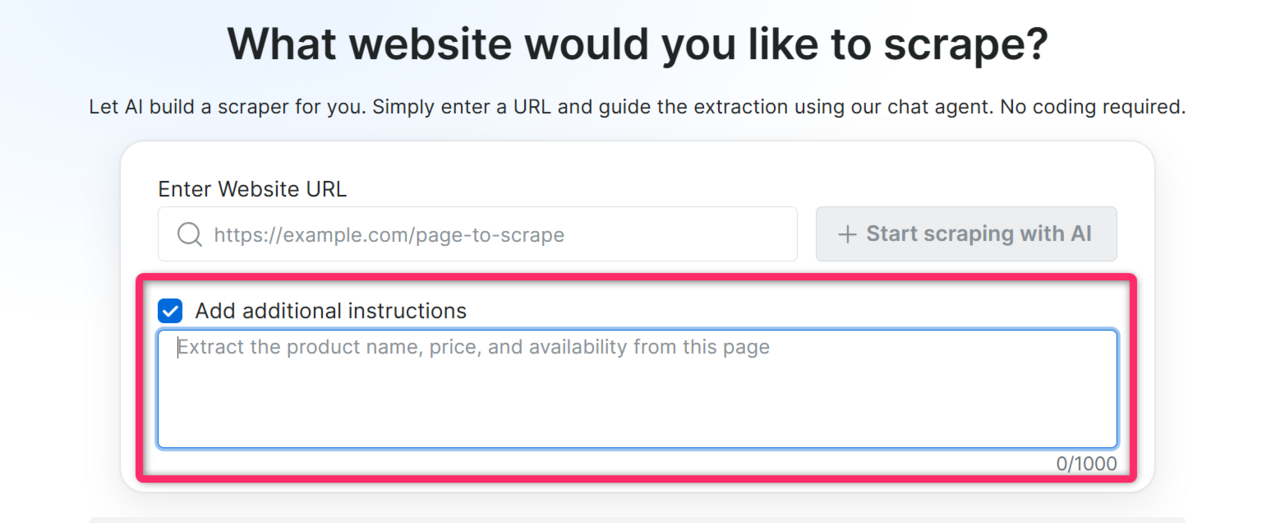 Useful context to include:
* **Specific fields** you need: "I need price, title, and stock status"
* **Where the data lives** on the page: "prices are in the product detail panel, not the listing page"
* **Actions required** to reach the data: "click 'Show more' to load full descriptions"
* **CSS selectors**, if you know them: `.product-price span.amount`
* **Page load behavior**, if the site is slow or lazy-loads content: "results load dynamically, give it extra time"
> **Expected result:** the AI Agent acknowledges the URL and may ask one or two clarifying questions about the data you want.
Respond in plain language.
> **Expected result:** the AI Agent generates a schema, a structured list of fields with data types that will become your scraper's output.
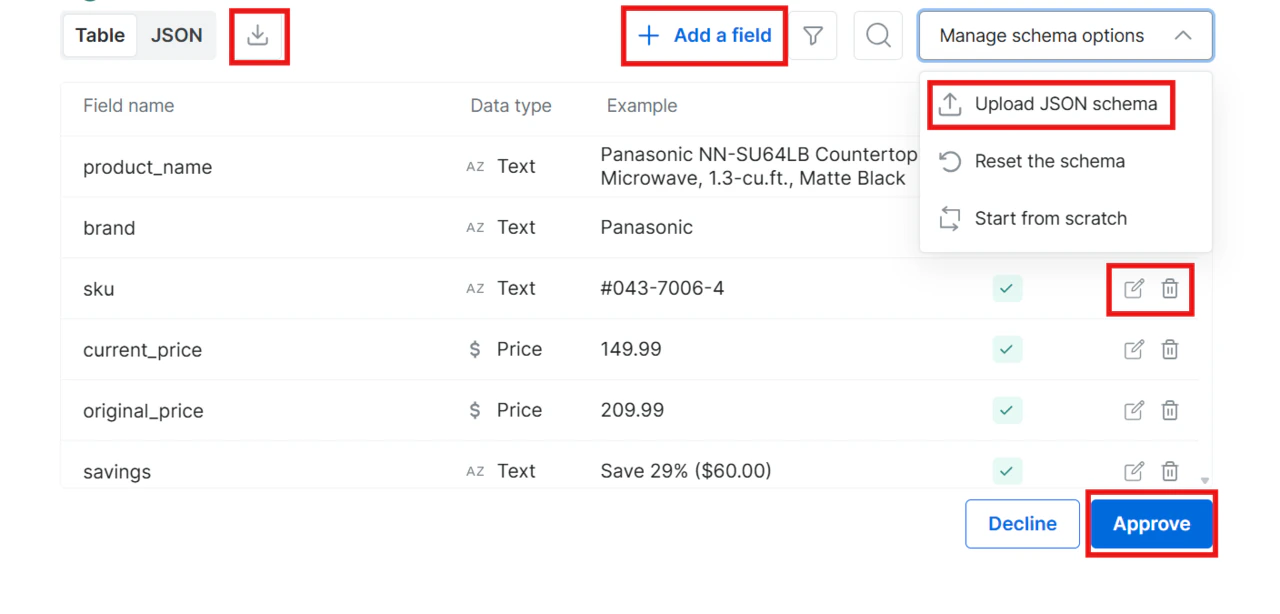
Read through the generated schema. You have four options:
* **Approve:** click Approve to accept the schema as-is
* **Decline:** type feedback in the chat (for example, "Remove the image field and add a rating field") and the AI regenerates the schema
* **Edit inline:** modify the schema directly without going back to the chat
* **Upload your own schema:** bring your own schema file; download the example file to see the correct format
Inline editing options:
* **Edit a field** (pencil icon): change a field's name or data type
* **Delete a field** (trash icon): remove fields you do not need
* **Add a field** (plus button): add new fields to the schema
Useful context to include:
* **Specific fields** you need: "I need price, title, and stock status"
* **Where the data lives** on the page: "prices are in the product detail panel, not the listing page"
* **Actions required** to reach the data: "click 'Show more' to load full descriptions"
* **CSS selectors**, if you know them: `.product-price span.amount`
* **Page load behavior**, if the site is slow or lazy-loads content: "results load dynamically, give it extra time"
> **Expected result:** the AI Agent acknowledges the URL and may ask one or two clarifying questions about the data you want.
Respond in plain language.
> **Expected result:** the AI Agent generates a schema, a structured list of fields with data types that will become your scraper's output.
Read through the generated schema. You have four options:
* **Approve:** click Approve to accept the schema as-is
* **Decline:** type feedback in the chat (for example, "Remove the image field and add a rating field") and the AI regenerates the schema
* **Edit inline:** modify the schema directly without going back to the chat
* **Upload your own schema:** bring your own schema file; download the example file to see the correct format
Inline editing options:
* **Edit a field** (pencil icon): change a field's name or data type
* **Delete a field** (trash icon): remove fields you do not need
* **Add a field** (plus button): add new fields to the schema
 Additional controls:
* **Start from scratch:** clears every field so you can build the schema manually from an empty state
* **Reset the schema:** discards inline changes and returns to the original AI-generated schema
Click **Approve** when you are ready.
> **Expected result:** once approved, the AI Agent starts generating the scraper code.
The AI writes the full scraper, including extraction logic, navigation handling, data validation, and error handling. This takes a few minutes.
> **Expected result:** a confirmation popup appears indicating your scraper is ready.
Additional controls:
* **Start from scratch:** clears every field so you can build the schema manually from an empty state
* **Reset the schema:** discards inline changes and returns to the original AI-generated schema
Click **Approve** when you are ready.
> **Expected result:** once approved, the AI Agent starts generating the scraper code.
The AI writes the full scraper, including extraction logic, navigation handling, data validation, and error handling. This takes a few minutes.
> **Expected result:** a confirmation popup appears indicating your scraper is ready.
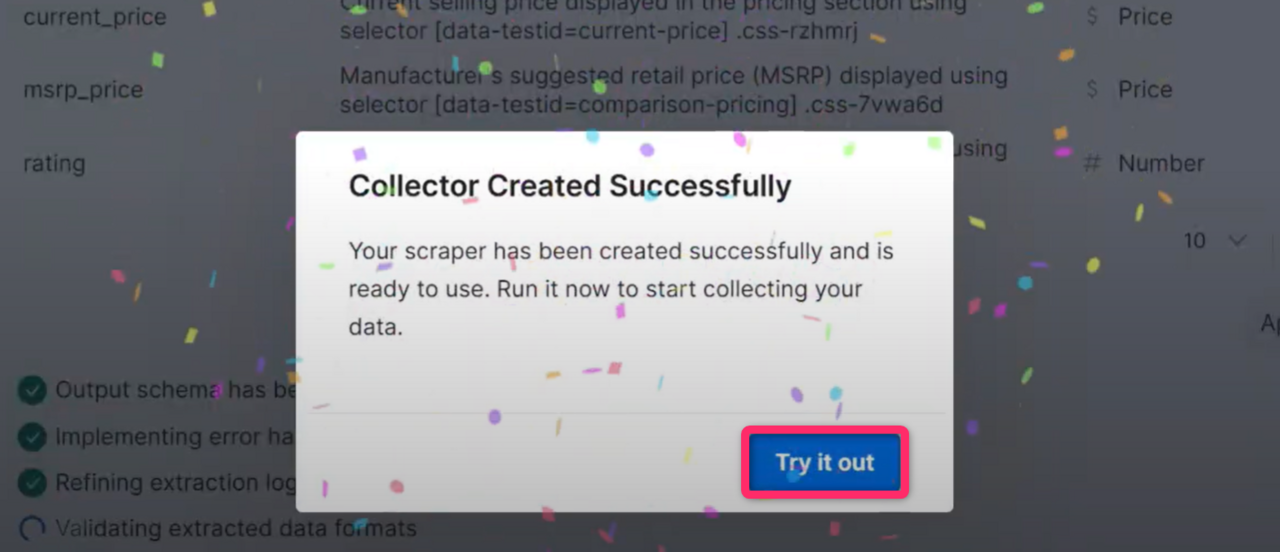 Click **Try it out** to open the Initiate Manually page. Review the collection settings and click **Start** to begin data collection.
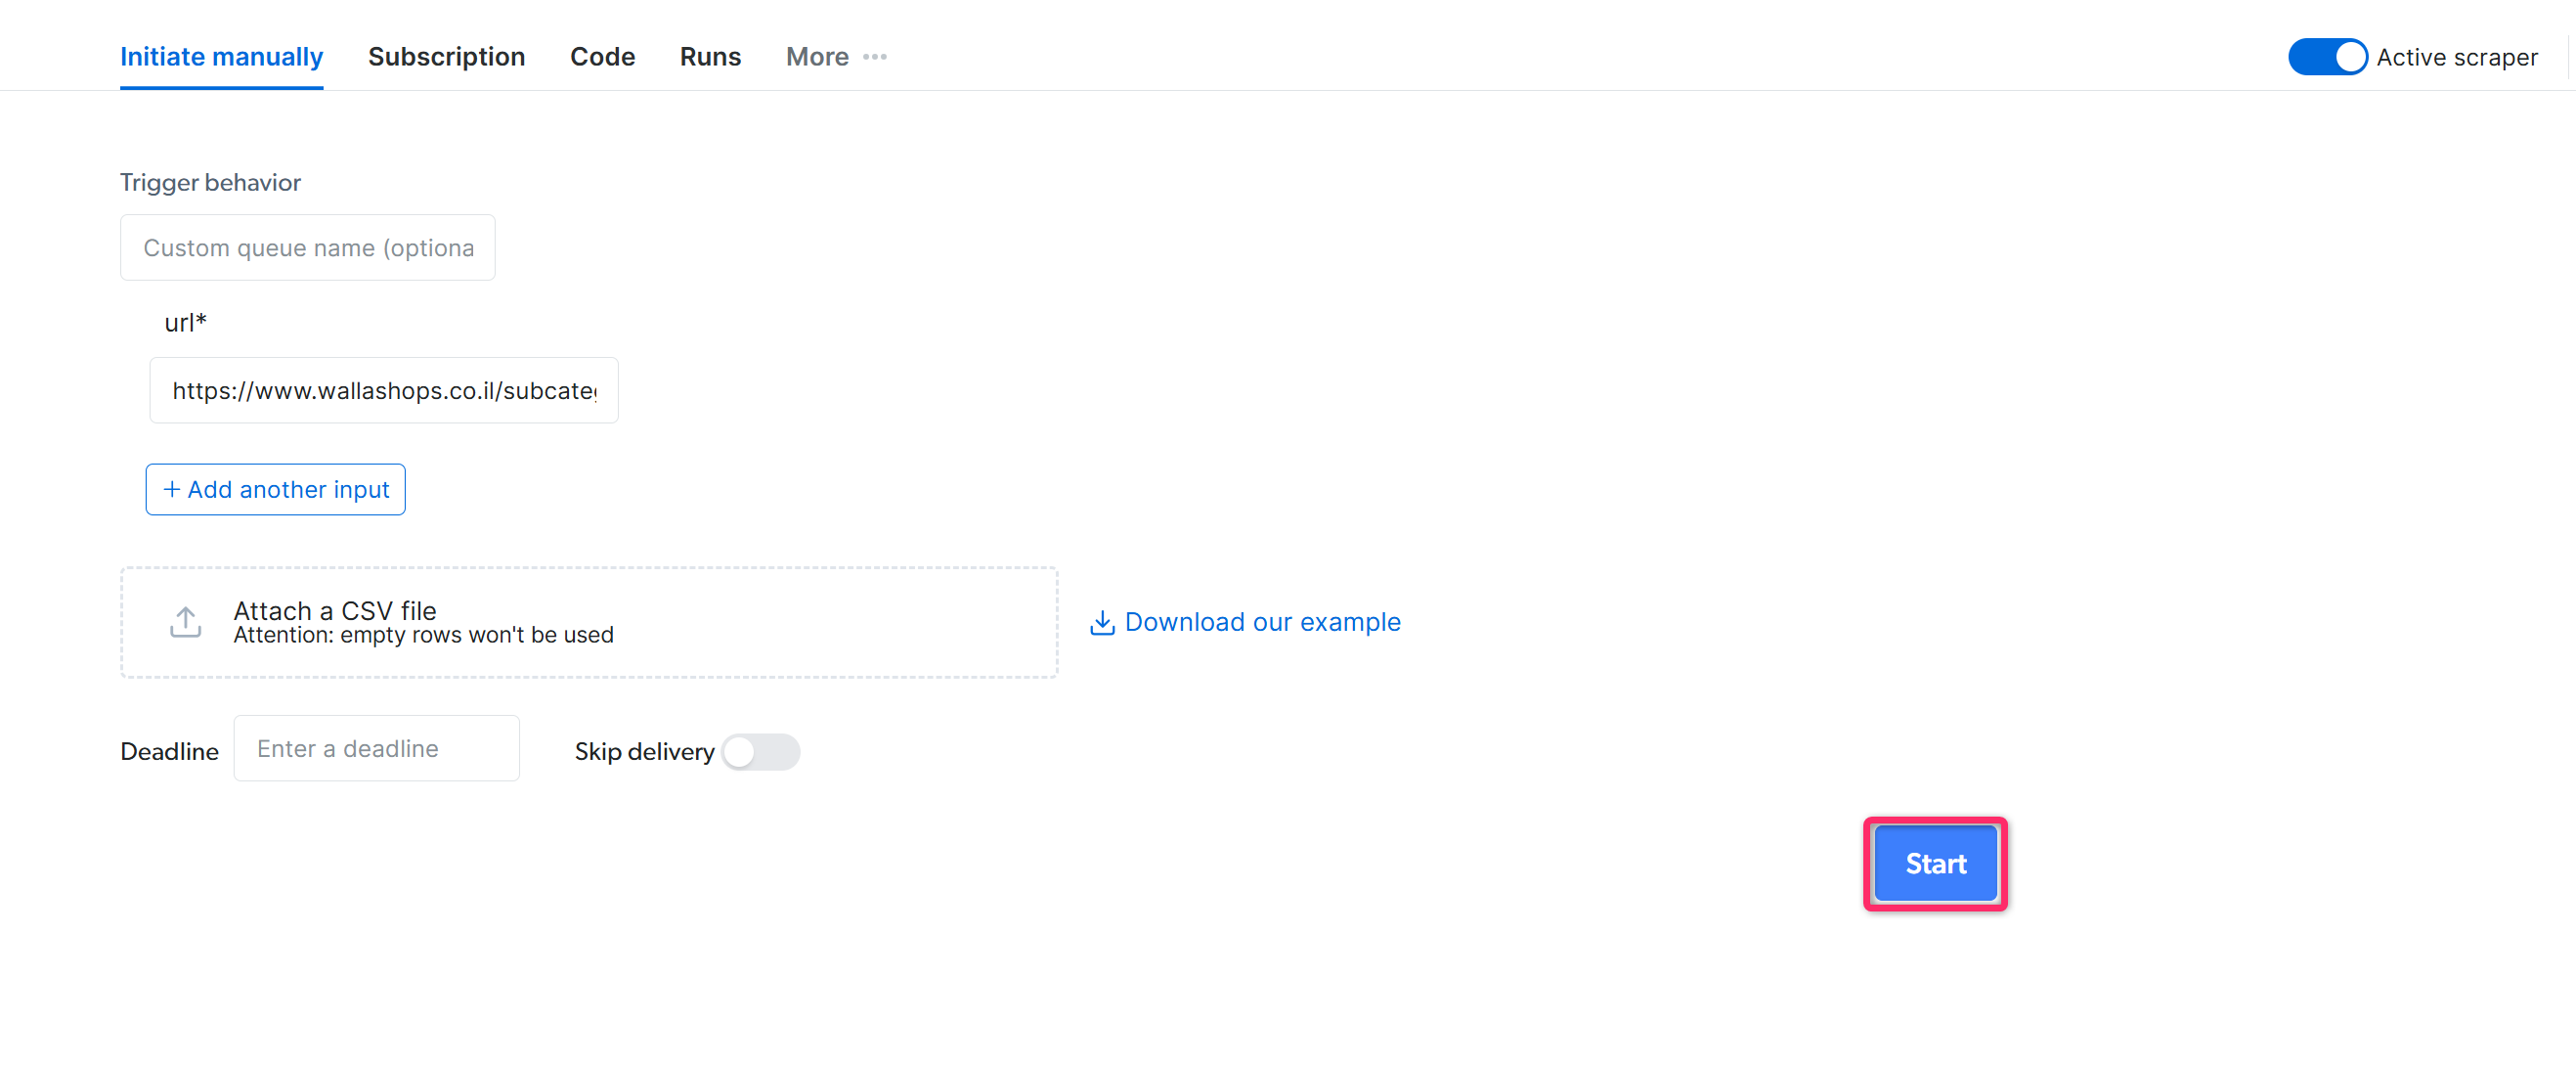 You can also choose an alternative initiation method:
* **[Initiate by API](/api-reference/scraper-studio-api/ai-flow/overview):** trigger the scraper programmatically without opening the control panel
* **Schedule:** run the scraper on a daily, weekly, or custom interval
> **Expected result:** the scraper collects data. Monitor progress from the Runs dashboard and download results in JSON, NDJSON, CSV, or XLSX once the job completes.
After the scraper is ready, use the [Self-Healing tool](/datasets/scraper-studio/self-healing-tool) to make plain-language changes, or open the code in the Bright Data Scraper Studio IDE to edit it directly.
## What can the AI Agent build?
Reach for the Bright Data Scraper Studio AI Agent when the data you need isn't already in the [Datasets Marketplace](/datasets/marketplace). For sites Bright Data already covers (Amazon, Walmart, LinkedIn, eBay), the marketplace ships pre-built scrapers that are faster and cheaper than building your own. The AI Agent shines on regional ecommerce, B2B catalogs, niche verticals and any site where no marketplace scraper exists.
The AI Agent builds one of four scraper types. Pick the one that matches what you have and what you need.
| Scraper type | What you provide | What you get | Page visits per input |
| ------------------- | ---------------------------- | ----------------------------------------- | --------------------- |
| **PDP** | List of product URLs | Full per-product detail | 1 |
| **Discovery** | Category / listing URL | Listing-level rows (title, price, rank) | 1 |
| **Discovery + PDP** | Category / listing URL | Full per-product detail for every item | 1 + N |
| **Search** | Keyword (+ optional country) | Either Discovery or Discovery + PDP shape | 1 + M |
**Not a crawler.** Don't pass a homepage and ask for "everything." Each scraper is scoped to one data shape.
### When do I use a PDP scraper?
Use a PDP scraper when you have a list of specific product URLs and need full per-product detail. Each input URL produces one row.
**Example:** 100 product URLs from a regional retailer like [dm.de](https://www.dm.de) → 100 rows with title, price, availability, images and any other field you defined in the schema.
Paste this into the AI Agent chat:
```text Prompt theme={null}
Build a PDP scraper for dm.de. For each product URL I provide, extract the product title, price, availability, brand, rating and all product image URLs. Return one row per input URL.
```
### When do I use a Discovery scraper?
Use a Discovery scraper when you need an overview of items on a single listing page and can live without per-product detail. Each input URL produces N rows where N equals the number of items in the listing.
**Example:** A category page like `https://www.dm.de/baby-und-kind` → 30 rows with title, price, rating and listing position. No description, no full image gallery.
Paste this into the AI Agent chat:
```text Prompt theme={null}
Build a Discovery scraper for the dm.de category page https://www.dm.de/baby-und-kind. Return one row per item shown in the listing with title, price, rating and listing position. Do not open the individual product pages.
```
### When do I use a Discovery + PDP scraper?
Use a Discovery + PDP scraper when you need full per-product detail for an entire category. Each input URL produces N rows with the full PDP shape.
This is the most expensive type. One category URL with 200 products costs roughly 200 times a single PDP scrape.
**Example:** A category page on a regional retailer like [decathlon.fr](https://www.decathlon.fr) → full per-product detail for every item in that category.
Paste this into the AI Agent chat:
```text Prompt theme={null}
Build a Discovery + PDP scraper for a category page on decathlon.fr (for example a sport category like running shoes). Find every product in the category, open each product page, and extract full detail: title, price, availability, description, rating and image URLs. Return one row per product.
```
### When do I use a Search scraper?
Use a Search scraper when you do not have specific URLs. Provide a keyword and optionally a country; the AI Agent picks Discovery or Discovery + PDP shape based on whether you asked for listing-level fields or full PDP detail.
**Example:** keyword "brake pads" on a B2B parts site like [autodoc.de](https://www.autodoc.de) → matching product results in either listing-level or full PDP shape.
Paste this into the AI Agent chat:
```text Prompt theme={null}
Build a Search scraper for autodoc.de. For the keyword "brake pads" in Germany, return matching products with title, price, brand and product URL. No need to open each product page.
```
## Frequently asked questions
Yes. Every scraper the AI Agent generates can be opened in the Bright Data Scraper Studio IDE and edited directly. If you prefer not to write code, use the [Self-Healing tool](/datasets/scraper-studio/self-healing-tool) to request changes in plain language.
The AI Agent generates scrapers that run on Bright Data's proxy and unblocking infrastructure, which handles most anti-bot defenses. For sites that require a logged-in session, build the scraper in the IDE and use `set_session_cookie()` or the authentication pattern that matches the target site.
The AI Agent relies on the context you give it. If the output is off, decline the schema and add more specifics about field names, selectors, or the exact page section where the data lives. You can also use the [Self-Healing tool](/datasets/scraper-studio/self-healing-tool) to refine a generated scraper after the fact.
## Related
Build the same scraper from the terminal or any coding agent
Build a scraper by writing JavaScript directly
Update a generated scraper with plain-language prompts
You can also choose an alternative initiation method:
* **[Initiate by API](/api-reference/scraper-studio-api/ai-flow/overview):** trigger the scraper programmatically without opening the control panel
* **Schedule:** run the scraper on a daily, weekly, or custom interval
> **Expected result:** the scraper collects data. Monitor progress from the Runs dashboard and download results in JSON, NDJSON, CSV, or XLSX once the job completes.
After the scraper is ready, use the [Self-Healing tool](/datasets/scraper-studio/self-healing-tool) to make plain-language changes, or open the code in the Bright Data Scraper Studio IDE to edit it directly.
## What can the AI Agent build?
Reach for the Bright Data Scraper Studio AI Agent when the data you need isn't already in the [Datasets Marketplace](/datasets/marketplace). For sites Bright Data already covers (Amazon, Walmart, LinkedIn, eBay), the marketplace ships pre-built scrapers that are faster and cheaper than building your own. The AI Agent shines on regional ecommerce, B2B catalogs, niche verticals and any site where no marketplace scraper exists.
The AI Agent builds one of four scraper types. Pick the one that matches what you have and what you need.
| Scraper type | What you provide | What you get | Page visits per input |
| ------------------- | ---------------------------- | ----------------------------------------- | --------------------- |
| **PDP** | List of product URLs | Full per-product detail | 1 |
| **Discovery** | Category / listing URL | Listing-level rows (title, price, rank) | 1 |
| **Discovery + PDP** | Category / listing URL | Full per-product detail for every item | 1 + N |
| **Search** | Keyword (+ optional country) | Either Discovery or Discovery + PDP shape | 1 + M |
**Not a crawler.** Don't pass a homepage and ask for "everything." Each scraper is scoped to one data shape.
### When do I use a PDP scraper?
Use a PDP scraper when you have a list of specific product URLs and need full per-product detail. Each input URL produces one row.
**Example:** 100 product URLs from a regional retailer like [dm.de](https://www.dm.de) → 100 rows with title, price, availability, images and any other field you defined in the schema.
Paste this into the AI Agent chat:
```text Prompt theme={null}
Build a PDP scraper for dm.de. For each product URL I provide, extract the product title, price, availability, brand, rating and all product image URLs. Return one row per input URL.
```
### When do I use a Discovery scraper?
Use a Discovery scraper when you need an overview of items on a single listing page and can live without per-product detail. Each input URL produces N rows where N equals the number of items in the listing.
**Example:** A category page like `https://www.dm.de/baby-und-kind` → 30 rows with title, price, rating and listing position. No description, no full image gallery.
Paste this into the AI Agent chat:
```text Prompt theme={null}
Build a Discovery scraper for the dm.de category page https://www.dm.de/baby-und-kind. Return one row per item shown in the listing with title, price, rating and listing position. Do not open the individual product pages.
```
### When do I use a Discovery + PDP scraper?
Use a Discovery + PDP scraper when you need full per-product detail for an entire category. Each input URL produces N rows with the full PDP shape.
This is the most expensive type. One category URL with 200 products costs roughly 200 times a single PDP scrape.
**Example:** A category page on a regional retailer like [decathlon.fr](https://www.decathlon.fr) → full per-product detail for every item in that category.
Paste this into the AI Agent chat:
```text Prompt theme={null}
Build a Discovery + PDP scraper for a category page on decathlon.fr (for example a sport category like running shoes). Find every product in the category, open each product page, and extract full detail: title, price, availability, description, rating and image URLs. Return one row per product.
```
### When do I use a Search scraper?
Use a Search scraper when you do not have specific URLs. Provide a keyword and optionally a country; the AI Agent picks Discovery or Discovery + PDP shape based on whether you asked for listing-level fields or full PDP detail.
**Example:** keyword "brake pads" on a B2B parts site like [autodoc.de](https://www.autodoc.de) → matching product results in either listing-level or full PDP shape.
Paste this into the AI Agent chat:
```text Prompt theme={null}
Build a Search scraper for autodoc.de. For the keyword "brake pads" in Germany, return matching products with title, price, brand and product URL. No need to open each product page.
```
## Frequently asked questions
Yes. Every scraper the AI Agent generates can be opened in the Bright Data Scraper Studio IDE and edited directly. If you prefer not to write code, use the [Self-Healing tool](/datasets/scraper-studio/self-healing-tool) to request changes in plain language.
The AI Agent generates scrapers that run on Bright Data's proxy and unblocking infrastructure, which handles most anti-bot defenses. For sites that require a logged-in session, build the scraper in the IDE and use `set_session_cookie()` or the authentication pattern that matches the target site.
The AI Agent relies on the context you give it. If the output is off, decline the schema and add more specifics about field names, selectors, or the exact page section where the data lives. You can also use the [Self-Healing tool](/datasets/scraper-studio/self-healing-tool) to refine a generated scraper after the fact.
## Related
Build the same scraper from the terminal or any coding agent
Build a scraper by writing JavaScript directly
Update a generated scraper with plain-language prompts