> ## Documentation Index
> Fetch the complete documentation index at: https://docs.brightdata.com/llms.txt
> Use this file to discover all available pages before exploring further.
# How to Set Up Bright Data With xpander.ai
> Integrate Bright Data with xpander.ai to give enterprise AI agents reliable web access and structured data extraction from public websites. Spans 195 countries.
You might be eligible for our Startup Program. Get fully funded access to the infrastructure you're reading about right now (up to \$20K value).
[xpander.ai](https://xpander.ai/) is a Backend-as-a-Service platform for building autonomous AI agents. It is a no-code solution designed to help enterprise developers efficiently build, test, and deploy AI agents. It also comes with an open-source SDK to programmatically build and run AI agents.
## Available Bright Data Tools
Launches a scraping job for a specified dataset using the Scraperss.
Sends an HTTP request through Bright Data’s proxy network for accessing the content of any web page.
Downloads a snapshot of a dataset in various formats, passing the data to the AI.
## How to Integrate Bright Data With xpander.ai
* [xpander.ai account](https://app.xpander.ai/login)
* [Bright Data API key](https://docs.brightdata.com/api-reference/authentication#api-key)
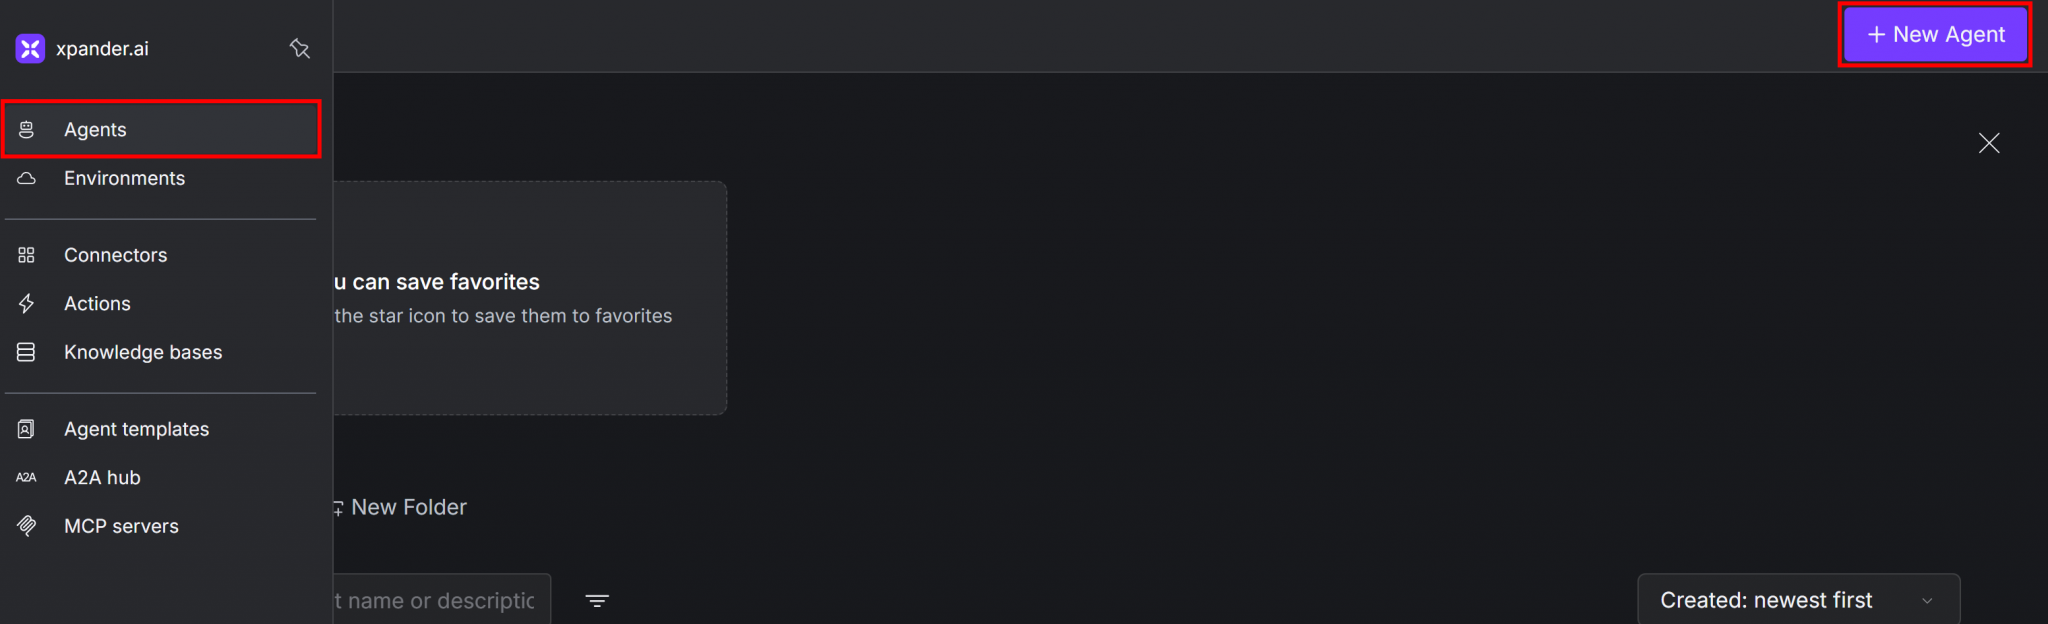
1. In your [profile dashboard](https://app.xpander.ai/agents) and press the “New Agent” button to add a new agent:
 1. Choose an appropriate name for your agent. For example, if you want to create a web scraping agent, you can call it “Web Scraper Agent”.
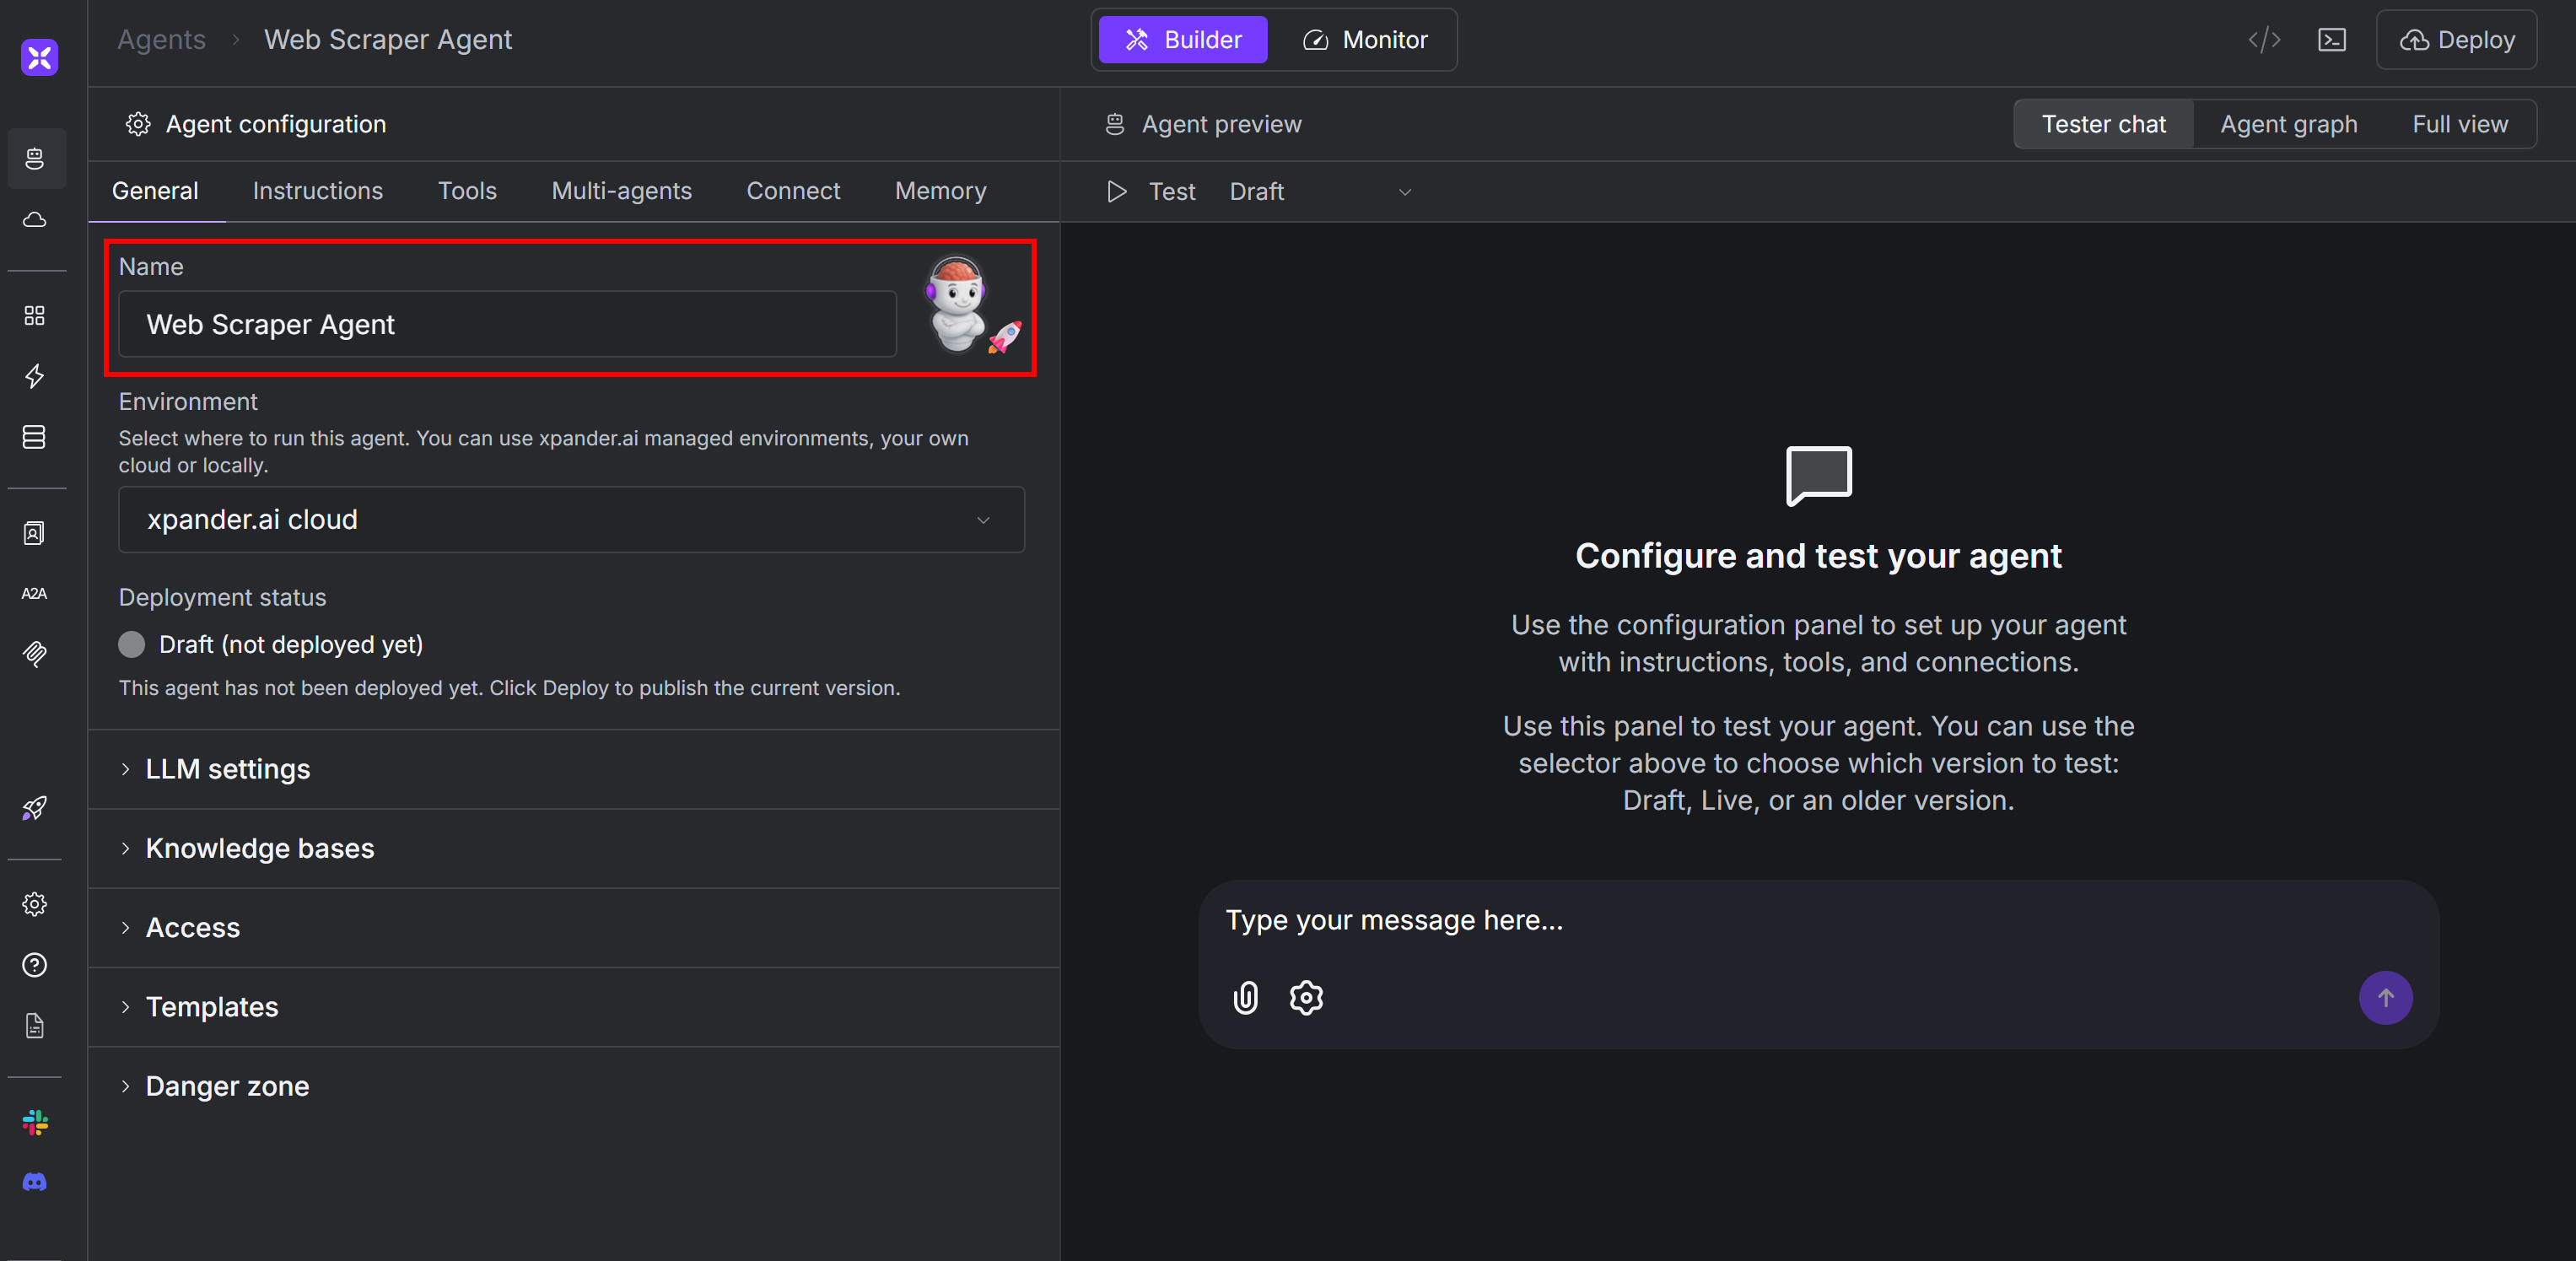 2. Leave all other settings in the “General” tab as they are. The defaults are enough for a simple setup like this one. By default, xpander.ai will use [OpenAI’s GPT-4o as the LLM model](https://openai.com/index/hello-gpt-4o/).
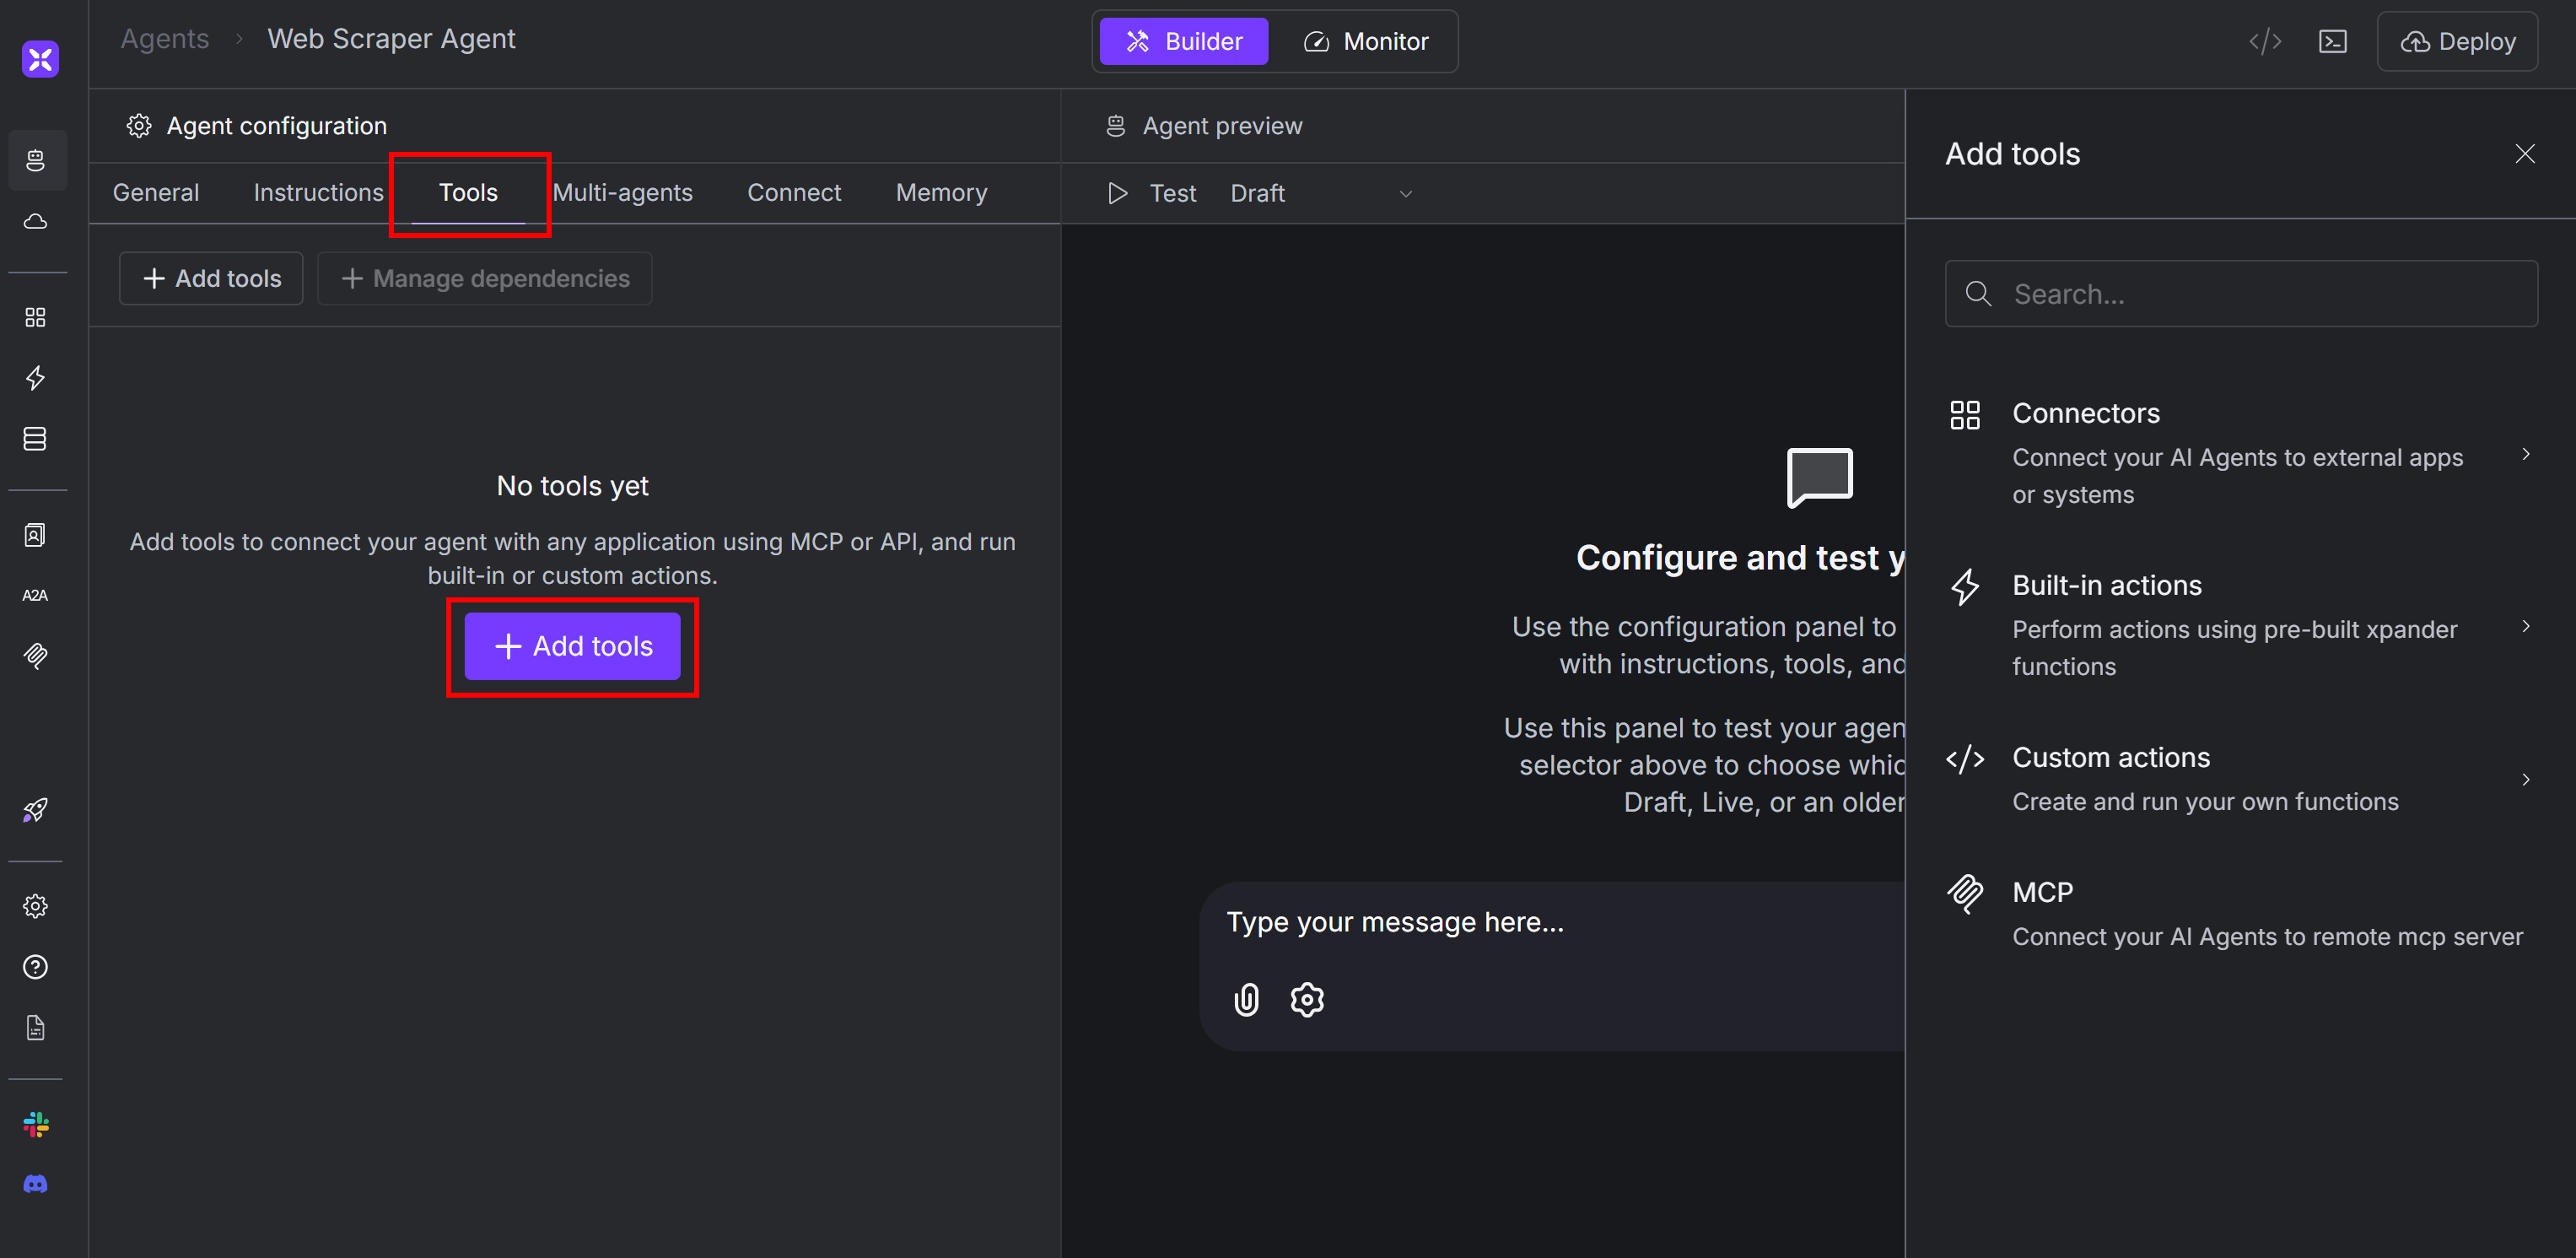
1. Go to the “Tools” tab on your agent’s page, then click the “Add tools” button:
2. Leave all other settings in the “General” tab as they are. The defaults are enough for a simple setup like this one. By default, xpander.ai will use [OpenAI’s GPT-4o as the LLM model](https://openai.com/index/hello-gpt-4o/).
1. Go to the “Tools” tab on your agent’s page, then click the “Add tools” button:
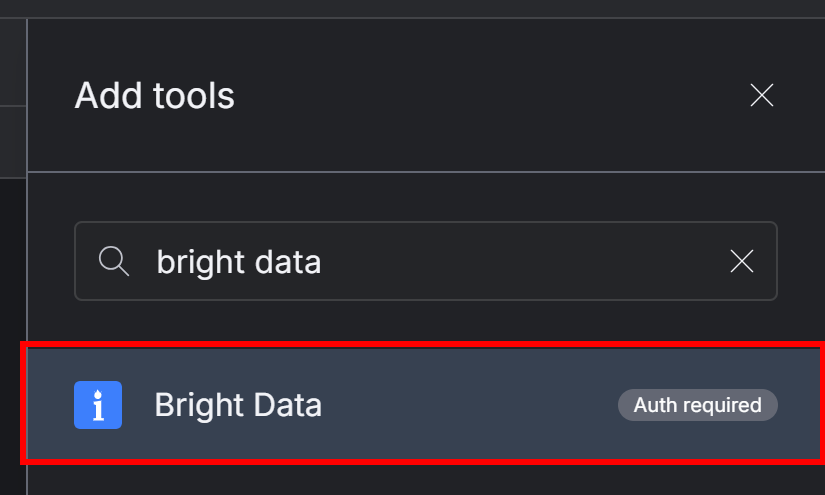
 2. Search for “bright data” on the right side panel and select the Bright Data integration:
 The following modal will show up:
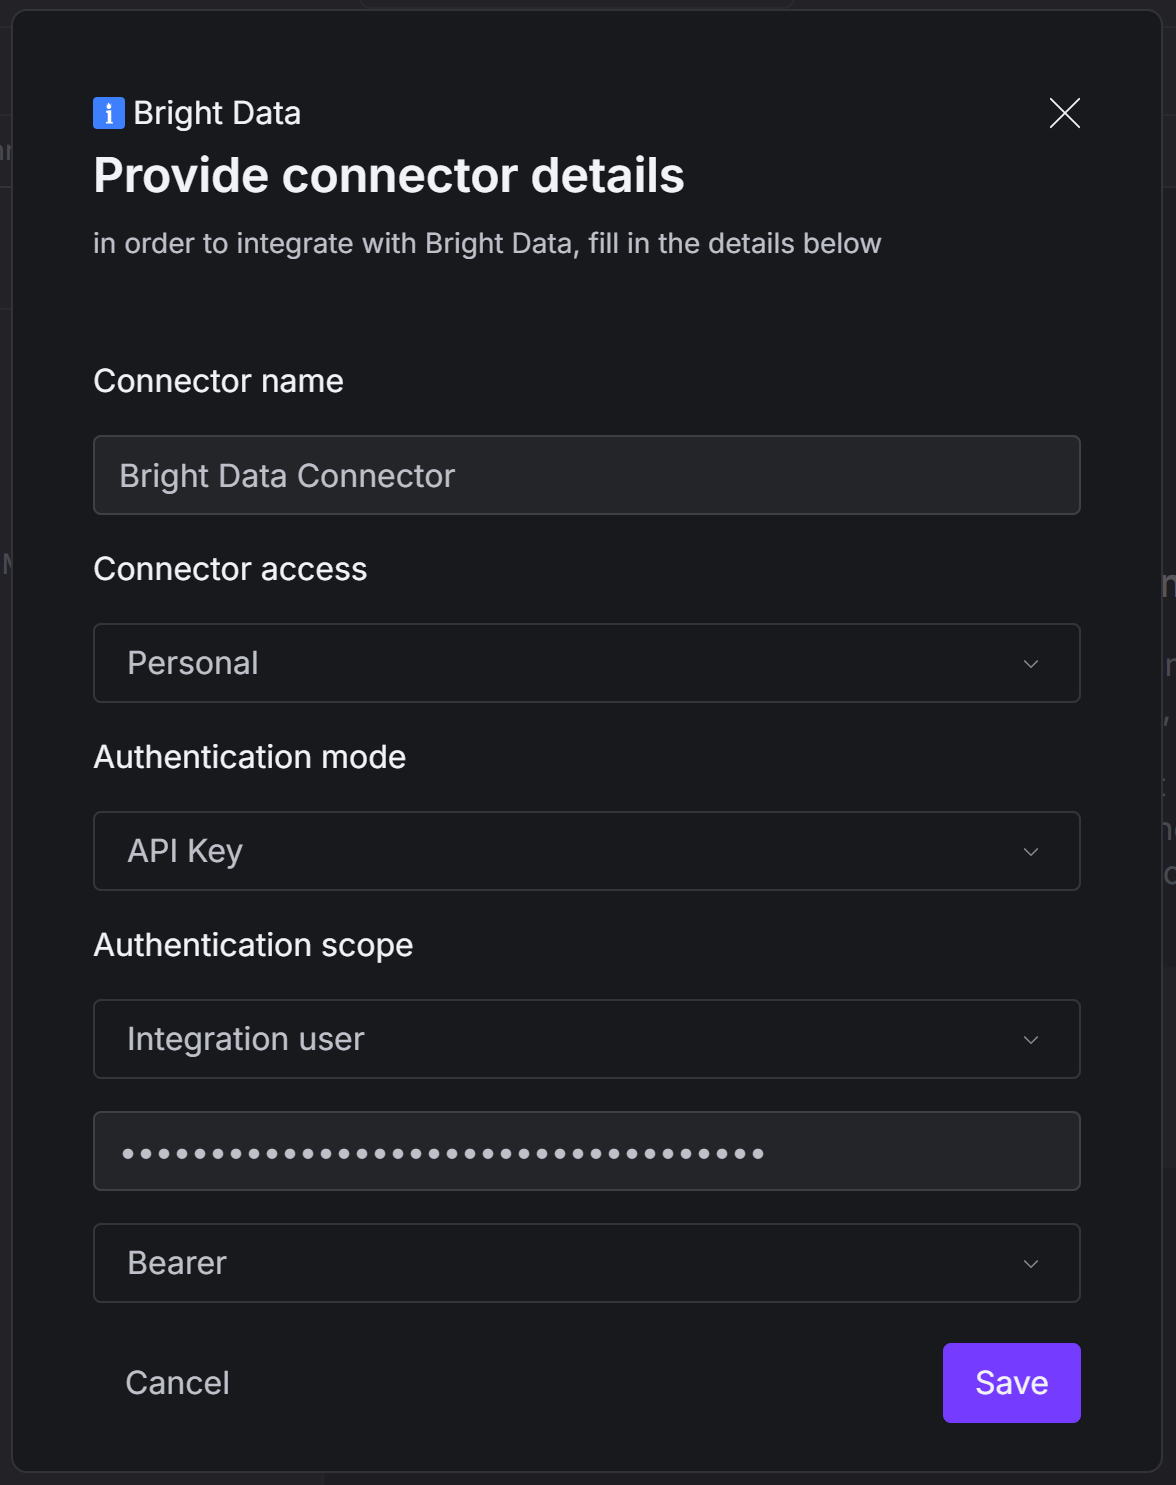 Fill it out as follows:
| Configuration Option | Value |
| :------------------- | :--------------------------------------------- |
| Connector name | Bright Data Connector (or any name you prefer) |
| Authentication mode | API Key |
| Authentication scope | Integration user |
| API Key | \[Your Bright Data API key] |
| Authentication type | Bearer |
Once everything is filled in, press the “Save” button.
Now, you will be prompted to select the specific Bright Data tools you want to enable in your agent:
Fill it out as follows:
| Configuration Option | Value |
| :------------------- | :--------------------------------------------- |
| Connector name | Bright Data Connector (or any name you prefer) |
| Authentication mode | API Key |
| Authentication scope | Integration user |
| API Key | \[Your Bright Data API key] |
| Authentication type | Bearer |
Once everything is filled in, press the “Save” button.
Now, you will be prompted to select the specific Bright Data tools you want to enable in your agent:
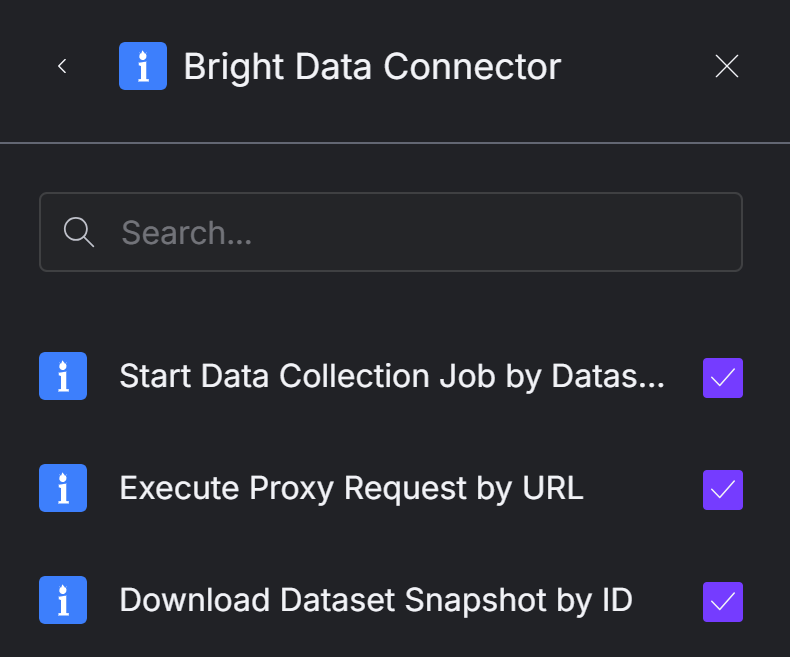 We recommend selecting all tools to unlock full web scraping capabilities. As of this writing, the available tools are:
* **Start Data Collection Job by Dataset ID**: Launches a scraping job for a specified dataset using the [Scraperss](https://brightdata.com/products/web-scraper).
* **Execute Proxy Request by URL**: Sends an HTTP request through [Bright Data’s proxy network](https://brightdata.com/proxy-types/) for accessing the content of any web page.
* **Download Dataset Snapshot by ID**: Downloads a snapshot of a dataset in various formats, passing the data to the AI.
Once you have selected the desired tools, click the “Add to agent” button in the bottom-right corner:
We recommend selecting all tools to unlock full web scraping capabilities. As of this writing, the available tools are:
* **Start Data Collection Job by Dataset ID**: Launches a scraping job for a specified dataset using the [Scraperss](https://brightdata.com/products/web-scraper).
* **Execute Proxy Request by URL**: Sends an HTTP request through [Bright Data’s proxy network](https://brightdata.com/proxy-types/) for accessing the content of any web page.
* **Download Dataset Snapshot by ID**: Downloads a snapshot of a dataset in various formats, passing the data to the AI.
Once you have selected the desired tools, click the “Add to agent” button in the bottom-right corner:
 The “Tools” tab of your agent will now show the Bright Data connector with the tools you configured:
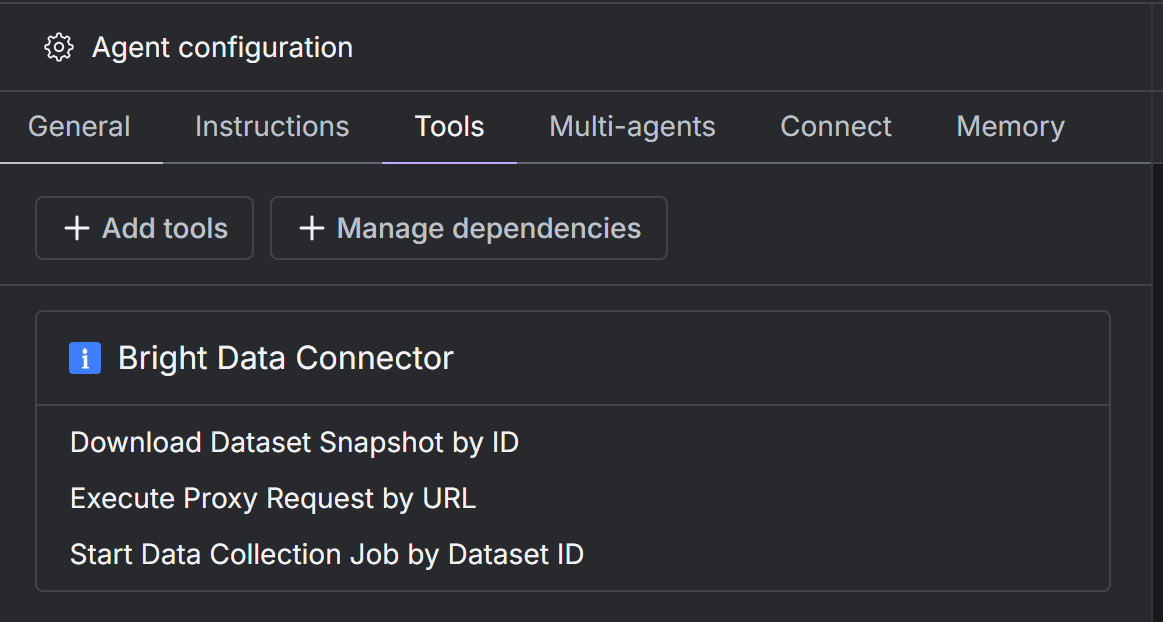 Notice that you can click on any tool to view or adjust its configuration.
Fantastic! Your AI agent is now fully integrated with Bright Data tools and ready to scrape the web.
Now that your agent has access to the Bright Data tools for web scraping, give it a custom [system prompt](https://www.promptlayer.com/glossary/system-prompt). This tells the agent what it is and how it should operate.
To do this, click on the “Instructions” tab and paste something like the following into the “System prompt” textarea:
```text theme={null}
You are an AI agent capable of grounding your responses by scraping data from the web
```
Notice that you can click on any tool to view or adjust its configuration.
Fantastic! Your AI agent is now fully integrated with Bright Data tools and ready to scrape the web.
Now that your agent has access to the Bright Data tools for web scraping, give it a custom [system prompt](https://www.promptlayer.com/glossary/system-prompt). This tells the agent what it is and how it should operate.
To do this, click on the “Instructions” tab and paste something like the following into the “System prompt” textarea:
```text theme={null}
You are an AI agent capable of grounding your responses by scraping data from the web
```
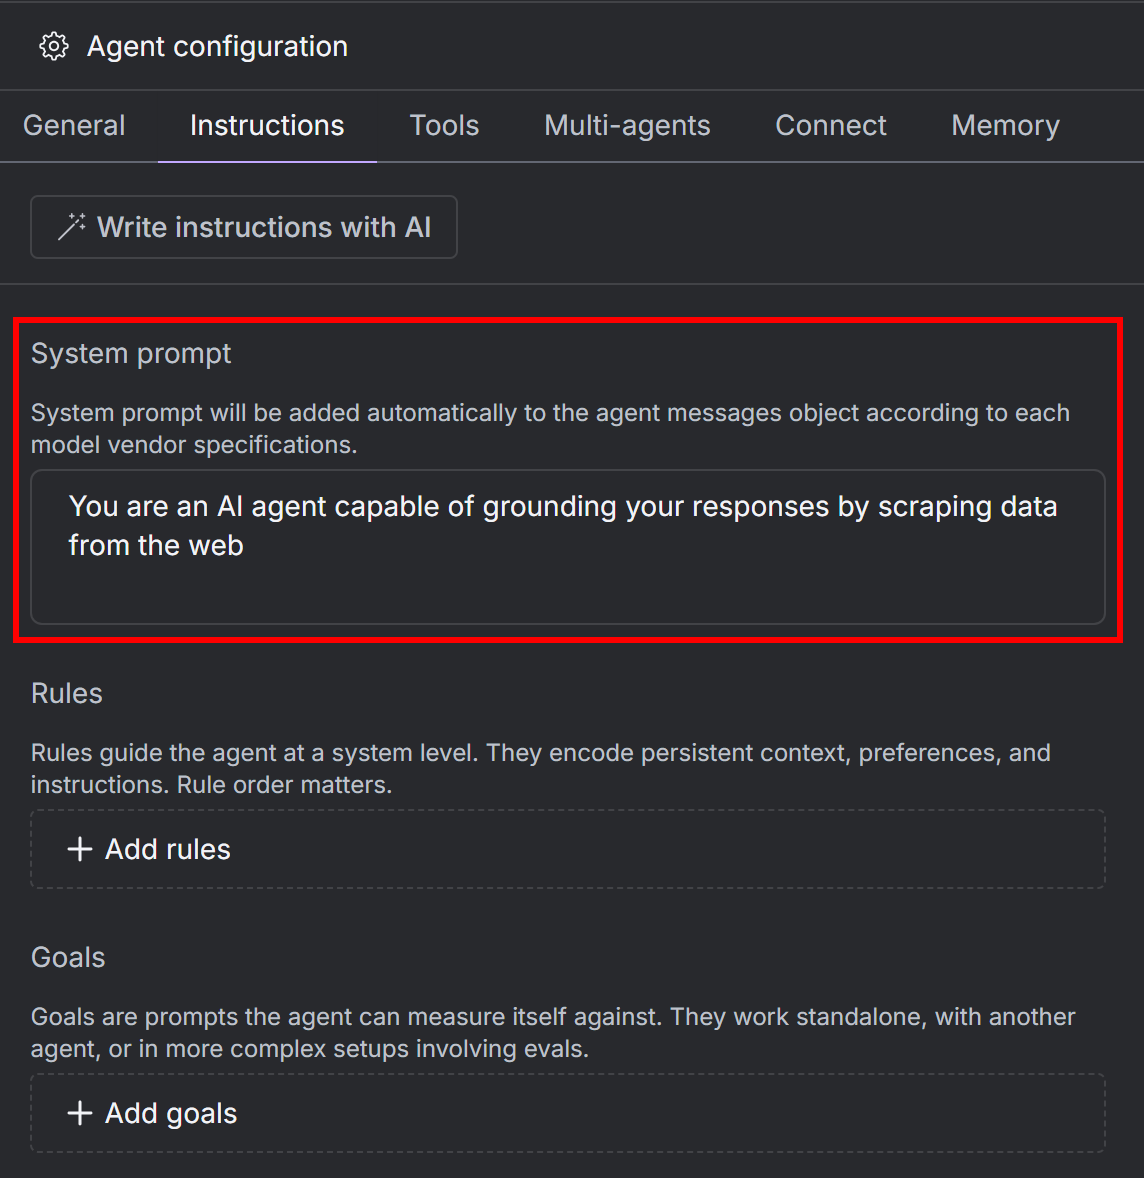 For more specialized agents, you can also add custom rules and goals.
Amazing! Your xpander scraping agent is ready.
Click on the “Agent graph” button to view your current AI agent workflow:
For more specialized agents, you can also add custom rules and goals.
Amazing! Your xpander scraping agent is ready.
Click on the “Agent graph” button to view your current AI agent workflow:
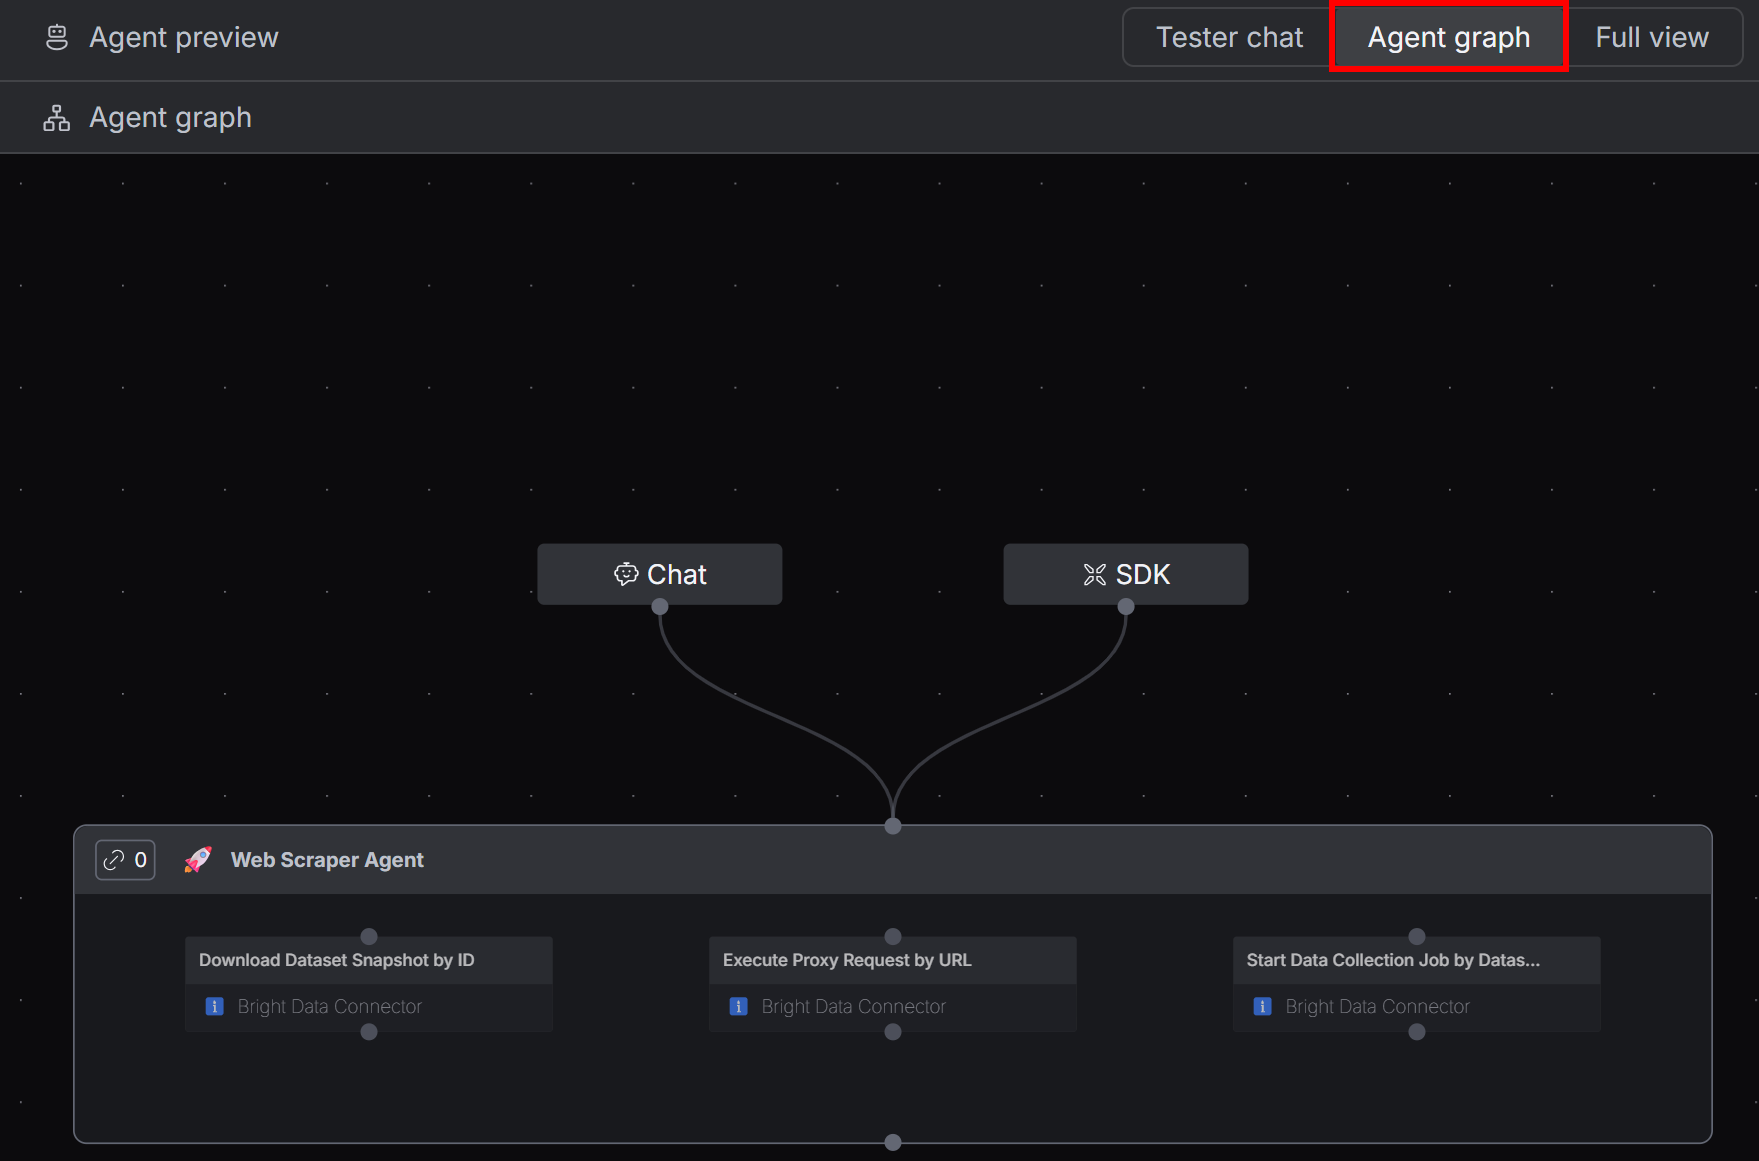 You will see a single agent with access to the three configured Bright Data tools for web scraping.
Well done! All that is left is to test the agent and see it in action.
Go back to the “Tester Chat” tab and try out your agent with a prompt like this:
```text theme={null}
Search for top 3 headphones under $100 and provide me info from their PDP's
```
This instructs your web scraping agent to dynamically look online for the top 3 headphones priced under \$100 and retrieve information directly from their [product detail pages (PDPs)](https://www.dynamicyield.com/glossary/product-detail-page/).
As you can imagine, a standard LLM would be able to handle this kind of task without access to dedicated scraping tools like those provided by Bright Data.
Paste the prompt into the chat input and send it to your agent:
You will see a single agent with access to the three configured Bright Data tools for web scraping.
Well done! All that is left is to test the agent and see it in action.
Go back to the “Tester Chat” tab and try out your agent with a prompt like this:
```text theme={null}
Search for top 3 headphones under $100 and provide me info from their PDP's
```
This instructs your web scraping agent to dynamically look online for the top 3 headphones priced under \$100 and retrieve information directly from their [product detail pages (PDPs)](https://www.dynamicyield.com/glossary/product-detail-page/).
As you can imagine, a standard LLM would be able to handle this kind of task without access to dedicated scraping tools like those provided by Bright Data.
Paste the prompt into the chat input and send it to your agent:
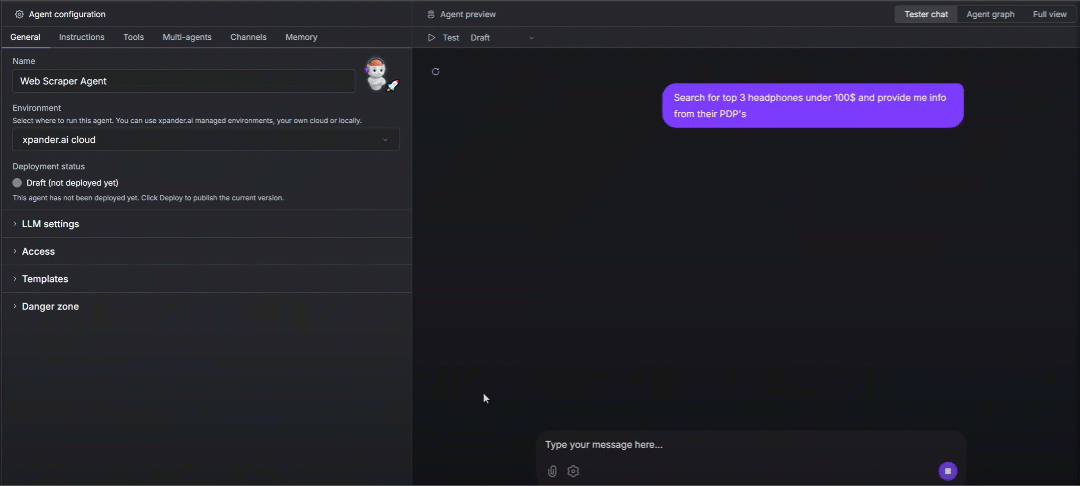 The agent uses the LLM and Bright Data tools to:
1. Perform a web search and find the top 3 headphones.
2. For each product, start a data collection job and download data from Amazon.
3. Summarize the information into a short, accurate response, complete with real-world links to the Amazon product detail pages.
If you expand one of the tool sections in the interface, you will see something like this:
The agent uses the LLM and Bright Data tools to:
1. Perform a web search and find the top 3 headphones.
2. For each product, start a data collection job and download data from Amazon.
3. Summarize the information into a short, accurate response, complete with real-world links to the Amazon product detail pages.
If you expand one of the tool sections in the interface, you will see something like this:
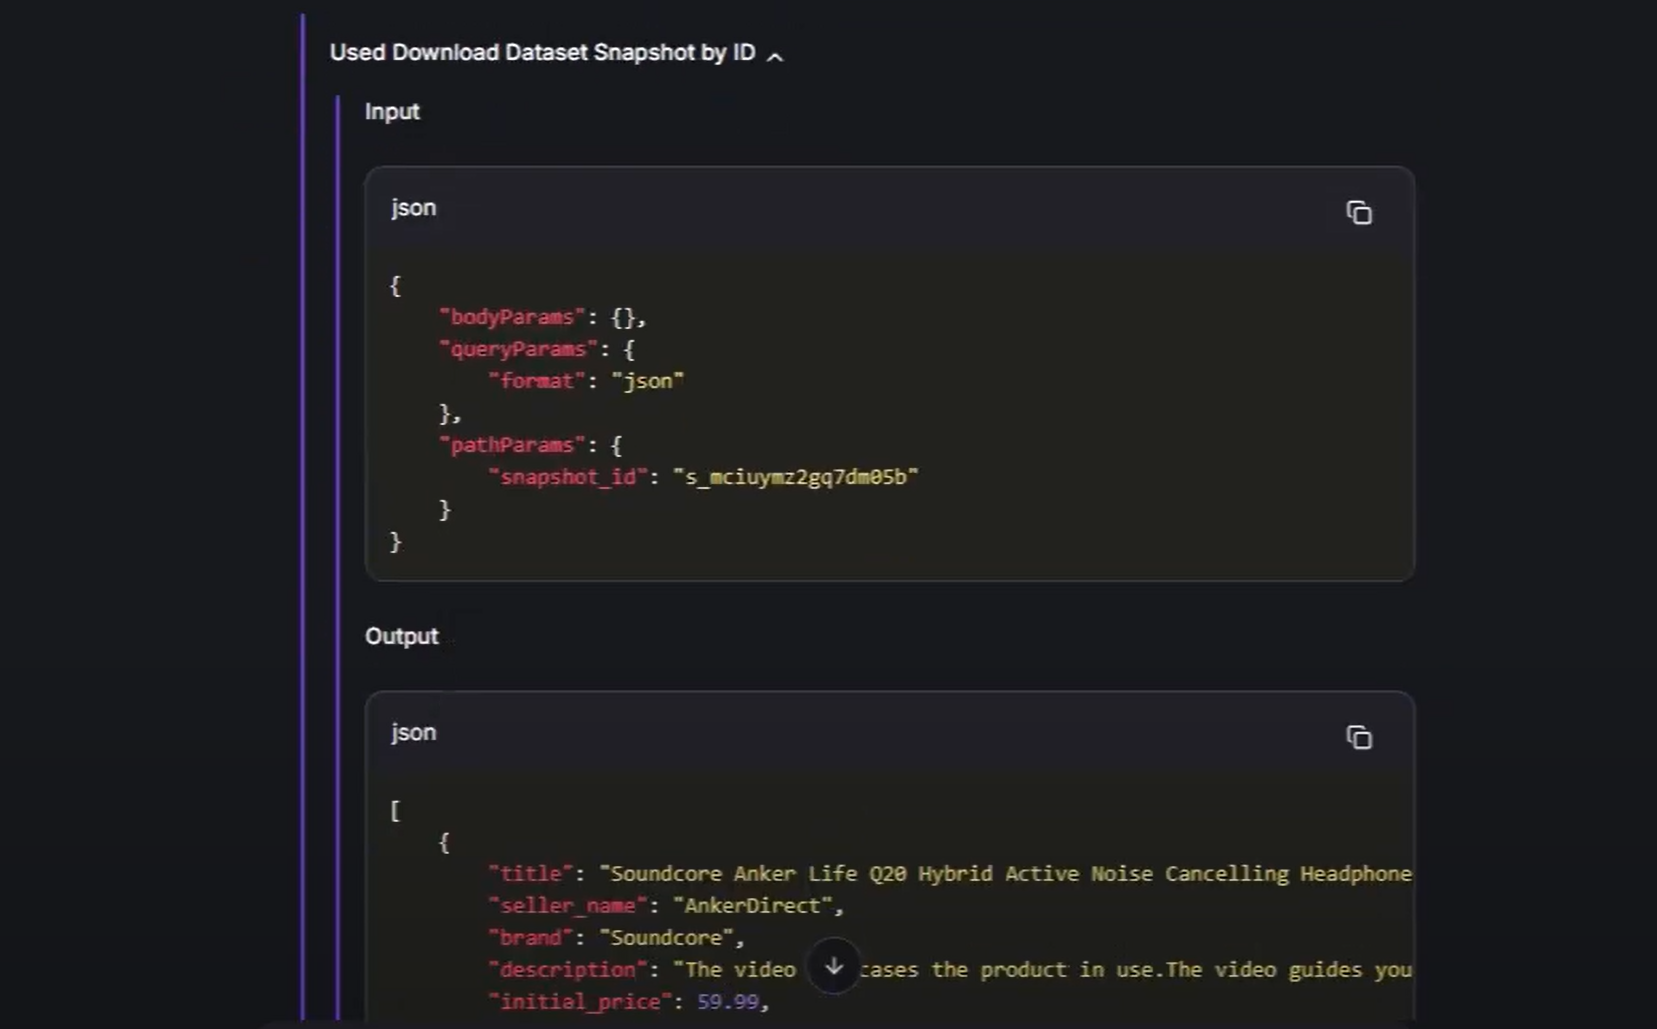 This proves that, behind the scenes, the AI agent automatically detected which Bright Data tools to use to complete the task. In detail, it called them with the right parameters to fetch fresh scraped data (in this case, directly from Amazon product pages).
Et voilà! You now have a fully functional scraping agent on xpander.ai, powered by Bright Data’s AI data infrastructure.
This proves that, behind the scenes, the AI agent automatically detected which Bright Data tools to use to complete the task. In detail, it called them with the right parameters to fetch fresh scraped data (in this case, directly from Amazon product pages).
Et voilà! You now have a fully functional scraping agent on xpander.ai, powered by Bright Data’s AI data infrastructure.