> ## Documentation Index
> Fetch the complete documentation index at: https://docs.brightdata.com/llms.txt
> Use this file to discover all available pages before exploring further.
# Create Your First Unlocker API
> Get started with Bright Data's Unlocker API in minutes. Follow this step-by-step guide to create your API, configure access, and prepare for your first unlock request.
**Verify your account and get \$5 free credit**
To activate API access, add a payment method to your Bright Data account. This verification grants you **\$5 in free credit**, and **you won’t be charged** at this stage.
This quick start walks you through creating your first **Unlocker API zone** in the Bright Data Control Panel.\
Once completed, your API will be ready to send unlock requests and return clean HTML or JSON responses.
## Step-by-step setup
Sign in to Bright Data}>
Log in to your Bright Data account using your credentials. If you don’t have an account yet, you’ll be prompted to create one before proceeding.
Navigate to the Create an API page}>
From the Bright Data Control Panel:
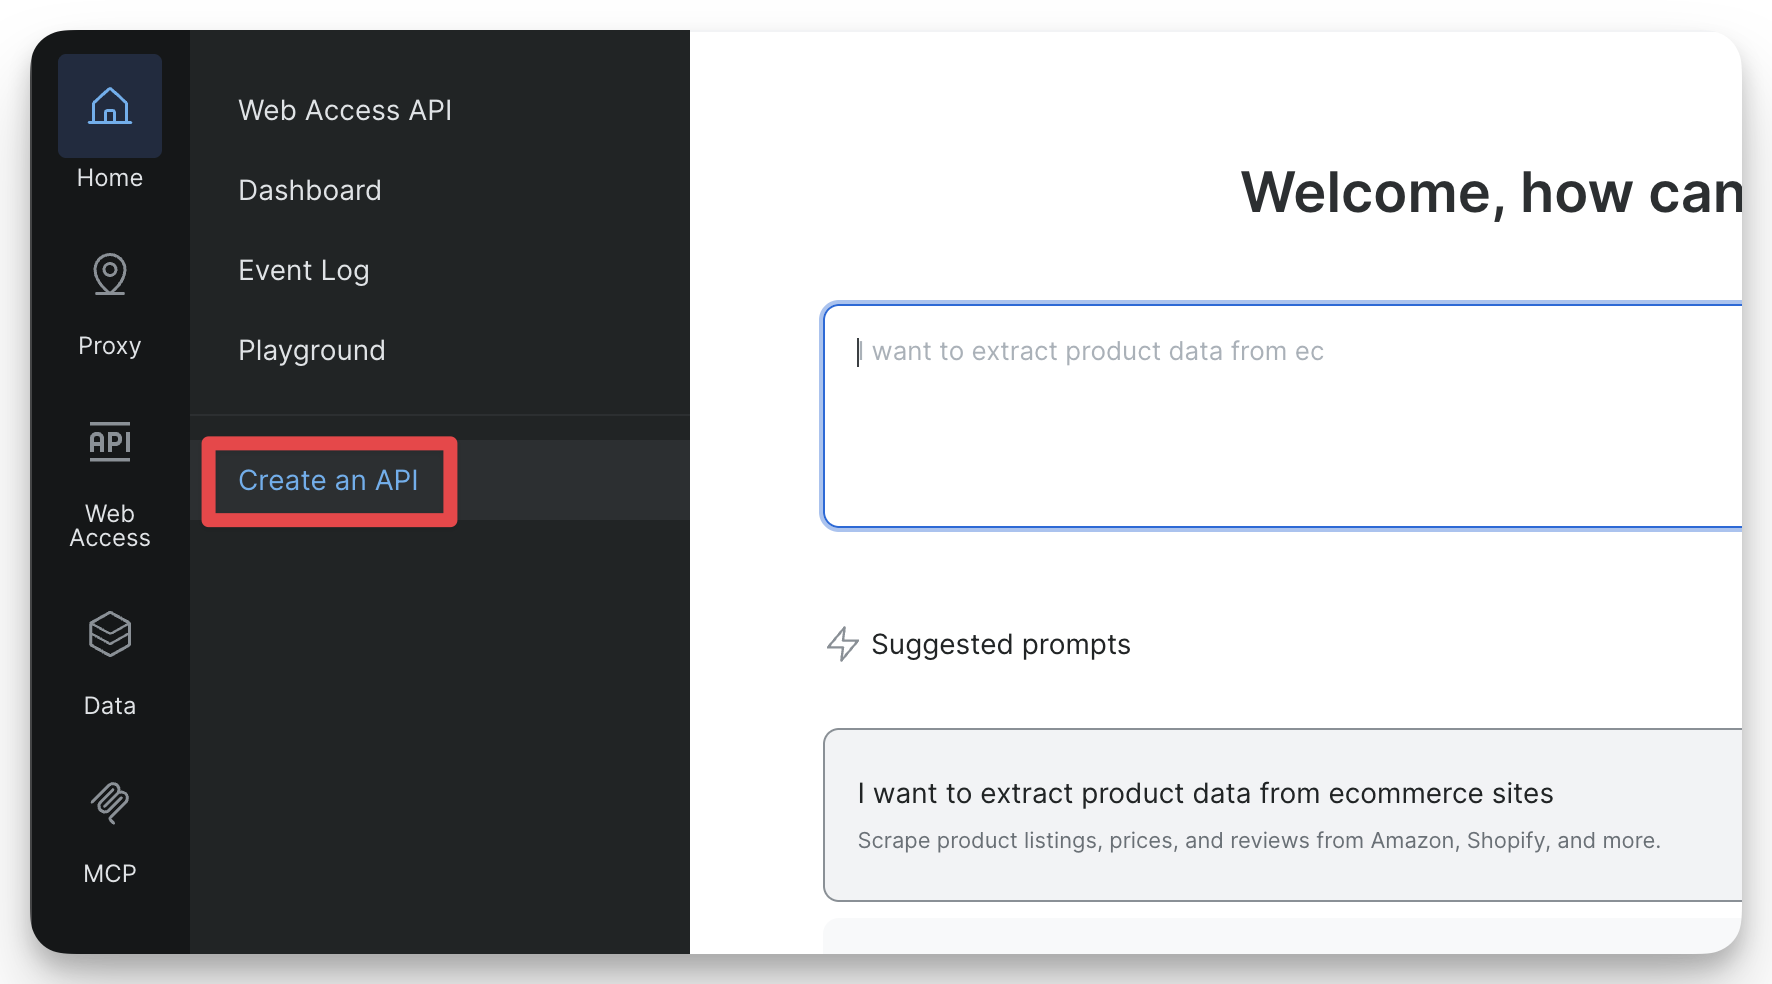
**1.** Open the left-hand navigation menu from the dashboard.\
**2.** Select **Web Access APIs** from the menu.\
**3.** Click **Create API** to start creating a new API.
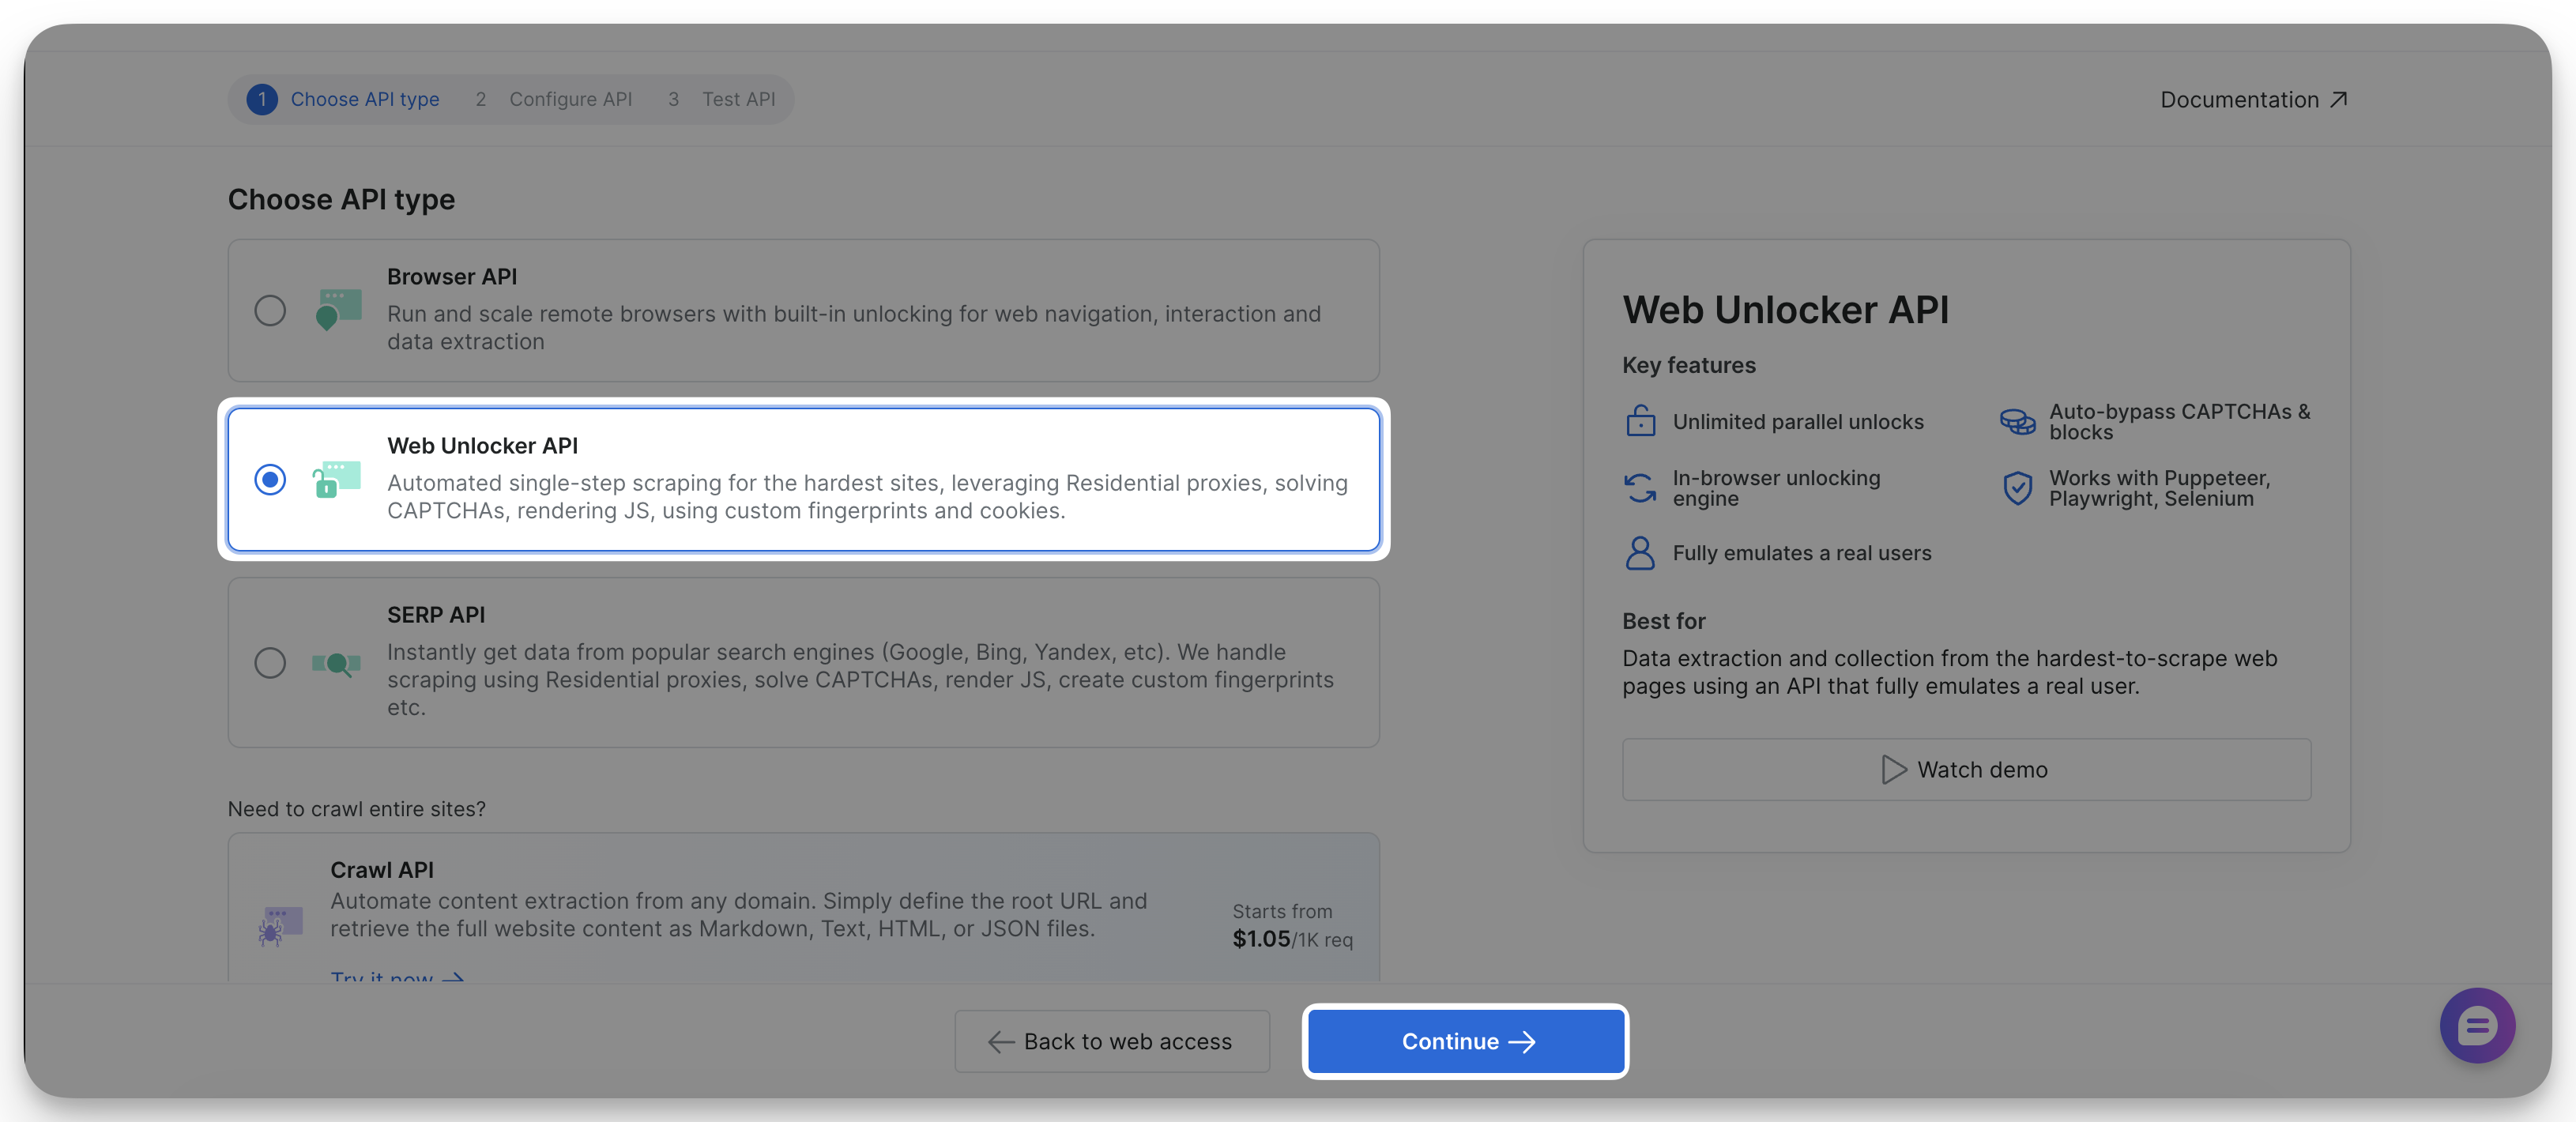
 In the API selection screen, choose **Web Unlocker API**. This enables automatic proxy management and unblocking logic for your requests.
Click **Continue** to proceed.
In the API selection screen, choose **Web Unlocker API**. This enables automatic proxy management and unblocking logic for your requests.
Click **Continue** to proceed.
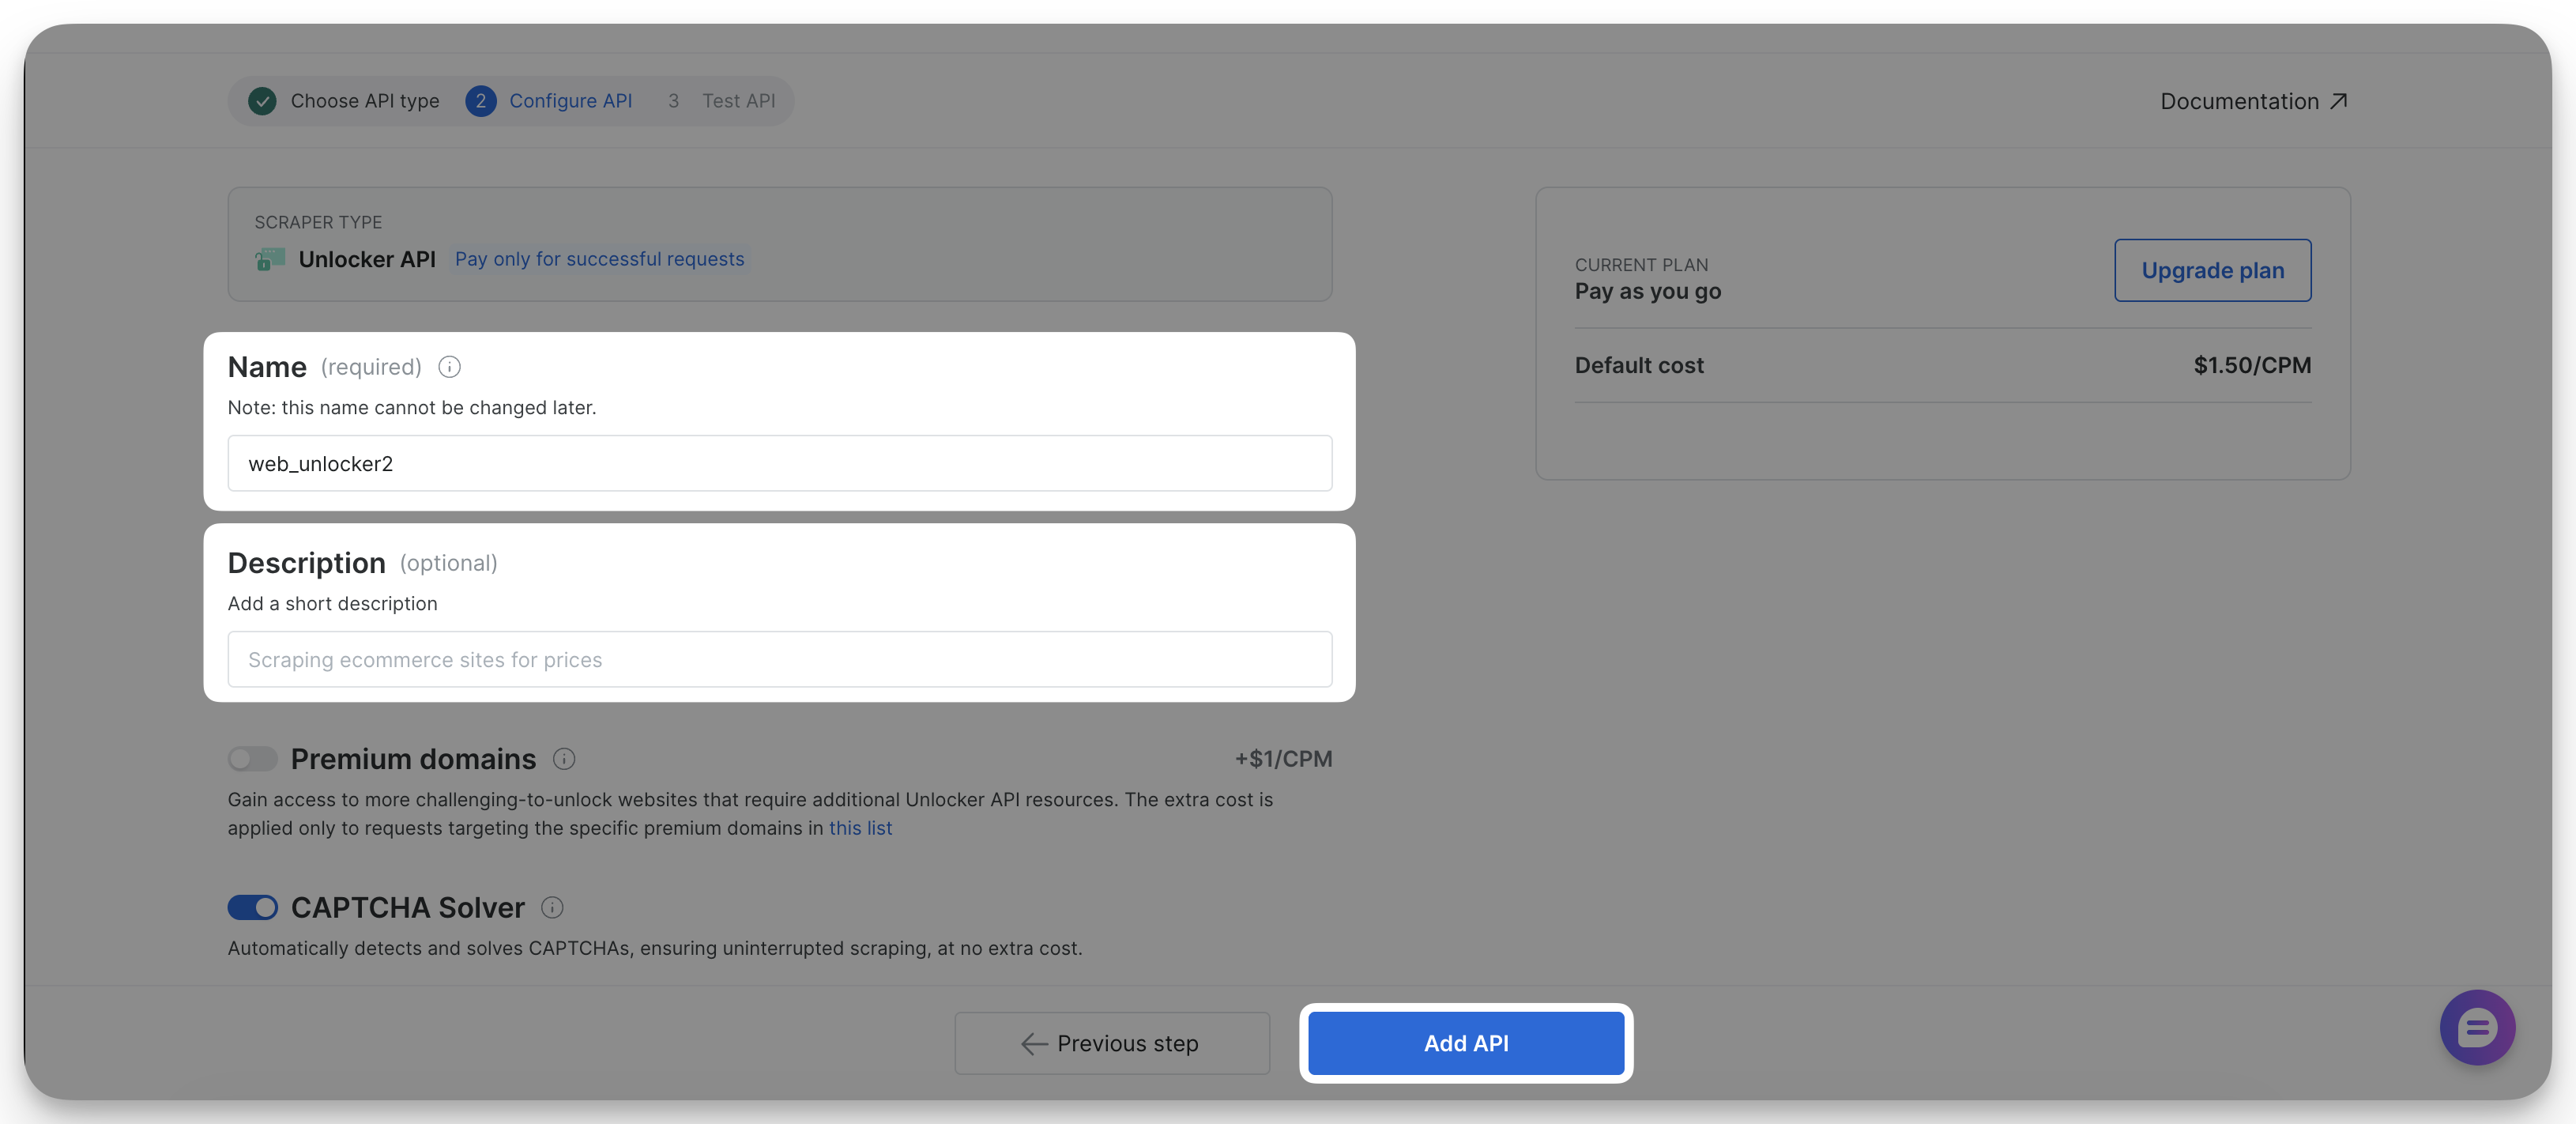
 Enter a **clear and descriptive name** for your Unlocker API. This helps you identify the API later, especially if you manage multiple zones.
You may also add an optional description for internal reference.
**The Unlocker API name cannot be changed once created.**
You can modify all other settings later, including domains, headers, and throttling options. For details, see [Configure your API](/scraping-automation/web-unlocker/configuration).
Enter a **clear and descriptive name** for your Unlocker API. This helps you identify the API later, especially if you manage multiple zones.
You may also add an optional description for internal reference.
**The Unlocker API name cannot be changed once created.**
You can modify all other settings later, including domains, headers, and throttling options. For details, see [Configure your API](/scraping-automation/web-unlocker/configuration).
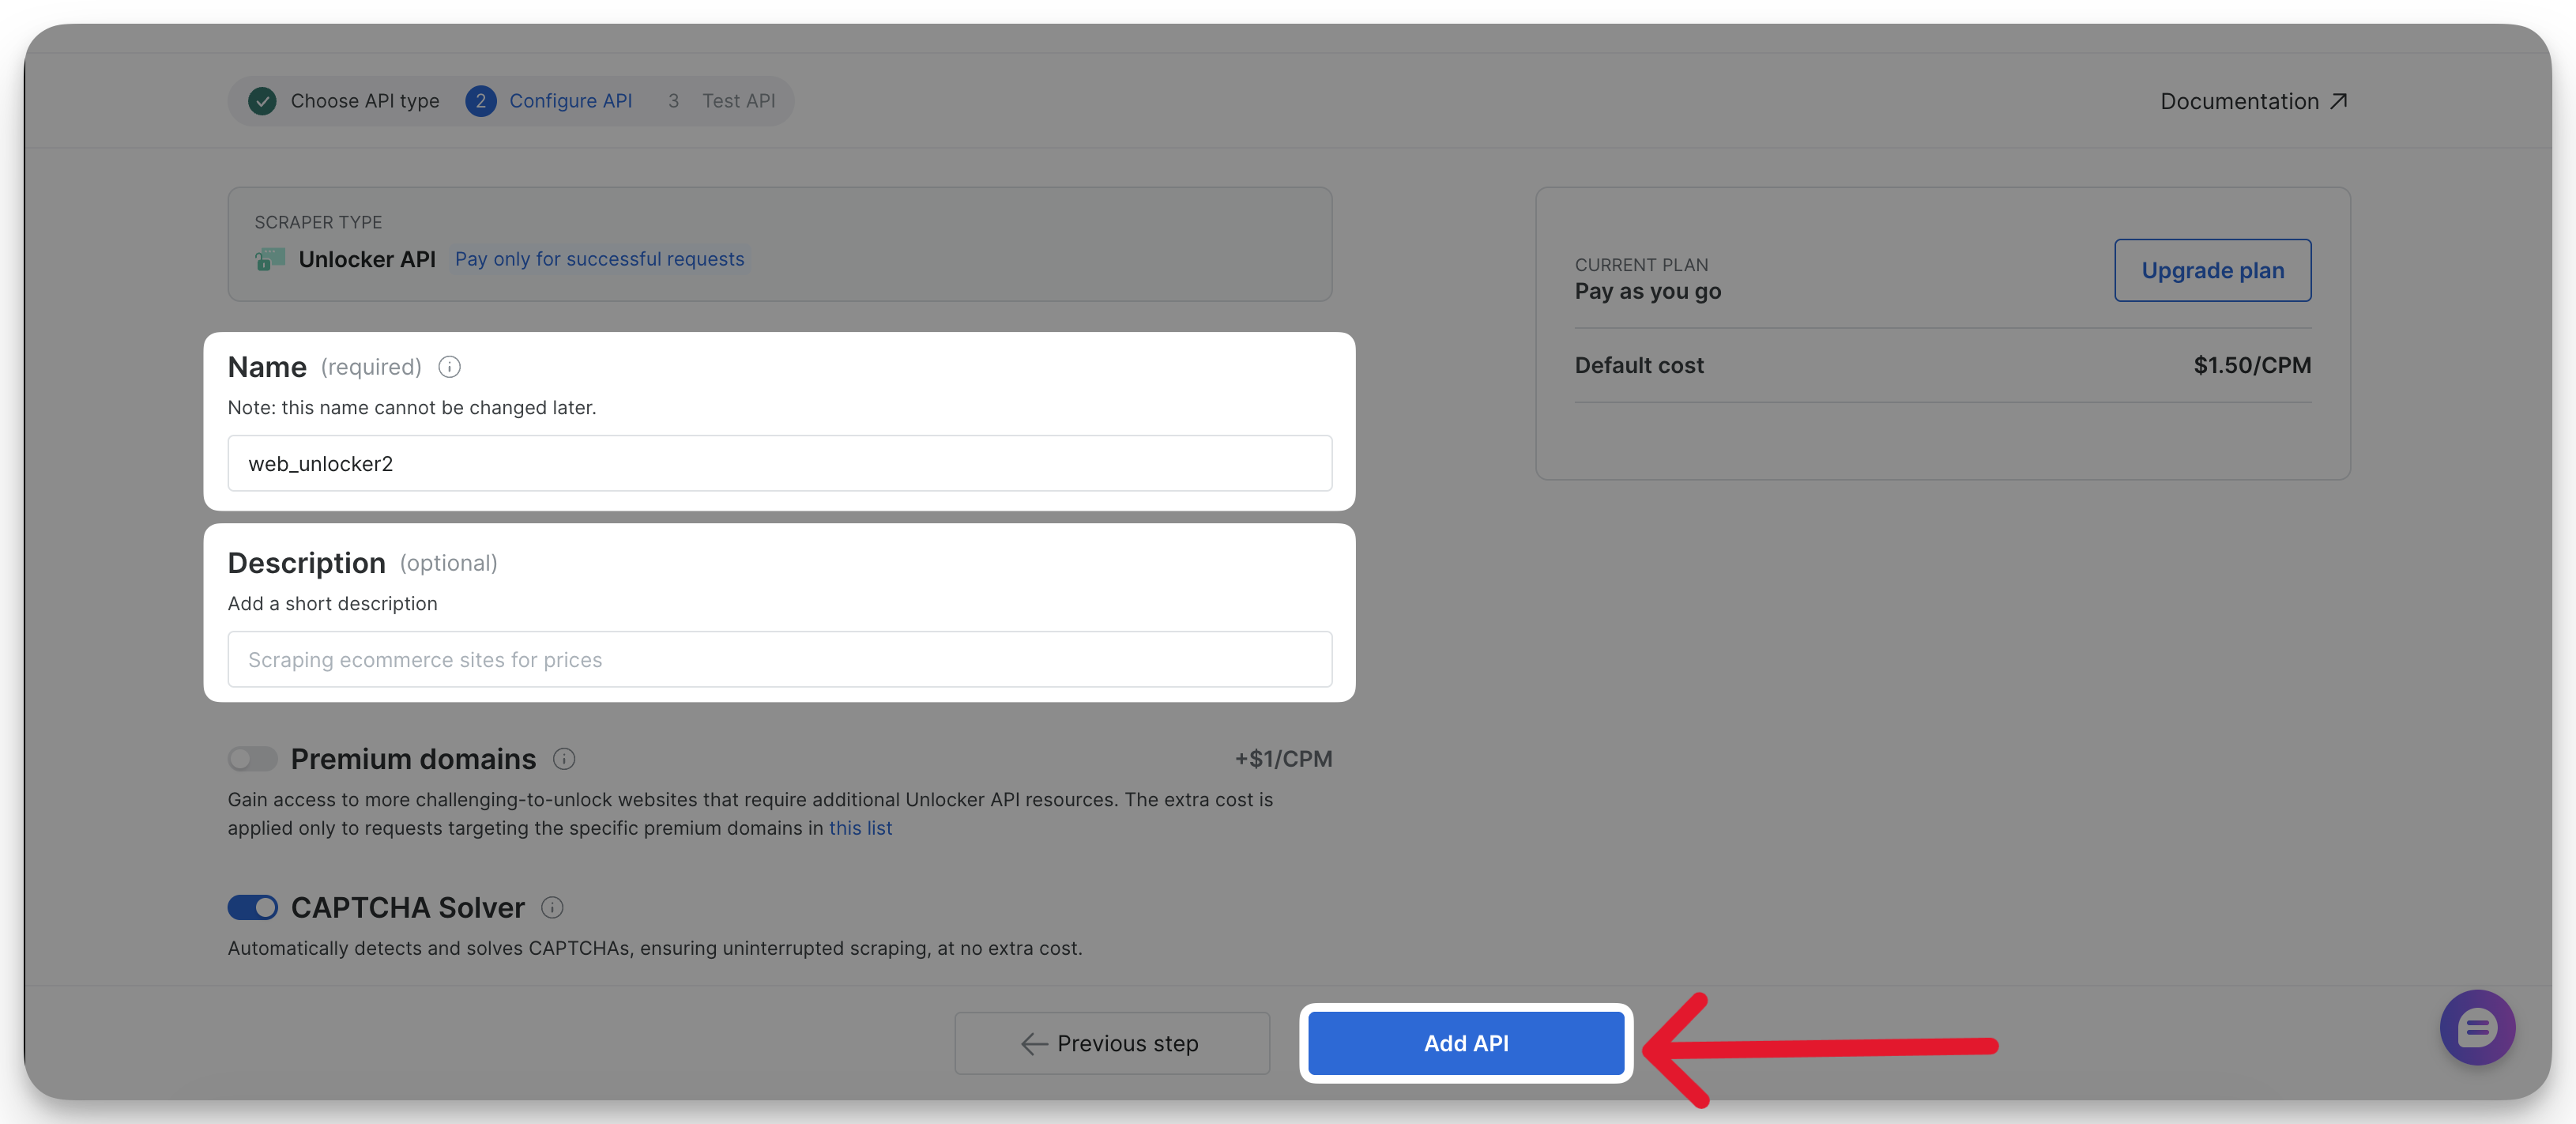
 If you signed up with a personal email (e.g., Gmail, GitHub) and have not yet added a payment method, the primary button will read **Add payment method** instead of **Add API**.
Click the button to open the payment verification form and complete the process. You will **not** be charged, this is for identity verification only.
Already have a payment method on file? This step is skipped automatically. For full details, see [Payment Verification](/general/account/billing-and-pricing/payment-verification).
Review your configuration and click **Add API**. If you were redirected to add a payment method, your zone is created automatically once verification completes. Your Unlocker API zone is now created and immediately available for use.
If you signed up with a personal email (e.g., Gmail, GitHub) and have not yet added a payment method, the primary button will read **Add payment method** instead of **Add API**.
Click the button to open the payment verification form and complete the process. You will **not** be charged, this is for identity verification only.
Already have a payment method on file? This step is skipped automatically. For full details, see [Payment Verification](/general/account/billing-and-pricing/payment-verification).
Review your configuration and click **Add API**. If you were redirected to add a payment method, your zone is created automatically once verification completes. Your Unlocker API zone is now created and immediately available for use.