

Make your first request in minutes
Once your Web Unlocker API is created, you can begin unlocking websites immediately. This guide walks you through sending your first successful request, explains the available access methods, and provides ready-to-use examples.Node.js Example
Python Example
Choose an access method
Bright Data provides two ways to access the Web Unlocker API. Both methods return identical results, but are optimized for different workflows.Direct API access (recommended)
A pure REST API method for easy access and straightforward integration.
Native proxy-based access
For workflows that rely on proxy-based routing.
Direct API access (recommended)
A simple and RESTful way to interact with Bright Data’s Web Unlocker API. Direct API access abstracts proxy management and allows you to send requests via a central endpoint, ensuring ease of use and straightforward REST API integration.When to use direct API access
- Centralized endpoint: Access Web Unlocker API via a single, RESTful endpoint.
- Streamlined direct integration: Eliminating the complexity of managing proxies or routing.
- Single API key authentication: Secure and easy to use, replacing the need for username-password management.
Sending your first request
After setting up your Web Unlocker API zone, you can find:- Your API key
- A ready-to-use request example
- Your zone name
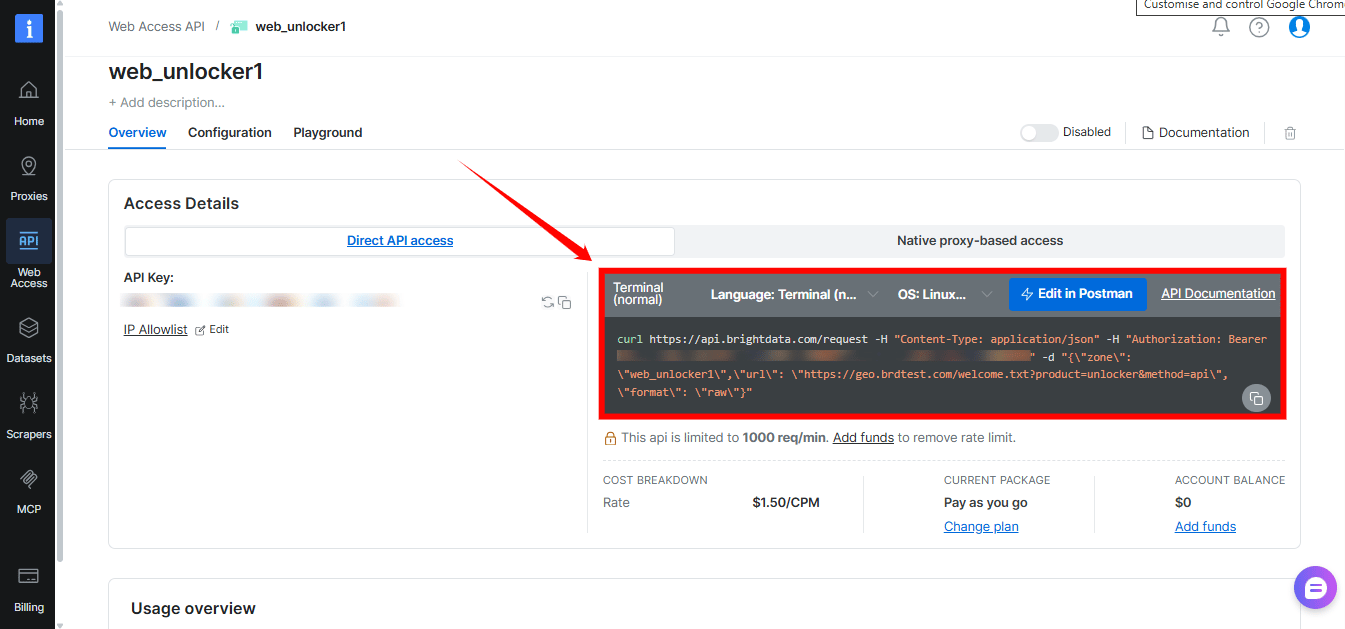
Direct API access - cURL
Request breakdown
- API Endpoint:
https://api.brightdata.com/request - Authorization Header:
Authorization: Bearer [INSERT YOUR API key]- Your API key is found within your Web Unlocker API zone.
- Payload:
zone: Your specific Web Unlocker API zone name.url: The target URL you wish to access via Web Unlocker API.format: Defines the response format. Userawto receive the raw response from the target site.- [Optional]
body: Specifies the raw POST payload sent to the target URL. e.g."body": "{\"key\":\"value\"}"
Generating your Bright Data API key
A Bright Data API key is your secure authentication token for accessing Web Unlocker API via Direct API access. When adding a new Web Unlocker API zone in the control panel, an API key will be generated automatically and can be found within the Overview tab of your zone.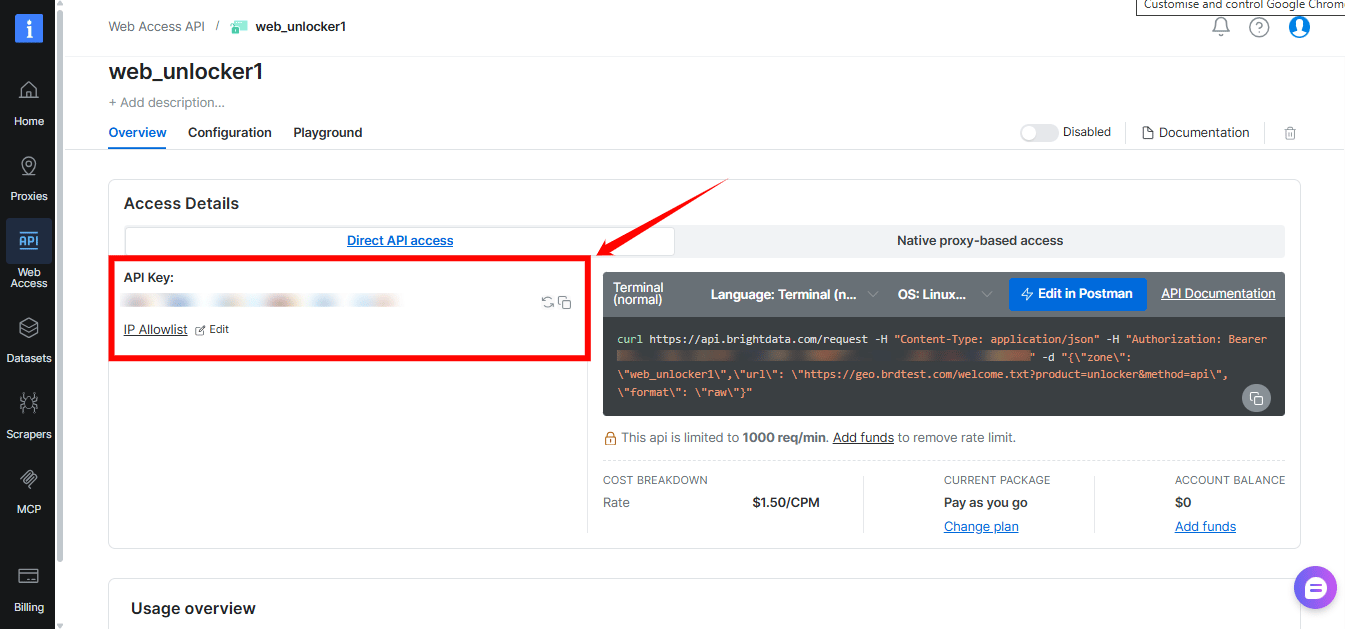
- Navigate to Account settings.
- Scroll down and click the Add API key button.
- Follow the on-screen instructions to complete the process.
Native proxy-based access
Proxy-based access is designed for workflows that already use proxy routing. Instead of a REST endpoint, requests are sent through Bright Data’s super proxy.Which credentials are required
In order to access Web Unlocker, you will need to provide credentials which are comprised of:- Your customer ID
- Your Web Unlocker API zone name
- Your Web Unlocker API password
- Bright Data SSL certificate
Where to find your customer ID
Customer ID can be found in the welcome email you received, or by clicking your account initial letter on the top right screen of your control panel, or by clicking here: Account settings .Zone name and password
Your zone name and password can be found in the overview tab of your unlocker zone in the control panel.Bright Data SSL Certificate
SSL Certificate can be found by clicking “SSL certificate” wizard on your zone’s overview top menu. See further instructions here: SSL certificate. Alternatively, you can ignore SSL errors.Web Unlocker API: HTTPS Proxy code examples
Once you have your credentials, use the following code to send your first request:Expand for code examples
Expand for code examples
Output
Common issues and quick fixes
-
401 Unauthorized
Authentication is missing or invalid.
→ Verify the
Authorizationheader and your API key. -
400 Bad Request
The request payload is invalid.
→ Ensure
zone,urlandformatare all present. - Content looks incomplete → Try another public URL, or review the configuration options.
Send your first async request
Asynchronous requests submit a job, return aresponse_id immediately, and let you collect the result later. Use async when you do not need the unlocked page in the same HTTP response.
Enable asynchronous requests
In your Web Unlocker API zone, open Advanced settings and turn on Asynchronous requests.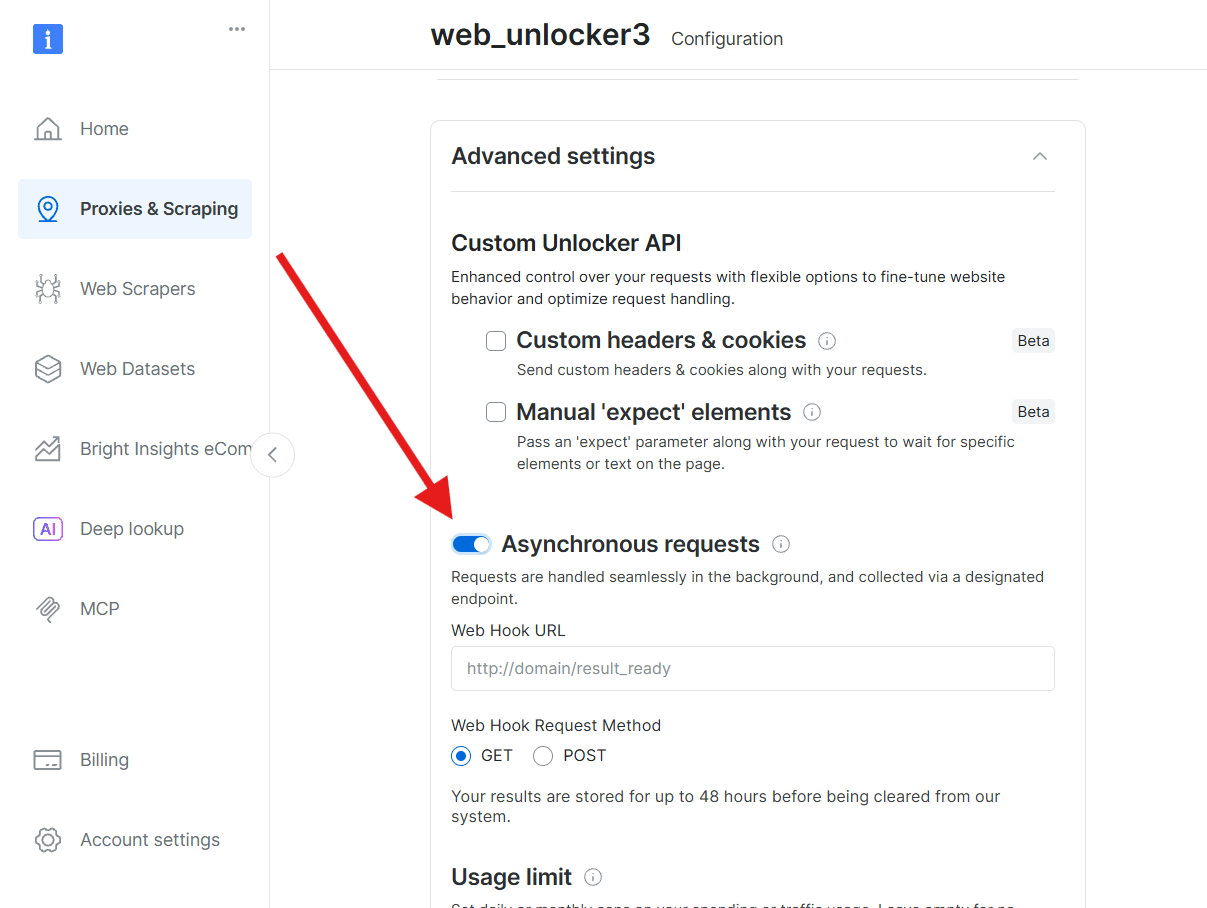
Submit the job
Send aPOST to the async request endpoint:
response_id:
Poll for the result
While the job runs, the API returns HTTP202 with "Request is pending". Wait before polling, or Bright Data may rate-limit excessive empty polls:
Once complete, retrieve the result:
results.json contains the status code, response headers and the unlocked page body: