

endpoint parameter for webhook delivery, or configure a cloud destination once and have every job write to it. The setup is identical for all scrapers; only the dataset_id changes.
Prerequisites
- A Bright Data account with an active API key
- Familiarity with the async request workflow
- For webhooks, a publicly accessible HTTPS endpoint (or a testing tool like webhook.site)
- For a cloud destination, permission to create credentials in that account: an IAM role for Amazon S3, a service account key for Google Cloud, a user and role for Snowflake
Which destination should I use?
Set a cloud destination once on the scraper’s Delivery settings tab in the Control Panel. Set a webhook per request with theendpoint parameter. Both can be active for the same job.
Which output formats can I use?
Scraper API output formats are NDJSON (default), JSON, JSON lines, CSV and Parquet. Each one has its own API value, and not every value is accepted everywhere:
A
/scrape request or a snapshot download with no format returns NDJSON, one record per line. Set format=json to get a JSON array instead. Verified on September 30, 2026.
“Not listed” means the value is not in the API specification for that parameter. NDJSON and JSON lines are separate API values, ndjson and jsonl.
What are streamed delivery and file delivery?
Streamed delivery and file delivery change what a delivery contains:- Streamed delivery sends results in batches of 10 to 100,000 lines while the job is still running, instead of one file when the job ends.
- File delivery adds the raw HTML, WARC or screenshot of each page next to the records.
How to deliver results to a webhook
When you trigger an async collection with anendpoint URL, Bright Data sends a POST request to that URL with the scraped data once the job completes. No polling required.
Step 1: Set up a test webhook
For testing, use webhook.site to get a temporary public URL:- Open webhook.site in your browser
- Copy the unique URL displayed (e.g.,
https://webhook.site/abc-123-def) - Keep the page open to monitor incoming requests
Step 2: Trigger a collection with the webhook URL
Add theendpoint query parameter to your async /trigger request:
Step 3: Verify delivery
Once the collection completes (typically 30-60 seconds for a few records), check your webhook.site page. You should see aPOST request with the scraped data.
The payload is the same JSON array you would receive from a direct API download:
Each record is an Instagram profile. The fields are listed in the Discover by username response sample.
How to handle webhooks in production
For production, point theendpoint URL to your own server endpoint.
server.js
server.py
How to authenticate webhook deliveries
If your endpoint requires authentication, add theauth_header parameter. Bright Data sends its value as the Authorization header on every delivery to that endpoint. Verified on September 7, 2026. Earlier versions of this page named the parameter webhook_header_Authorization; the API ignores that name and delivers with no Authorization header, so replace it if you copied it.
Which headers does a delivery carry?
Every webhook delivery is aPOST with Content-Type: application/json; charset=utf-8, a User-Agent starting with BRD dca-stage-deliver, a dca-collection-id header holding the snapshot ID and a dca-filename header naming the file. Match deliveries to jobs with dca-collection-id rather than parsing the body. Observed on September 7, 2026.
Which IPs do webhooks come from?
If your server uses an IP allowlist, add the following 14 Bright Data webhook source IPs. Every asynchronous webhook delivery from Bright Data, across the Scraper API, the AI scrapers and the SERP API, comes from one of them.How to deliver results to Amazon S3
Set up an IAM role once, then add adeliver block to each /trigger request that should write to your bucket.
Step 1: Create the IAM policy and role
Bright Data writes to your bucket by assuming an IAM role in your AWS account. Create a policy that allows the writes, a role that Bright Data’s delivery role can assume, and attach the role to the bucket.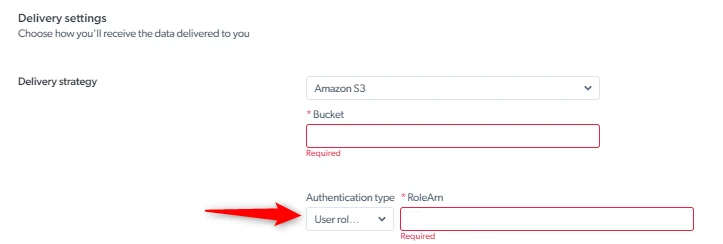
1
Create a policy
In the IAM console, open Policies and create a policy that allows 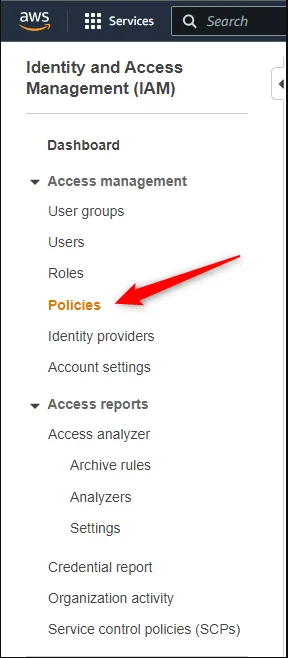
PutObject and GetObject on the bucket.2
Create a role
Open Roles, create a role, and attach the policy from step 1 under Permission policies. Note the role’s ARN; it looks like 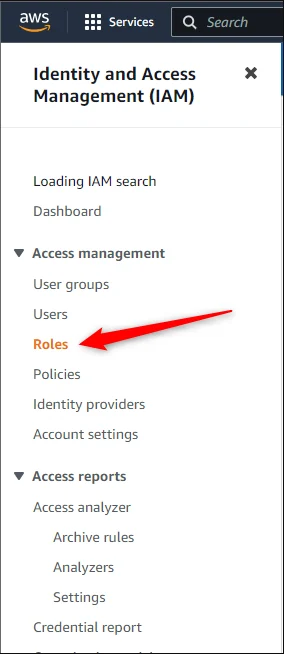
arn:aws:iam::<ROLE_ID>:role/<ROLE_NAME> and goes into credentials.role_arn.credentials.external_id:3
Attach the role to the bucket
On the bucket, grant the role from step 2 access by its ARN.
Step 2: Trigger a collection with an S3 deliver block
Add a deliver object to the /trigger request body, next to input. Bright Data writes the results of this job to your bucket:
Step 3: Verify delivery
Once the collection completes, check your S3 bucket for the delivered file:sd_m1a2b3c4d5e6f7g8h.json). Download and inspect it:
How to deliver results to Google Cloud Storage
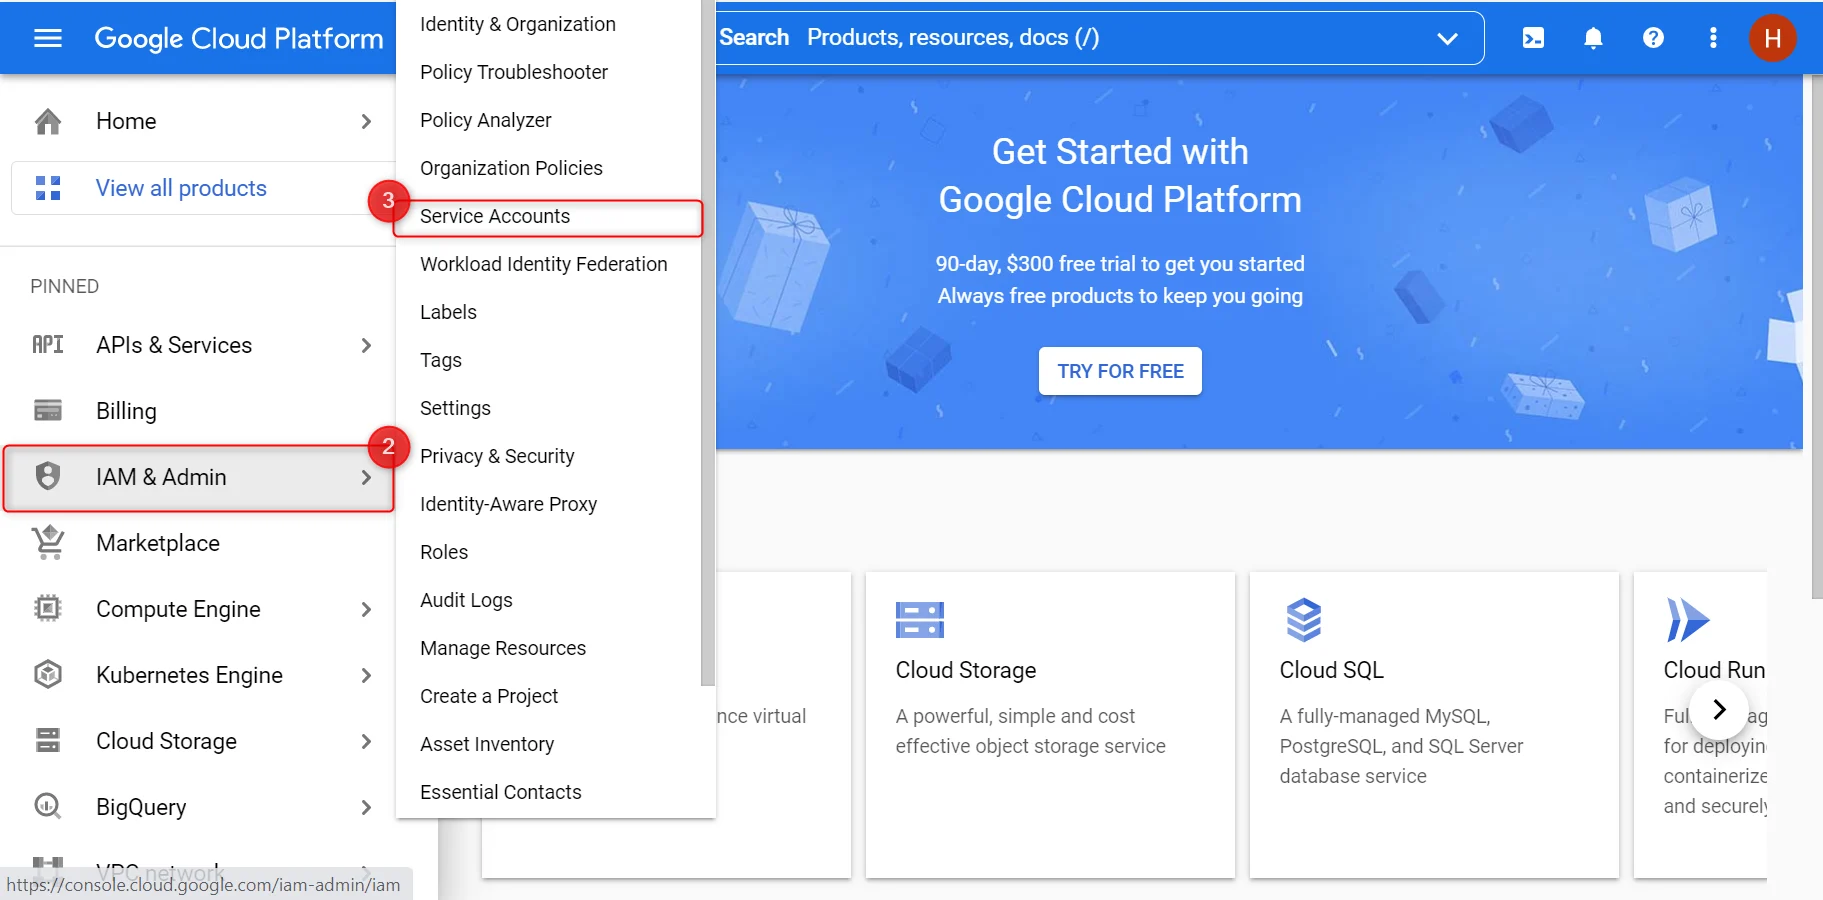
Google Cloud Storage delivery authenticates with a service account key. Create the key, then paste its private key into the scraper’s delivery settings.- Open the Google Cloud console, expand the menu and open IAM & Admin.
-
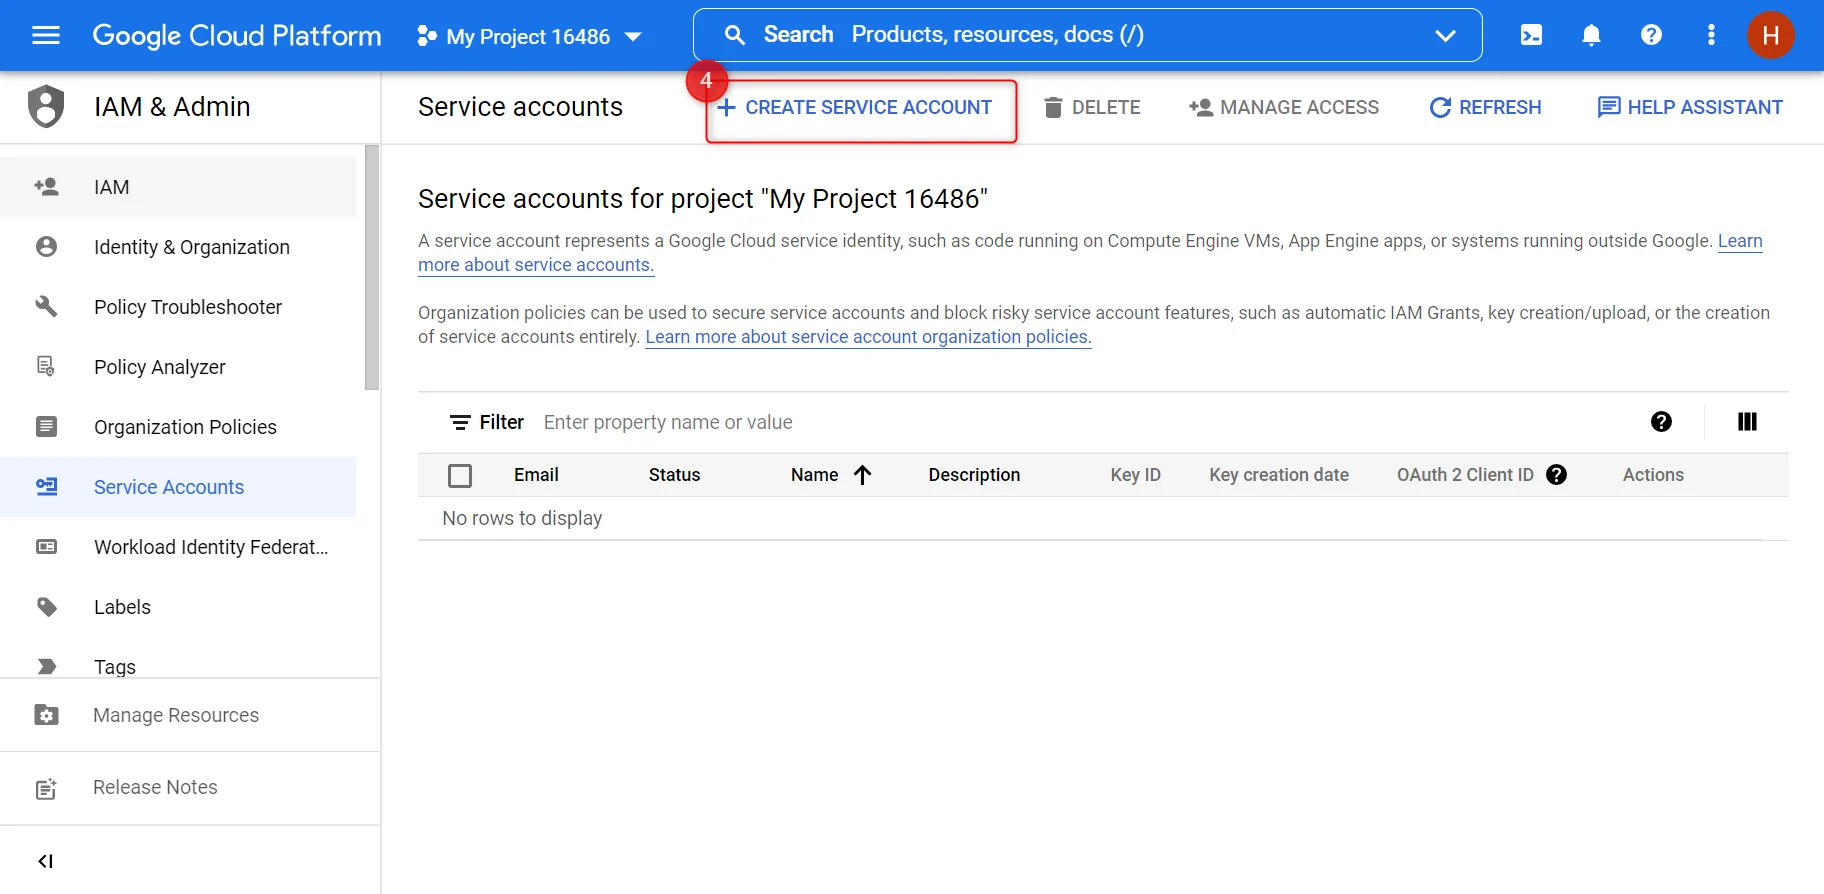
Click Service accounts.
-
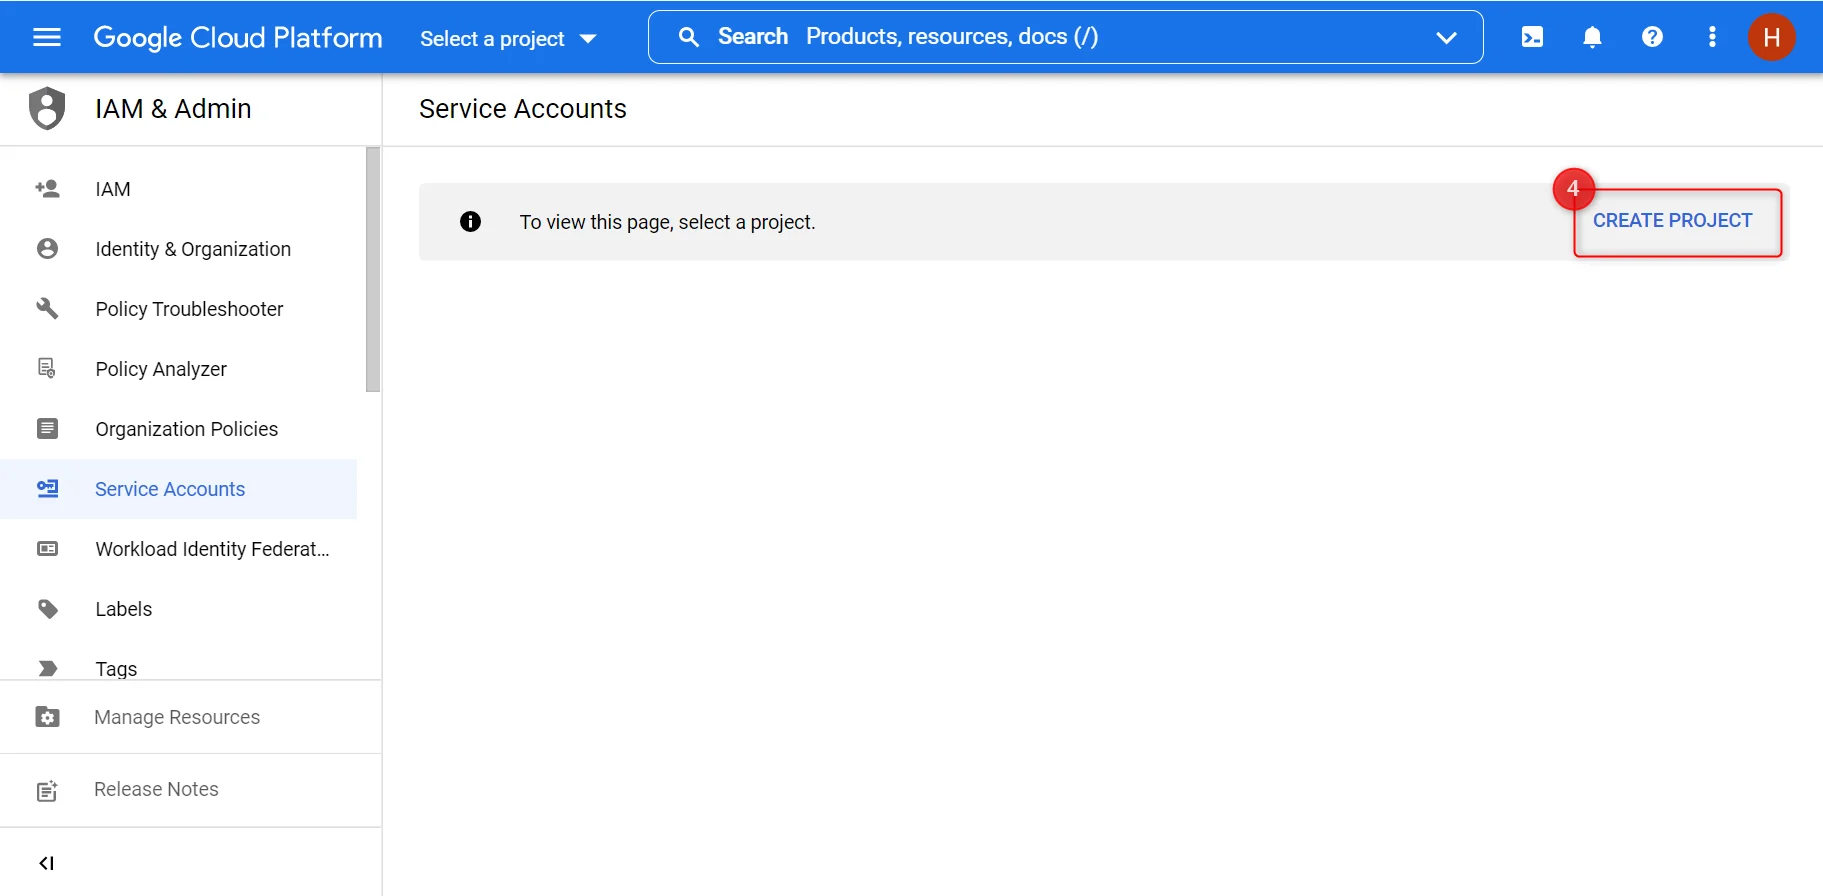
Choose an existing service account or create one. If the button is missing, create a project first.
-
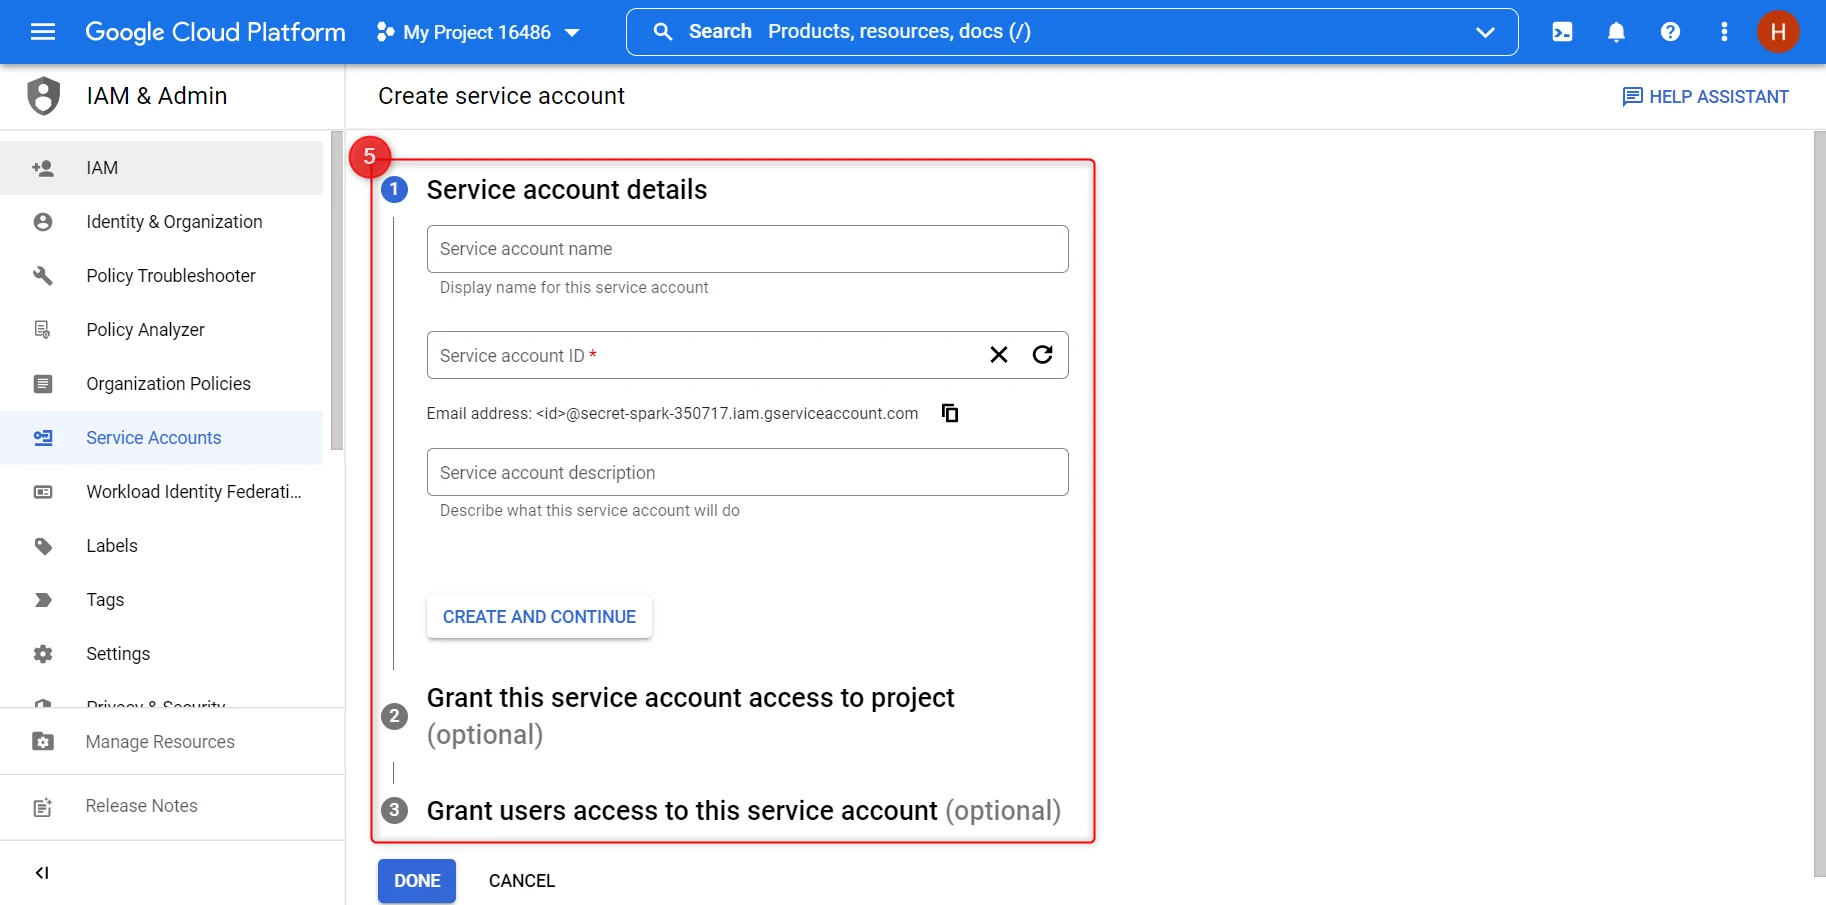
Enter the name, ID and description, grant the account access to the bucket, and create it.
-
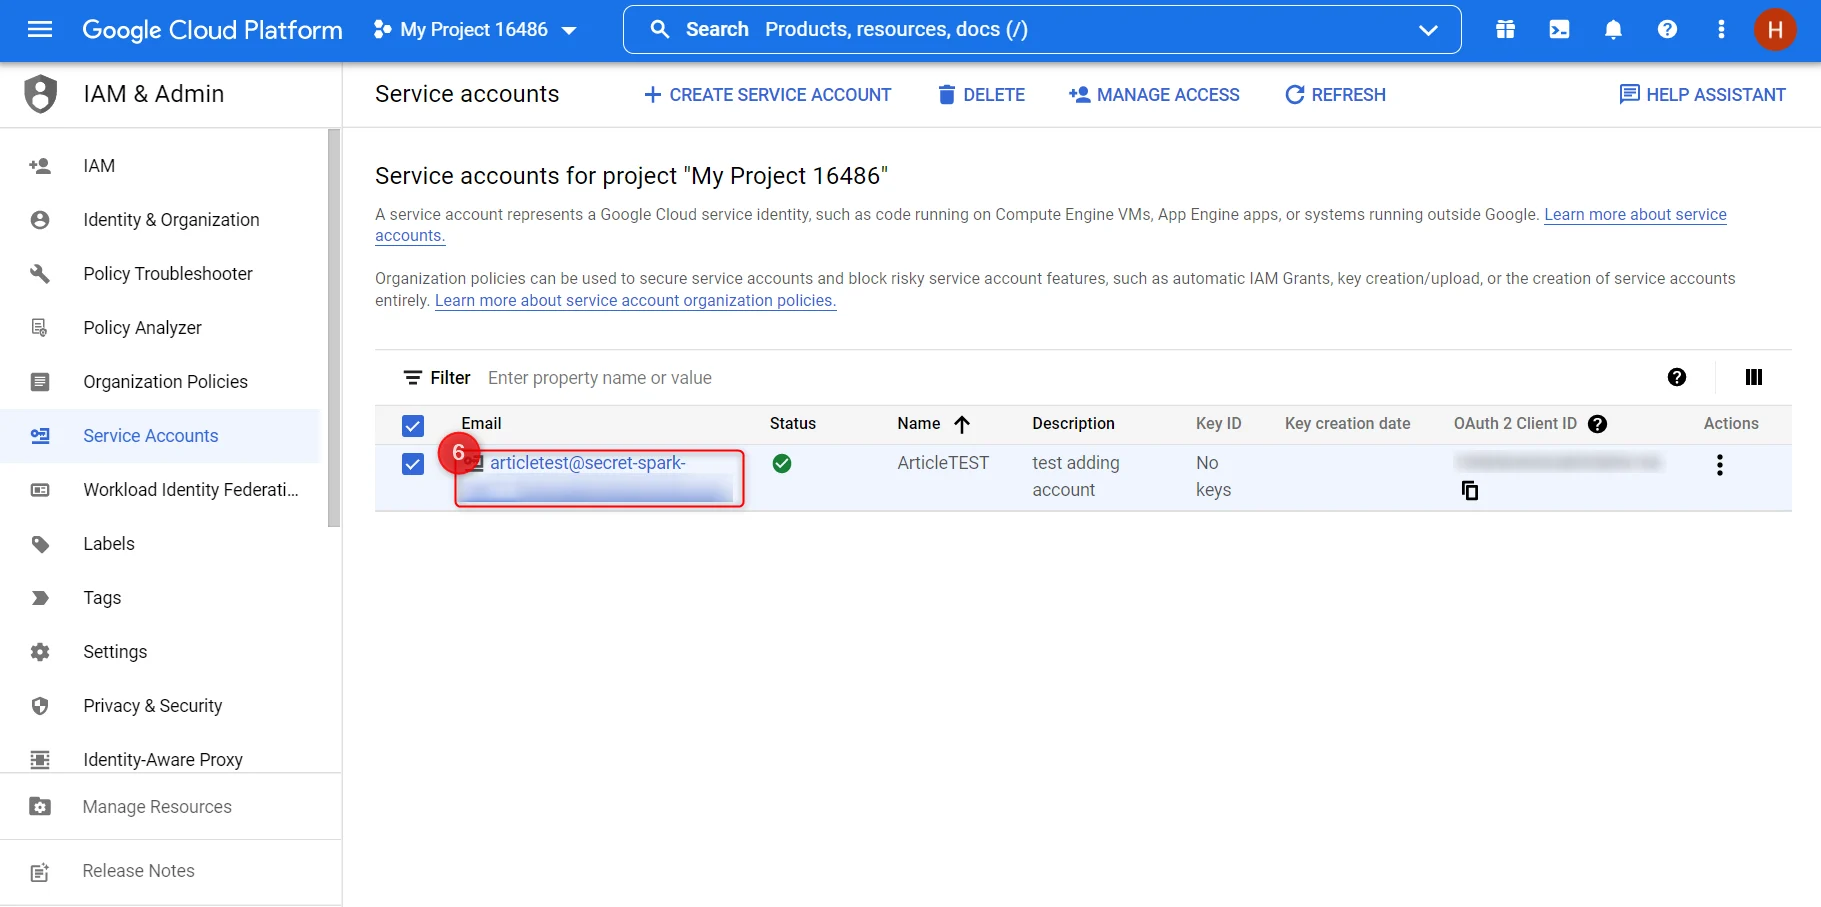
Click the service account’s email address.
-
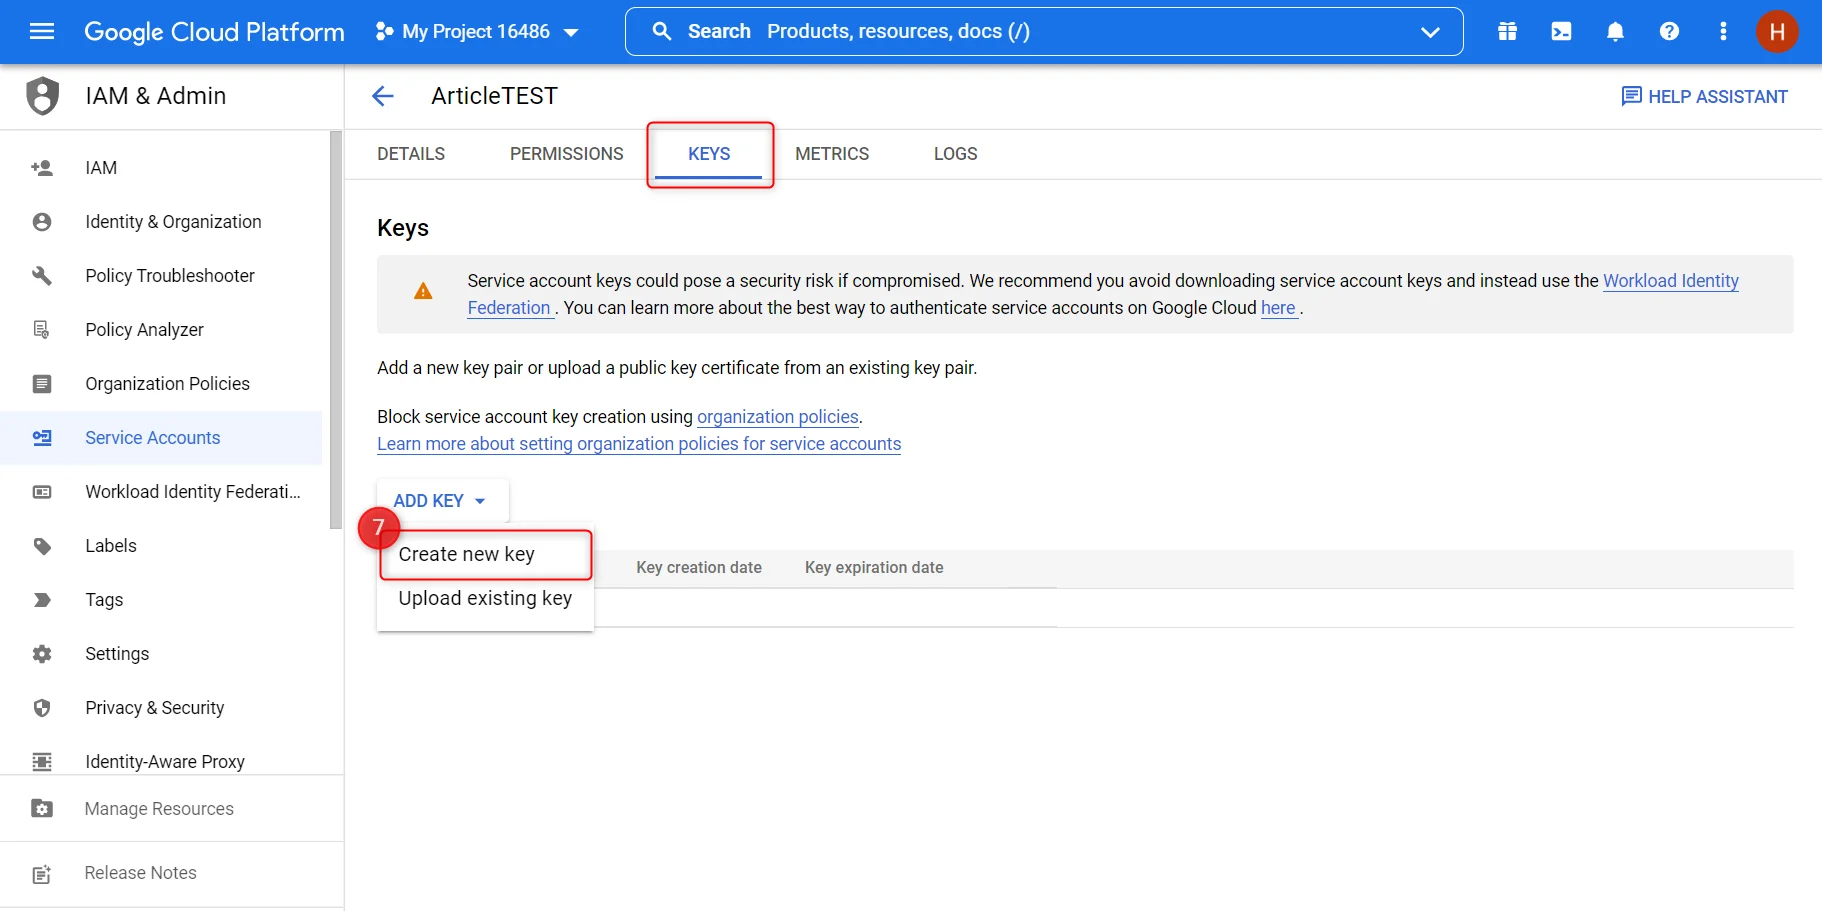
Open the Keys tab, click Add key, then Create new key.
-
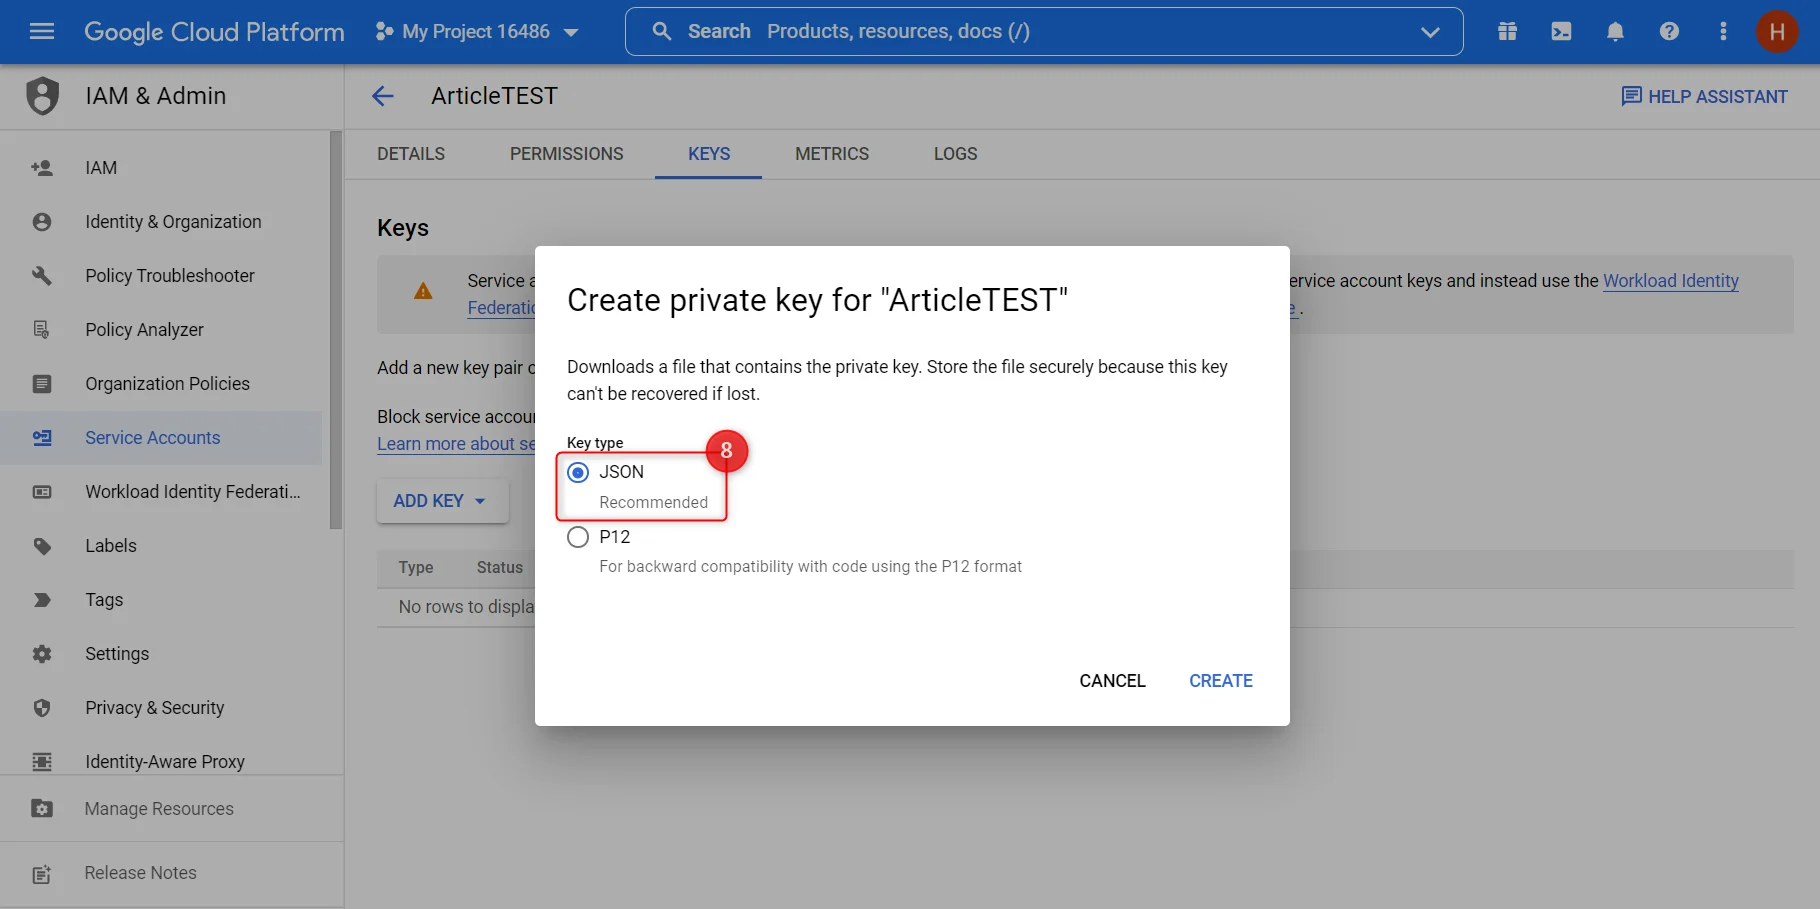
Choose JSON. The key file downloads to your machine.
-
Copy the
private_keyvalue from the downloaded file into the scraper’s delivery settings, with the bucket name and the file format.
How to deliver results to Snowflake
Bright Data loads data through an internal named stage, using a user and role you create for it. Run the following in your Snowflake account, then enter the values in the scraper’s delivery settings.1
Choose or create a database
2
Choose or create a schema
Every database has a
PUBLIC schema. To use another one:3
Choose or create a warehouse
Snowflake’s guidance on sizing a warehouse for data loading applies; see Warehouses overview.
4
Choose or create an internal named stage
5
Create a role that can write to the stage
6
Create a user for Bright Data and grant it the role
7
Allowlist Bright Data's IPs if you use a network policy
If a network policy is active on the account, add these four addresses to it:
Troubleshooting
Webhook not receiving data?
- Verify the URL is publicly accessible (not
localhost) - Check that your endpoint returns a
200status code within 30 seconds - Verify the 14 webhook IPs above are allowlisted if you have firewall rules
Receiving compressed data?
If you omituncompressed_webhook=true, data arrives gzip-compressed. Add uncompressed_webhook=true to your trigger URL, or decompress the payload on your server.
Payload too large for your server?
Large collections can produce payloads up to 1 GB. Setexpress.json({ limit: "100mb" }) in Express.js or equivalent in your framework. For very large datasets, use S3 delivery instead.
Files not appearing in S3?
- Verify the IAM role ARN and external ID are correct
- Check that the bucket policy allows
s3:PutObjectfrom Bright Data’s account - Ensure the bucket region matches your configuration
- Review delivery status in the Bright Data dashboard under Logs
Access denied errors on S3?
Verify the trust policy on your IAM role names Bright Data’s delivery role in account422310177405 and that the external ID in the trust policy matches the external_id you send.
FAQ
Does delivery configuration differ per platform?
No. Webhook parameters and cloud destination setup are identical for every Bright Data scraper. Only thedataset_id in the trigger request changes.
Can I use a webhook and cloud storage at the same time?
Yes. Cloud delivery is configured per scraper in the Control Panel, and theendpoint parameter is set per request, so a single job can do both.
What happens if my webhook is down when a job finishes?
Bright Data retries delivery. If your endpoint stays unavailable, download the snapshot directly using thesnapshot_id returned by the trigger call; snapshots stay available for 30 days.