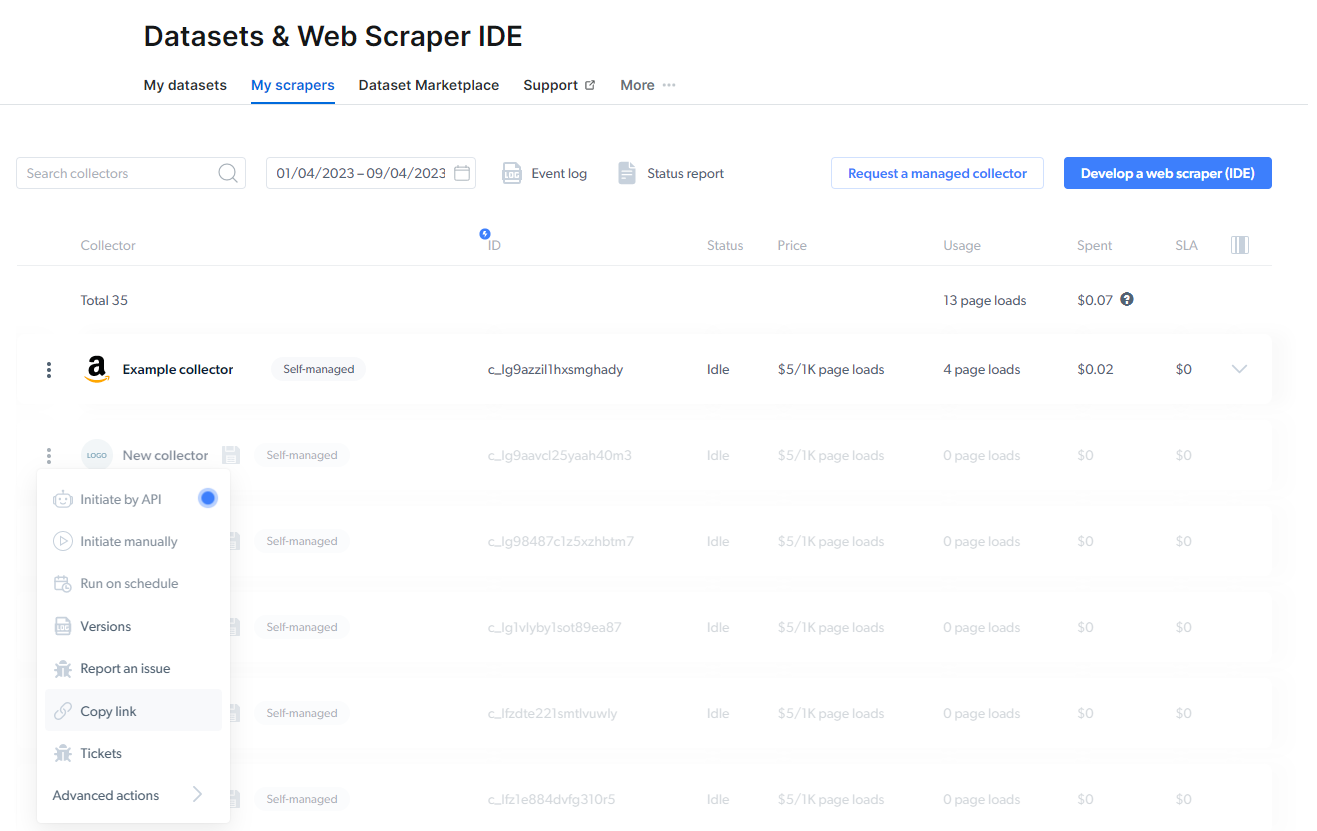
Initiate scraper
To start collecting the data, choose one of three options:- Initiate by API
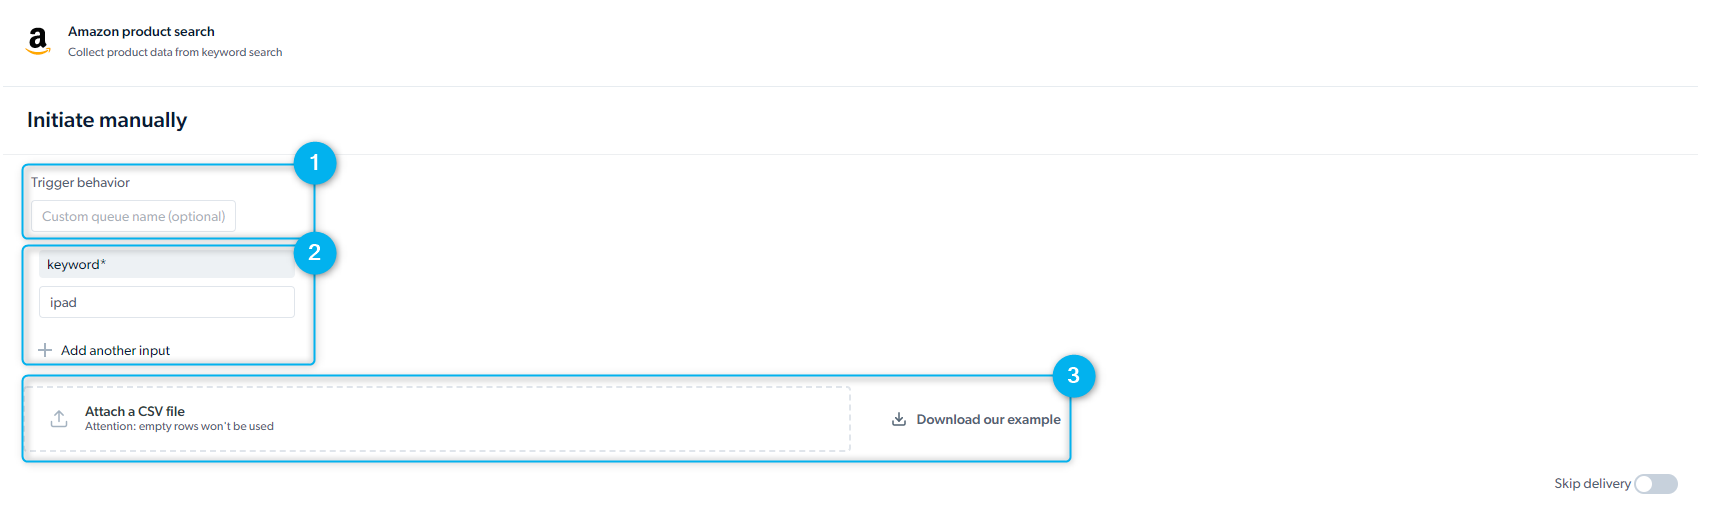
- Initiate manually
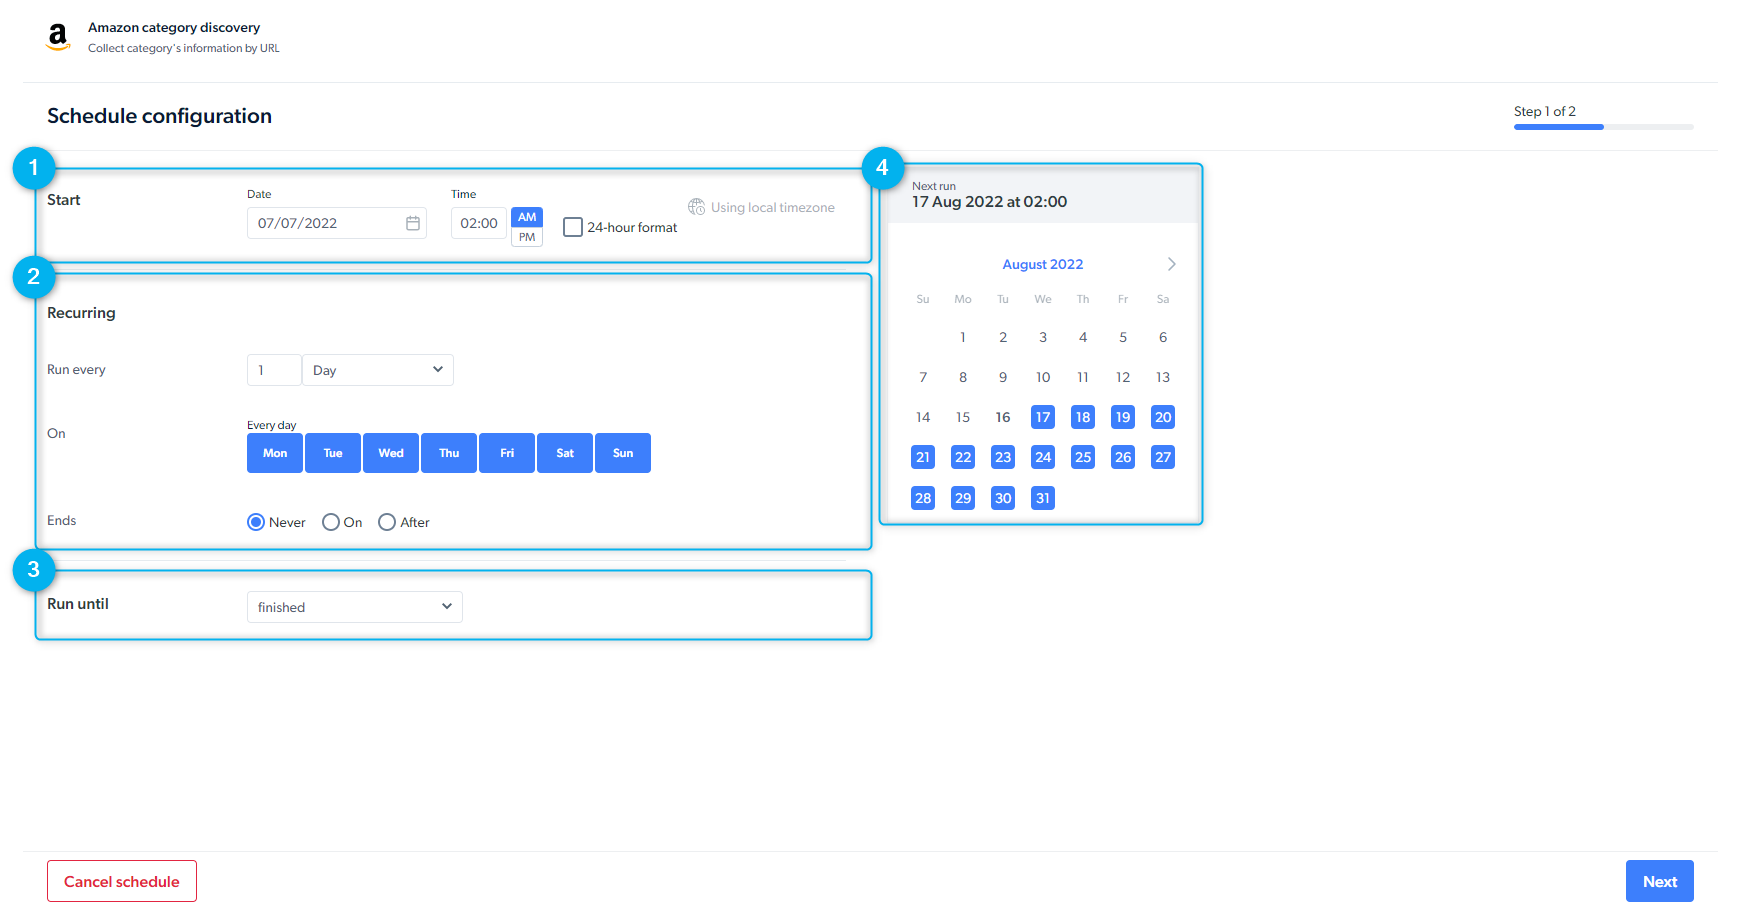
- Schedule a scraper
Start data collection through our API without needing to access the Bright Data control panel : Getting started with API documentationBefore initiating an API request, Create an API key. To create an API key, go to:
Dashboard side menu settings > account settings > API key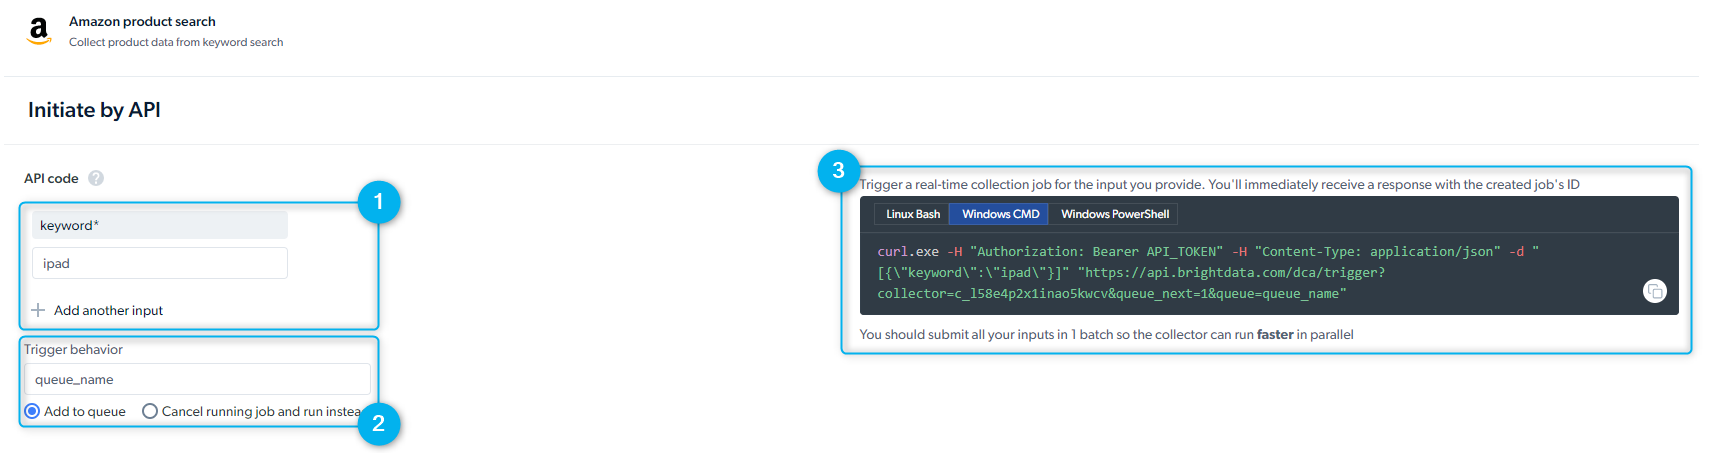
Dashboard side menu settings > account settings > API key
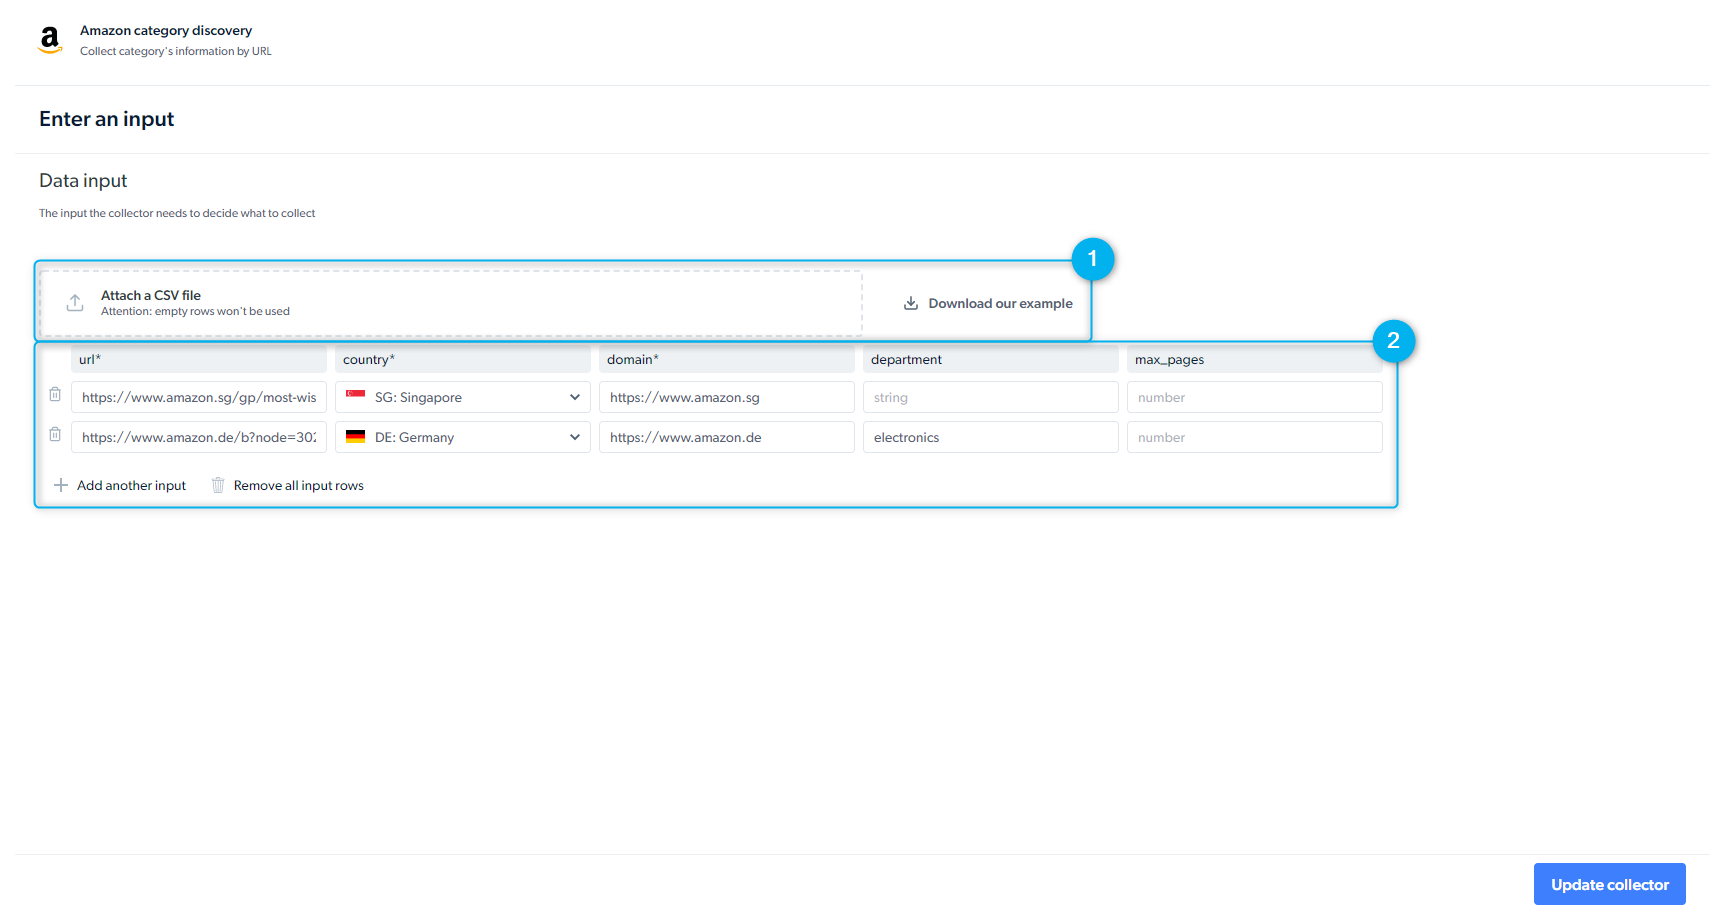
- Set Up Inputs Manually - provide input manually or through the API request
- Trigger behavior - you can add several requests in parallel that are activated according to the order they’re defined. You can add another job run to the queue and run more than two jobs simultaneously.
- Preview of the API Request - Bright Data provides you with a REST API call to initiate the scraper. Please select the “Linux Bash” viewer for CURL commands. As soon as you send the request, you will receive a job id.
Receive data API call is required in order to receive data when delivery preferences is set to API download
Rate Limits & Concurrent Requests
To ensure stable performance and fair usage, Scraper Studio IDE enforces rate limits based on the request type: single-input (real-time) or batchWhat is the Rate Limit?
The Scraper Studio IDE supports the following maximum number of concurrent requests:| Method | Rate-limit |
|---|---|
| Batch | up to 1000 concurrent requests |
| Real-time | no limit |
Batch vs. Real-time Collection Methods
Batch collection is designed for large-scale data collection. It lets you submit a list of URLs (or inputs) and retrieve the results once the job is complete. Real-time collection is designed for use cases that require immediate results. It lets you submit a single URL (or input) and receive the response in real time. Both methods are reliable and efficient—they’re simply optimized for different data collection needs.Delivery Options
You can set your delivery preferences for the dataset. To do that simply click on the scraper row from the ‘My scrapers’ tab and then click on ‘Delivery preferences’Choose when to get the data
Choose when to get the data
- Batch : an efficient way of managing large amounts of data
- Split batch : deliver the data in smaller batches as soon as it’s ready
- Real-time : is an ideal way to get a fast response for one request
- Skip retries : Do not retry when error occurs. Can speed up collection
Choose file format
Choose file format
- JSON
- NDJSON
- CSV
- XLSX
- PARQUET
Choose how to receive the data
Choose how to receive the data
- API Download
- Webhook
- Cloud storage providers : Amazon S3, Google Cloud Storage, Azure, Alibaba Cloud OSS
-
SFTP/FTP
Media files cannot be delivered when it’s set to Email or API download
Choose data preferences (batch)
Choose data preferences (batch)
- Result and Errors in separate files
- Result and Errors together in one file
- Only successful results
- Only errors
Define notifications
Define notifications
- Notify when the collection is complete
- Notify success rates
- Notify when an error occurs
Output schema
Schema defines the data point structure and how the data will be organized. You can change the schema structure and modify the data points to suit your needs, re-order, edit, set default values and add additional data to your output configuration.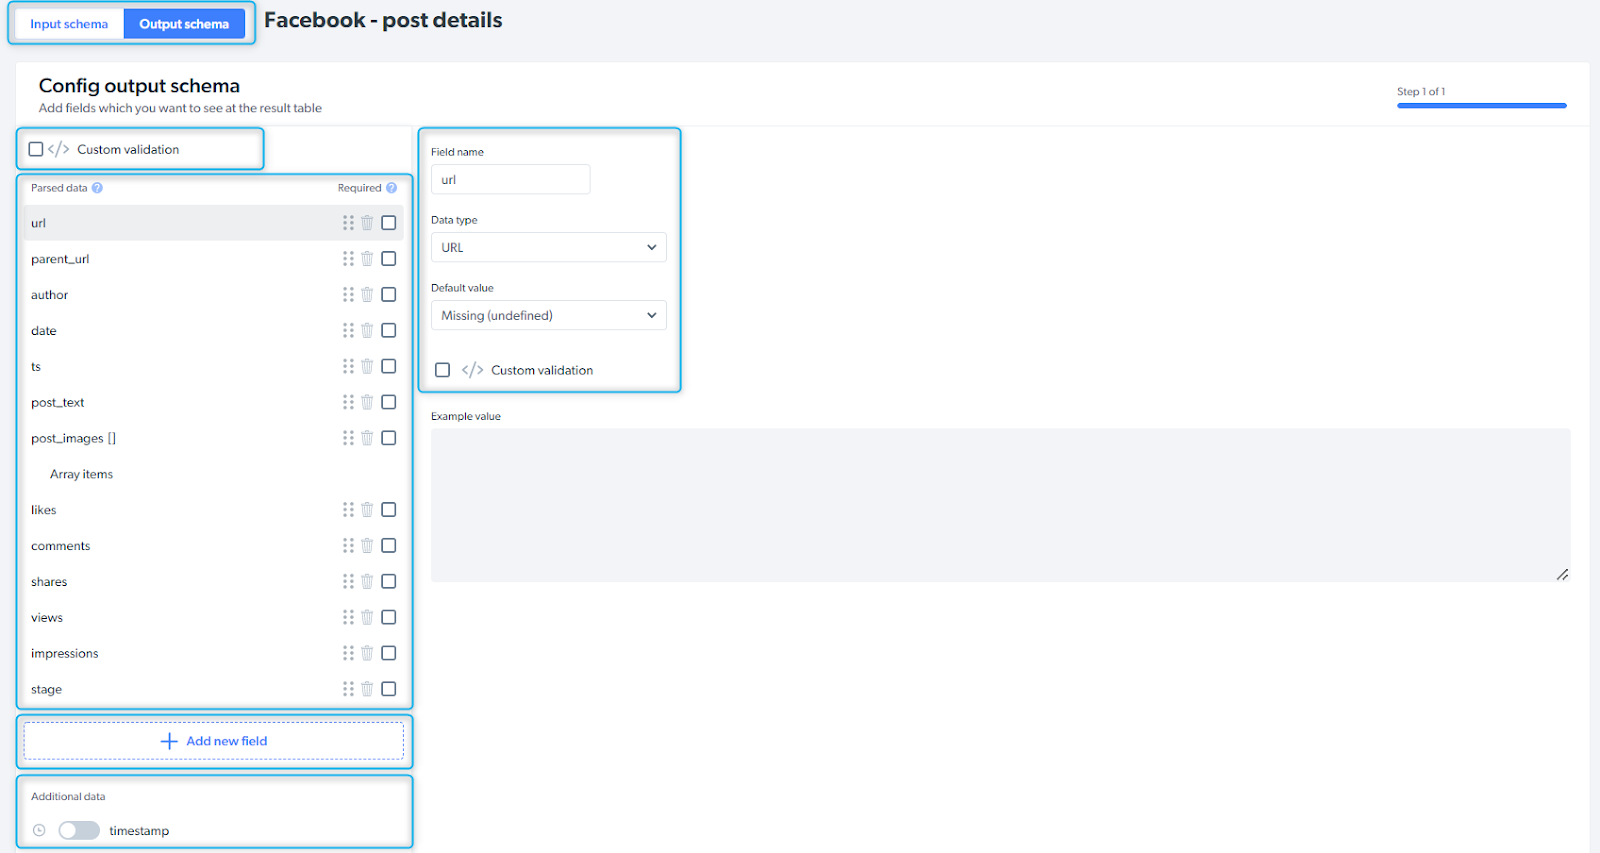
| Input / Output schema | choose the tab you’d like to configure |
| Custom validation | validate the schema |
| Parsed data | data points collected by the scraper |
| Add new field | if you need additional data point, you can add fields and define field name and type |
| Additional data | additional information you can add to the schema (timestamp, screenshot, etc.) |