Streamline your network management with Proxifier! By integrating Bright Data, you can securely route traffic from applications that lack native proxy support. With Proxifier’s flexible rule-based system, you can customize traffic routing and enjoy seamless, anonymous browsing.
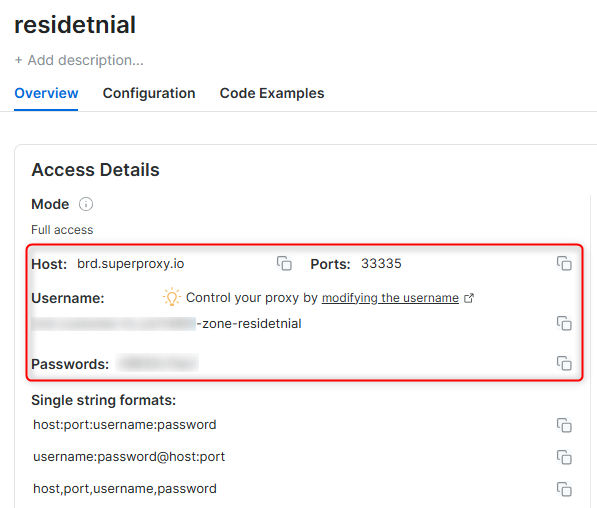
Expand to get your Bright Data Proxy Access Information
Bright Data proxies are grouped in “Proxy zones”. Each zone holds the configuration for the proxies it holds.
To get access to the proxy zone:
To access Bright Data’s Residential Proxies you will need to either get verified by our compliance team, or install a certificate. Read more…
If you target a search engine like google, bing or yandex, you need a special Search Engine Results Page (SERP) proxy API. Use Bright Data SERP API to target search engines. Click here to read more about Bright Data SERP proxy API.
In many tools you will see a “test proxy” function, which performs a conncectivity test to your proxy, and some add a geolocation test as well, to identify the location of the proxy.
To correctly test your proxy you should target those search queries to:
https://geo.brdtest.com/welcome.txt
.
Some tools use popular search engines (like google.com) as a default test target. Bright Data will block those requests and you tool will show proxy error although your proxy is perfectly fine.
If your proxy test fails, this is probably the reason. Make sure that your test domain is not a search engine (this is done in the tool configuration, and not controlled by Bright Data).
Proxifier is a powerful desktop application that allows programs without native proxy support to connect through HTTPS, HTTP, or SOCKS5 proxies. It’s ideal for routing traffic securely, managing application-specific connections, and providing an alternative to VPNs. Its rule-based setup lets you assign proxies to specific applications, giving you precise control over your internet usage.
Step 1. Download and Install Proxifier
1. Visit the Proxifier website to download the application.
2. Follow the installation instructions and launch Proxifier on your system.
Step 2. Access Proxy Settings
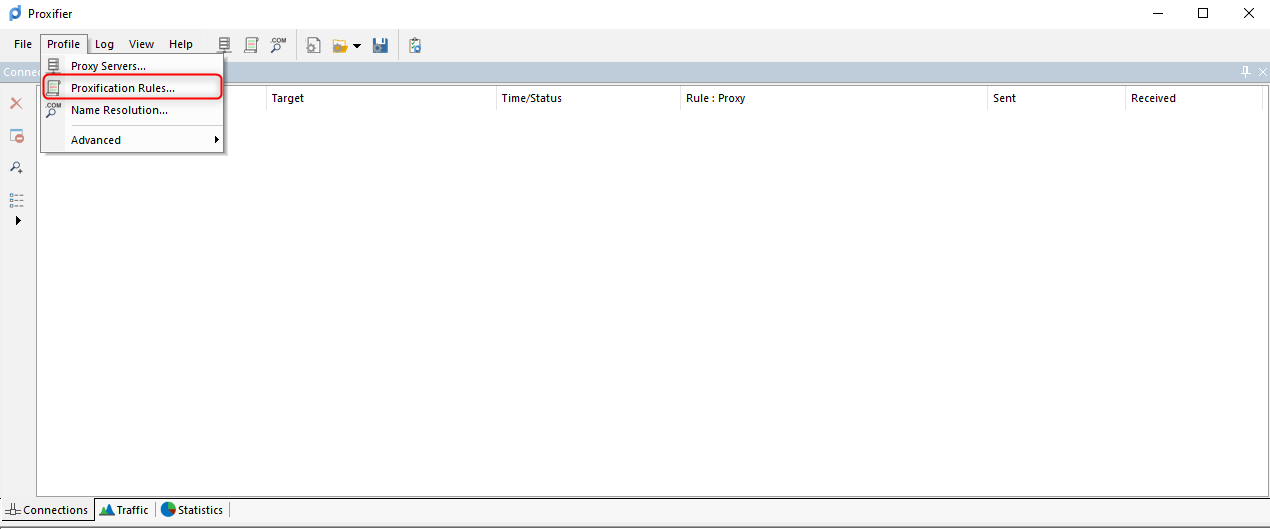
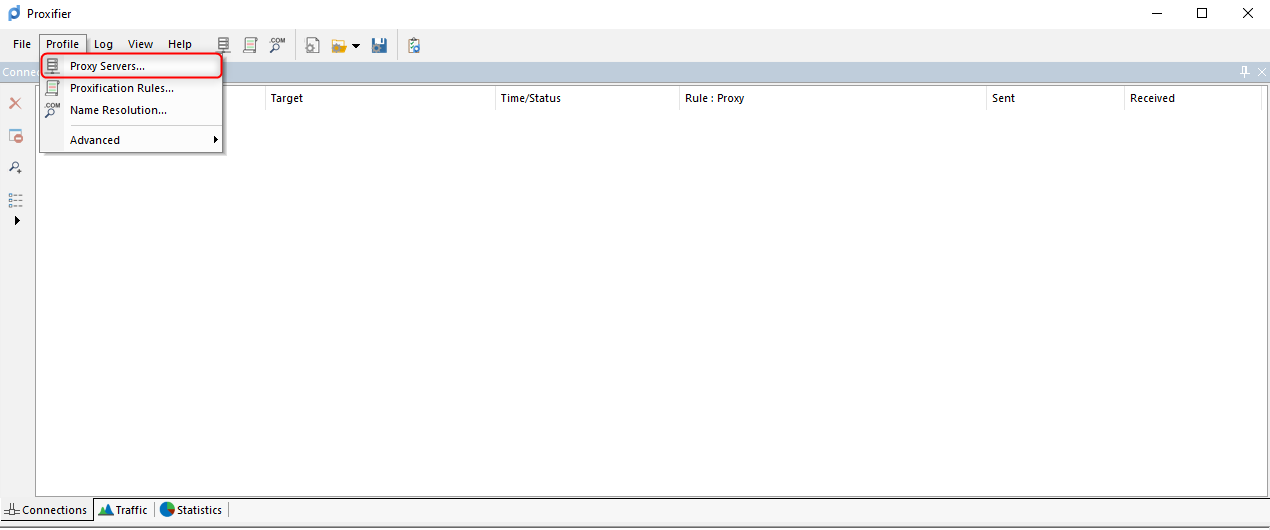
1. Open Proxifier and navigate to the Profile menu.
2. Select Proxy Servers to manage your proxy configurations.
Step 3. Add Your Bright Data Proxy
1. Click the Add button to configure a new proxy.
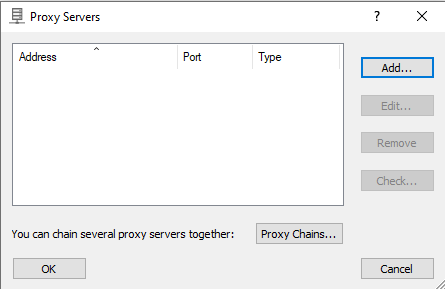
2. In the Proxy Server dialog, input the following details:
Type: Select HTTP, HTTPS, or SOCKS5.
Address: http://brd.superproxy.io/
.
Port: Enter the port from your Bright Data dashboard.
Enable Authentication and provide:
Username: Your Bright Data username.
Password: Your Bright Data password.
3. Click OK to save the settings. The proxy will now appear in the list.
For geo-targeted proxies, include the country code in your username (e.g., your-username-country-US
for a US-based IP).
Step 4. Test the Proxy Connection
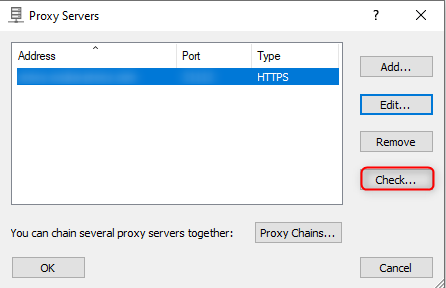
1. In the Proxy Servers section, select your configured proxy.
2. Click Check and then Start Testing. Ensure the test is successful before proceeding.
Step 5. Create Proxy Rules for Applications
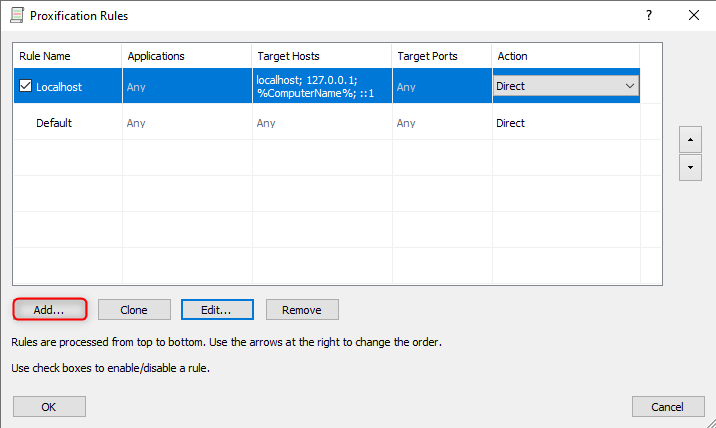
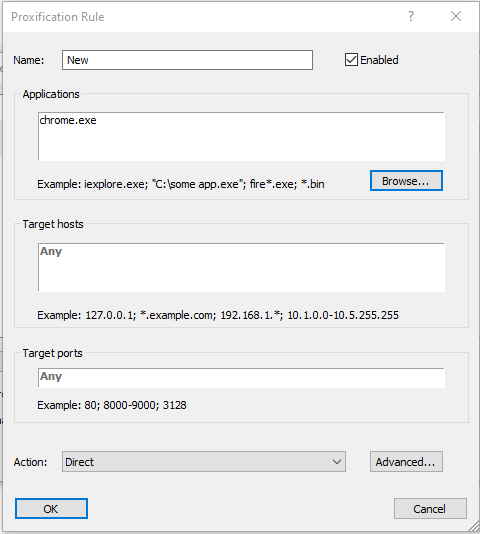
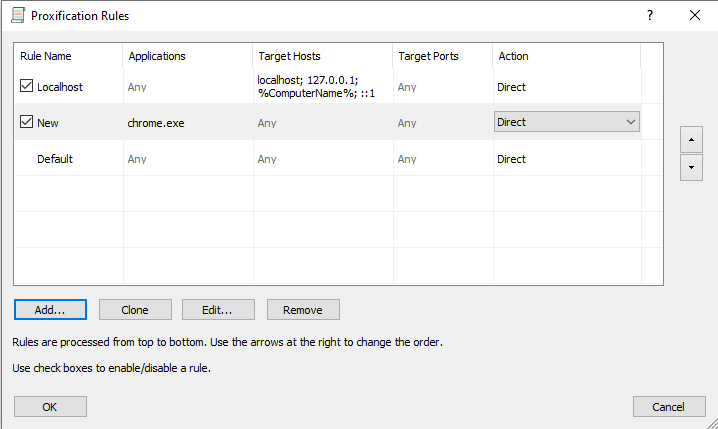
1. Go to Profile > Proxification Rules.
2. Click Add to set up a new rule.
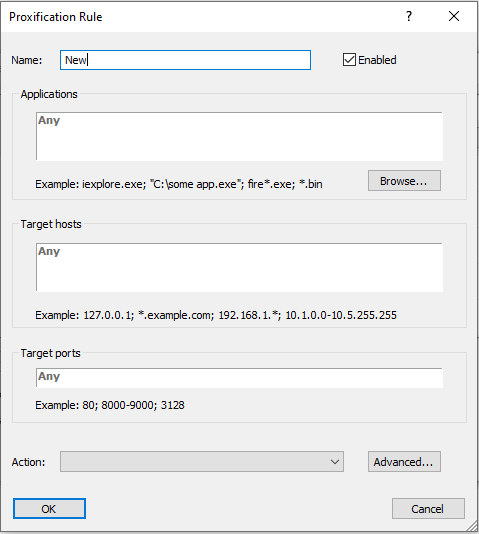
3. Name the rule for clarity.
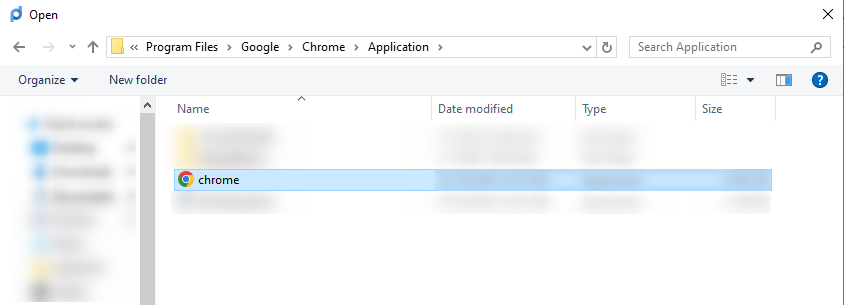
4. Use the Browse button to specify the application (e.g., Chrome, Firefox) for the rule.
5. Choose how the traffic is routed:
Through the proxy.
Directly to the internet.
Blocked entirely.
6. Save the rule and move it to the top of the list for priority.
Step 6. Verify and Start Browsing
1. Launch the application associated with your rule.
2. Visit an IP-checking website (e.g., httpbin.org/ip) to confirm that the proxy is active.
With Bright Data set up in Proxifier, you can manage your network traffic with precision, route applications through secure proxies, and ensure privacy for even the most complex workflows. Whether you need anonymity, faster connections, or app-specific routing, this setup empowers you to control your internet experience with ease.