How do I re-verify my account to clear a billing issue?
How do I re-verify my account to clear a billing issue?
If your account was blocked, you will immediately receive an email explaining how to resolve the issue. Contact your dedicated account manager or Bright Data’s compliance team at compliance@brightdata.com. To reinstate your blocked account, you will need to provide the following:
- A company registration form
- A photo of the flagged payment method
Why was my account is suspended due to billing issues?
Why was my account is suspended due to billing issues?
Bright Data may suspend your account (which prevents access to any zones in it) due to billing issues for one of the following reasons:
- A discrepancy between payment method and personal details
- The user has logged in from a country that differs from where the credit card is from
- Too many attempts to process a declined payment
- Failure to authenticate a credit card payment using 3D secure
Why was my account is disabled?
Why was my account is disabled?
Bright Data disables (note: disabled account differs from a suspended account) accounts that have been idle for 12 months.
To re-enable your account you need to reach out to our staff, either through the Help & Support section in the control panel, or by emailing sales@brightdata.com.
How can I set up a password for my account?
How can I set up a password for my account?
- Visit https://brightdata.com/cp/setting/auth.
- In the “Setup a password” section, enter your desired password.
- Ensure your password includes digits, uppercase and lowercase letters, and at least one special character.
- Confirm your password by re-entering it.
- Click “Save password.”
- If prompted, enter your 2FA code to verify the action.
How to add users to the invoice recipients list?
How to add users to the invoice recipients list?
To add an email address to invoice recipients list, please follow the below guide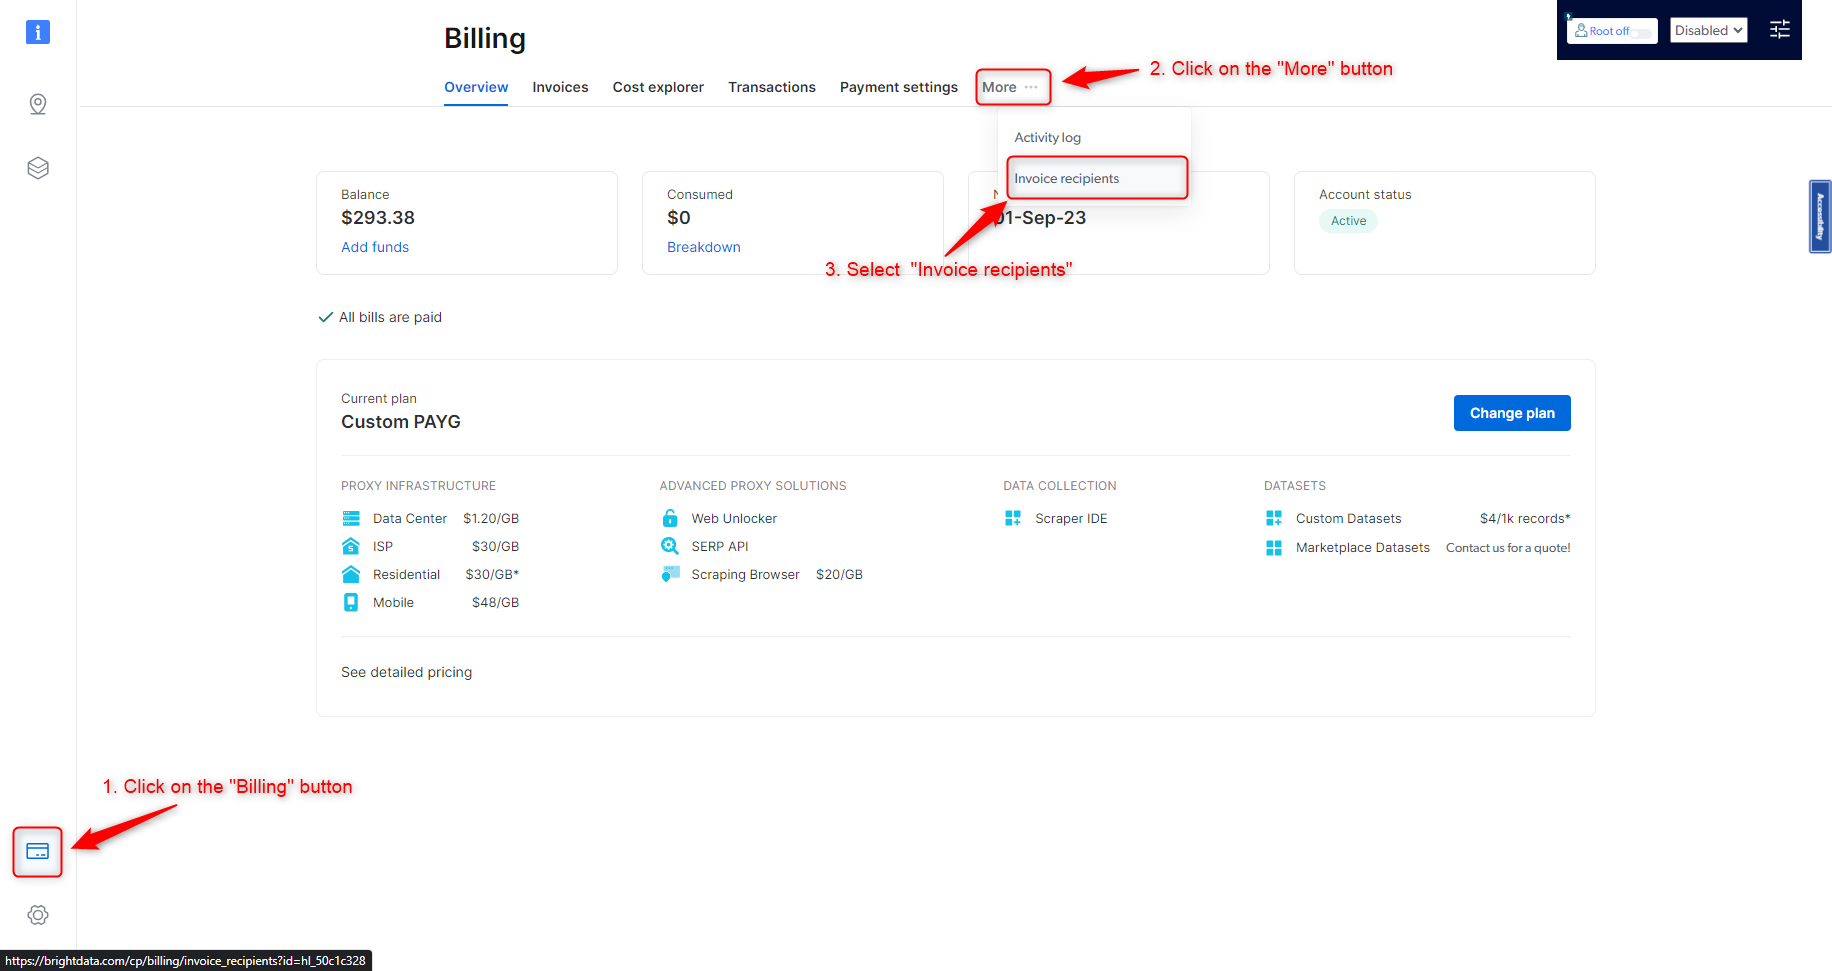
1
Click the "Billing" button on the Control Panel sidebar
2
Click on "More ..." button on the top
3
In the opened menu, select "Invoice recipients"

4
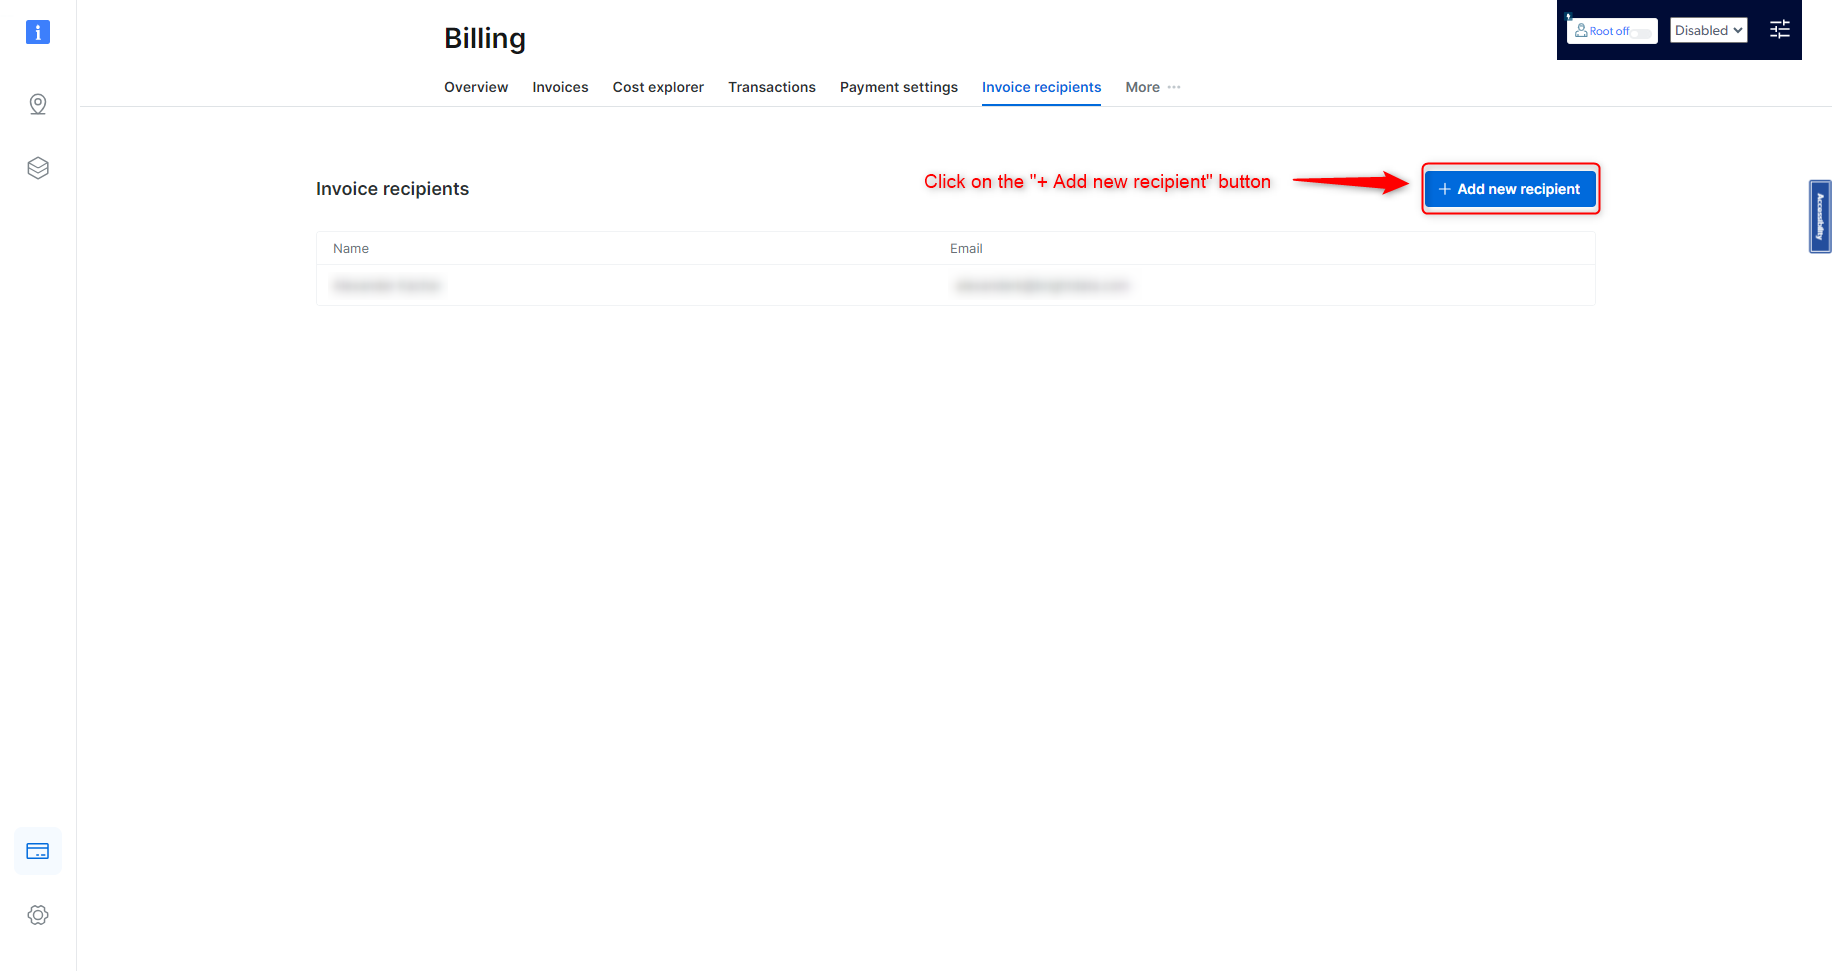
Inside the opened "Invoice recipients" screen, click on the "+ Add new recipient" button button

5
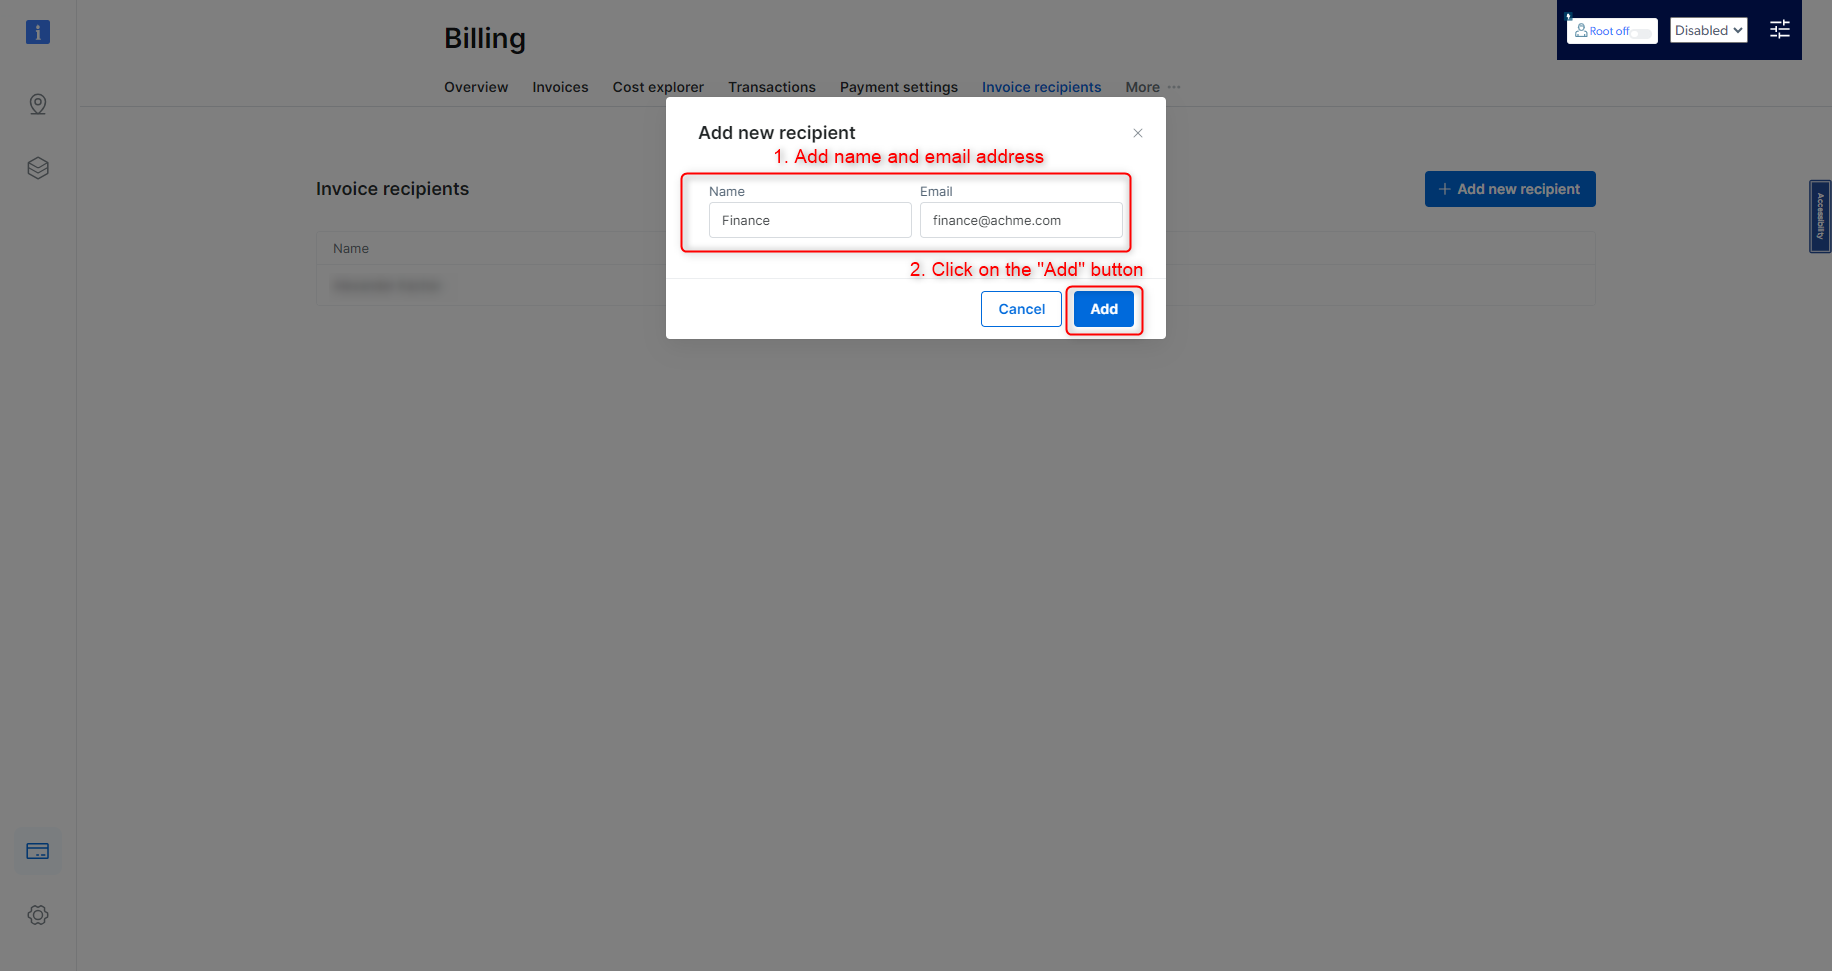
Add name and email address
6
Click on the "Add" button

What if my account is not in “active” status for the entire month?
What if my account is not in “active” status for the entire month?
If you have remaining funds in your balance during a month in which you were inactive, you will not lose your balance, but will be charged to bring that balance up to the minimum monthly commitment on the 1st day of the next month.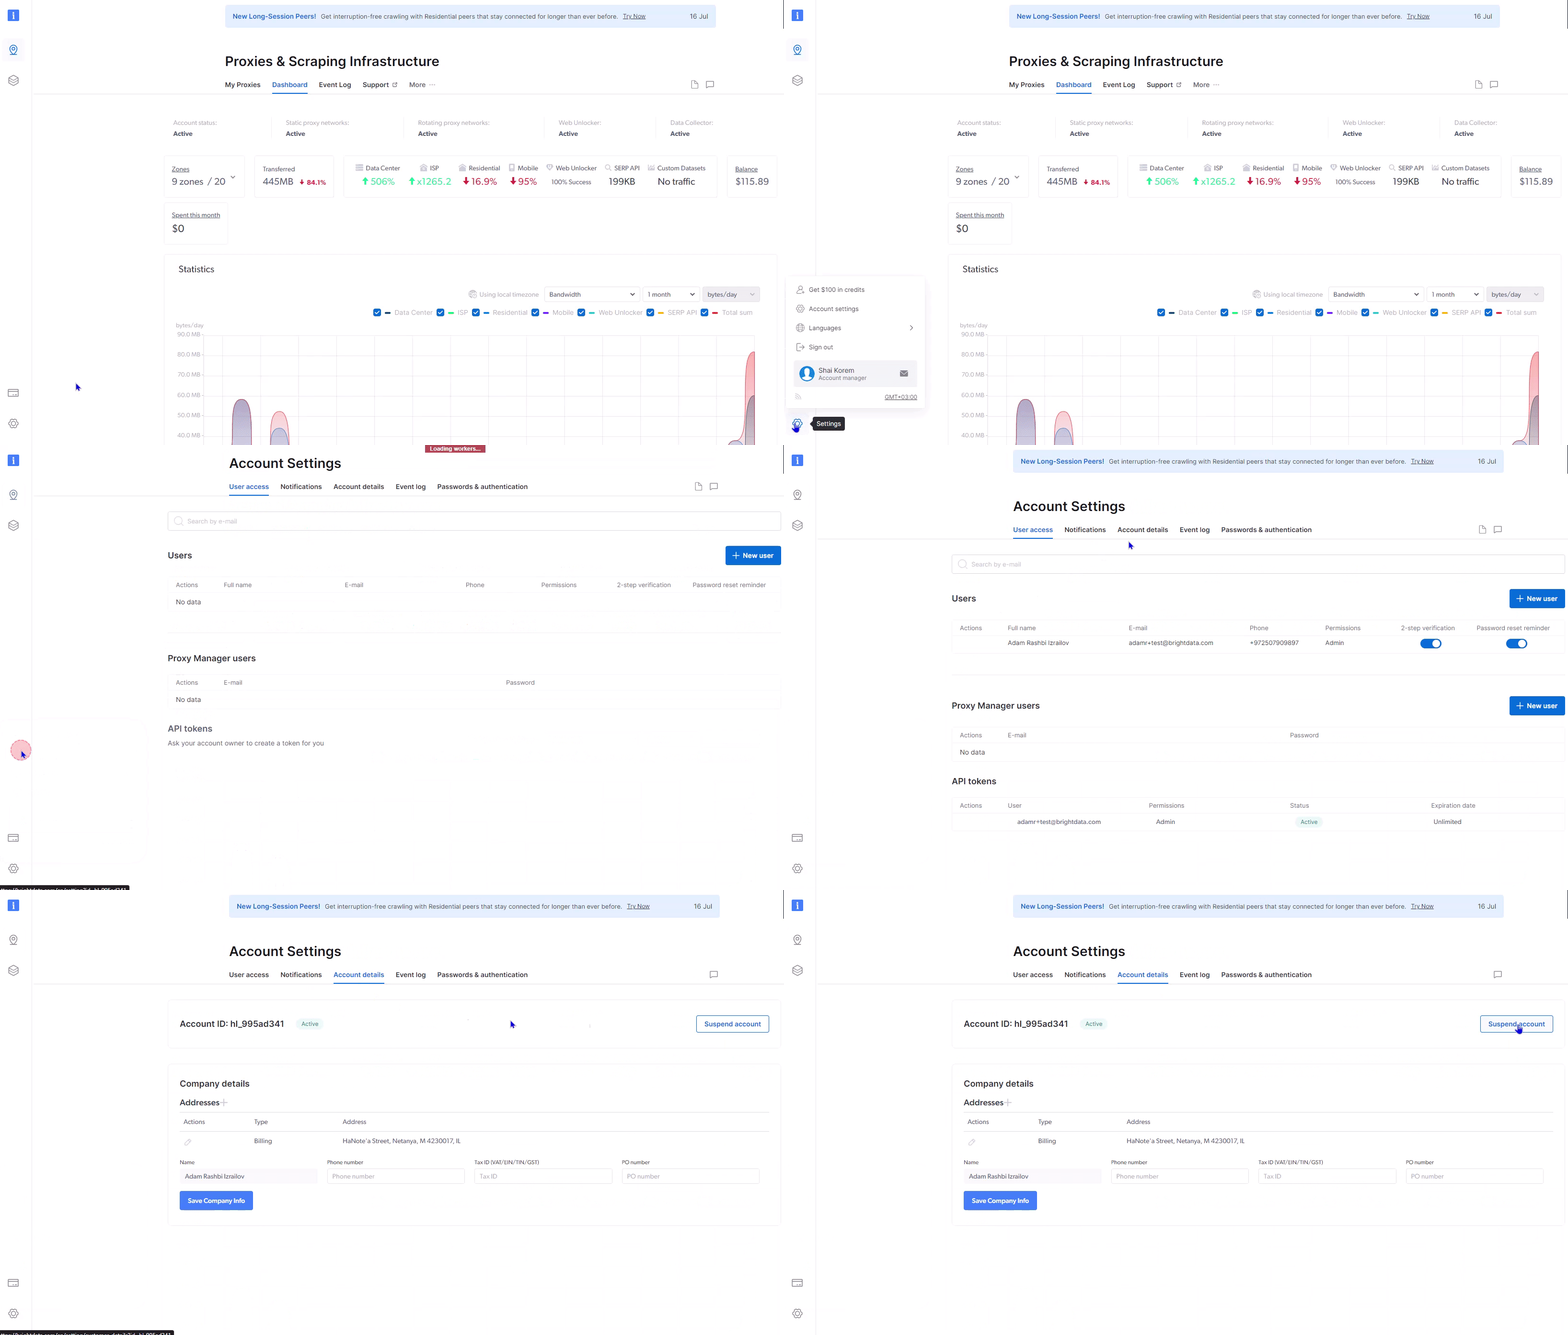

How can I prevent suspension of my account?
How can I prevent suspension of my account?
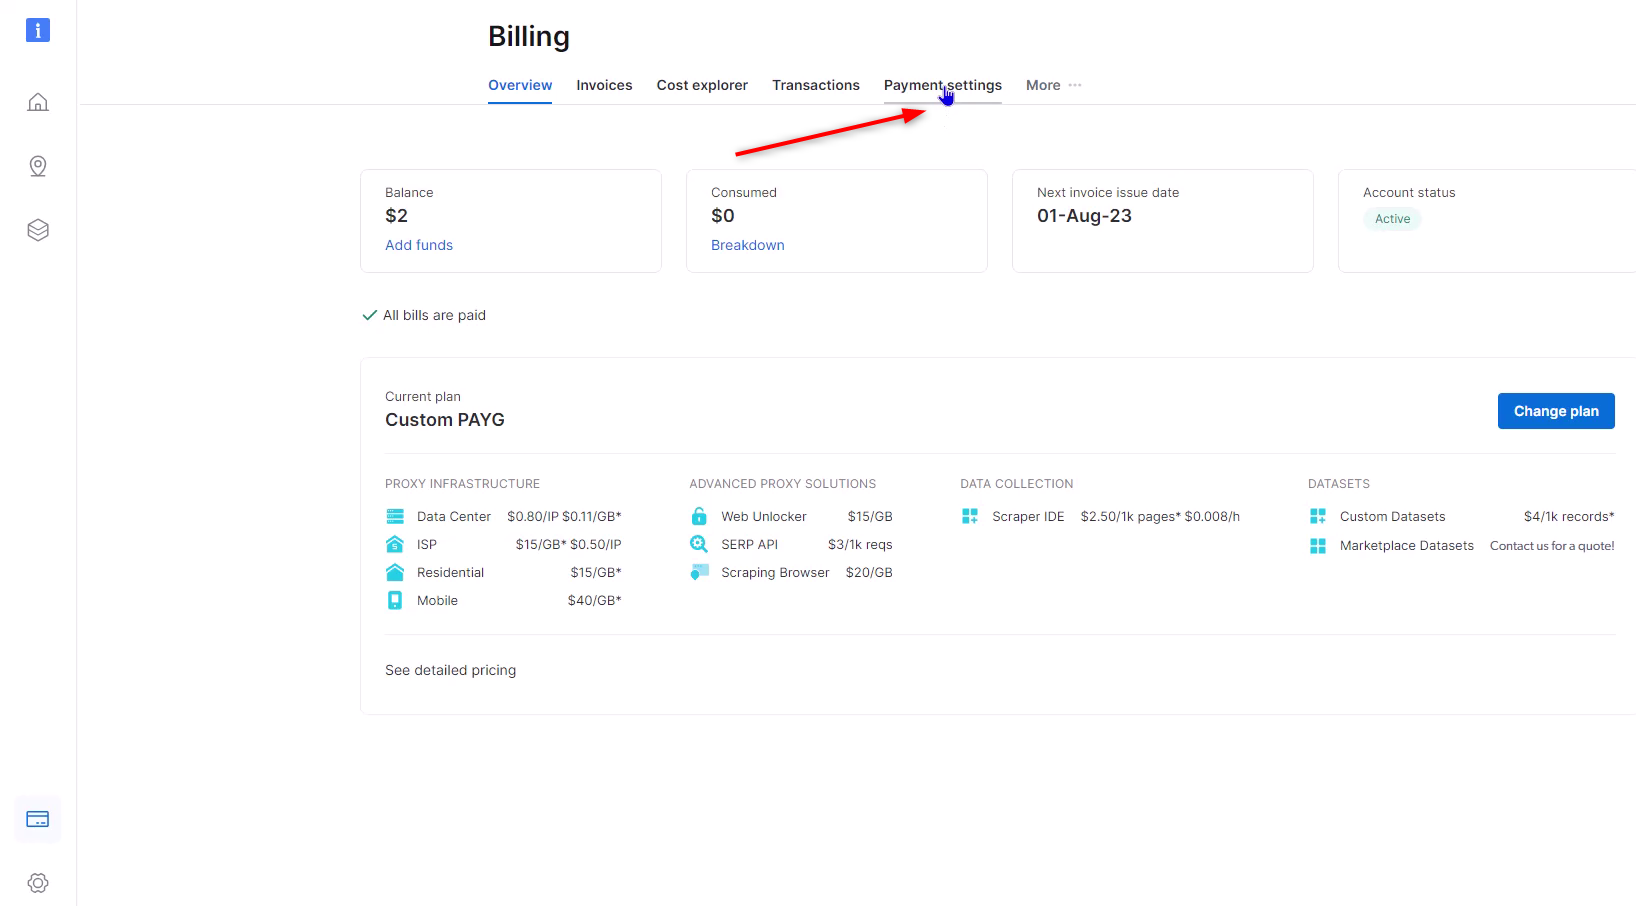
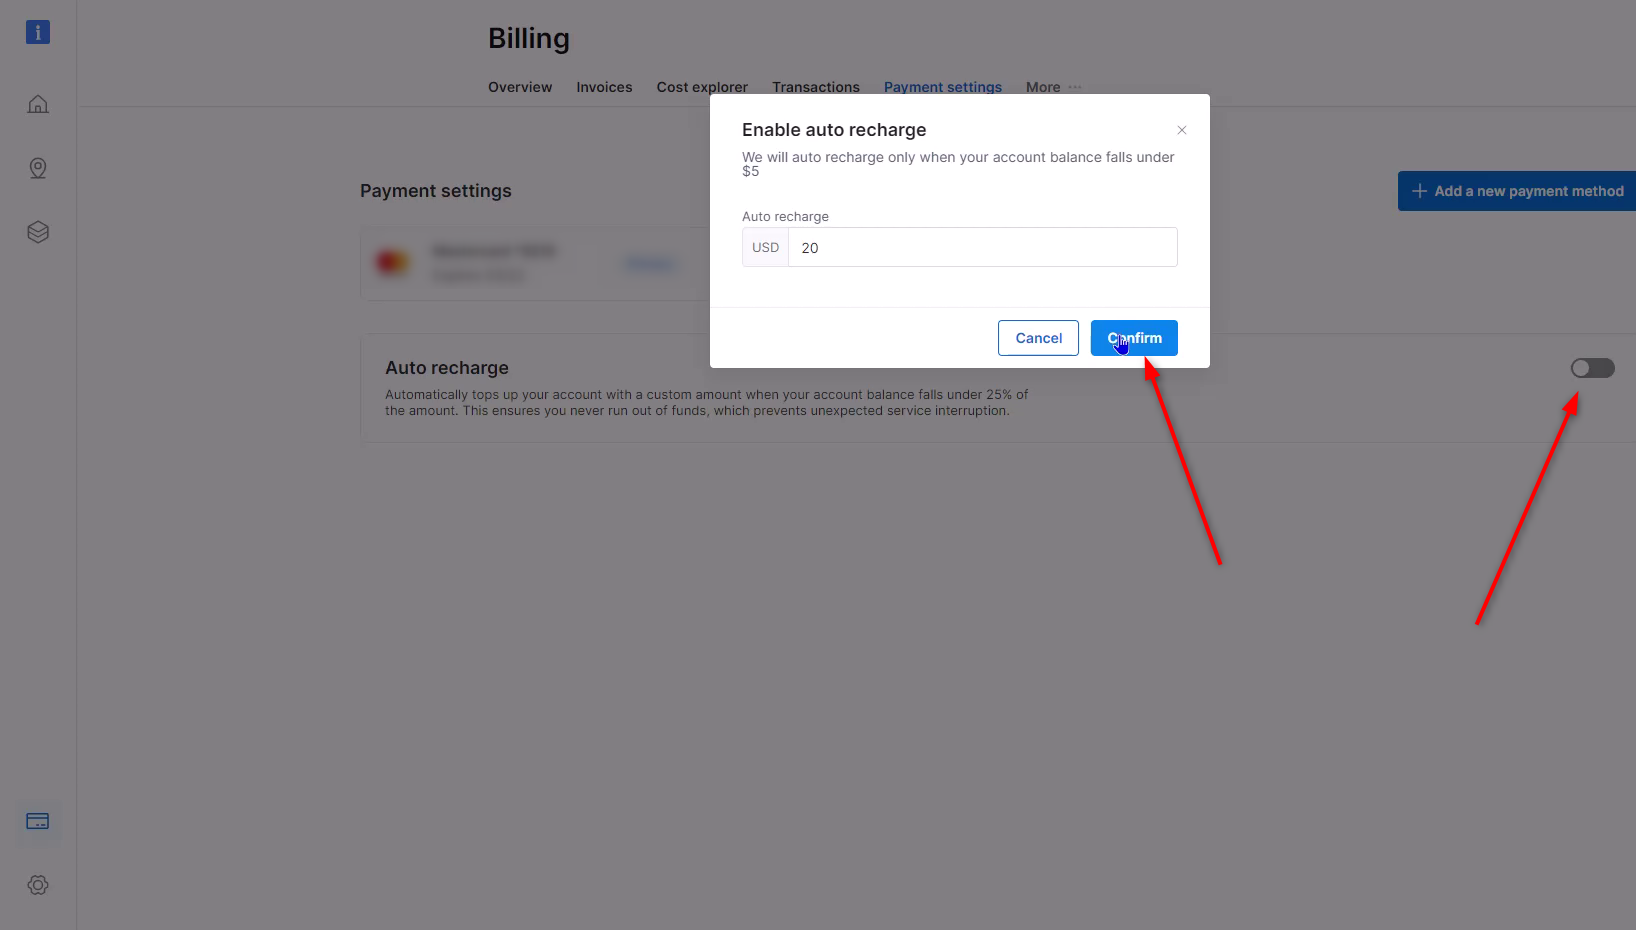
If your account suspended due to insuffecient funds, you can always charge funds to your account and the suspension will be removed immediately.To ensure that your account is never suspended, we highly recommend that you use our automatic recharging option. It can be activated in the “billing” section of your account and ensures uninterrupted service. Auto recharge starts to work when your available balance drops below 85% of the total account balance. The amount set is entirely up to you and can be of any denomination. You can find the auto recharge section here.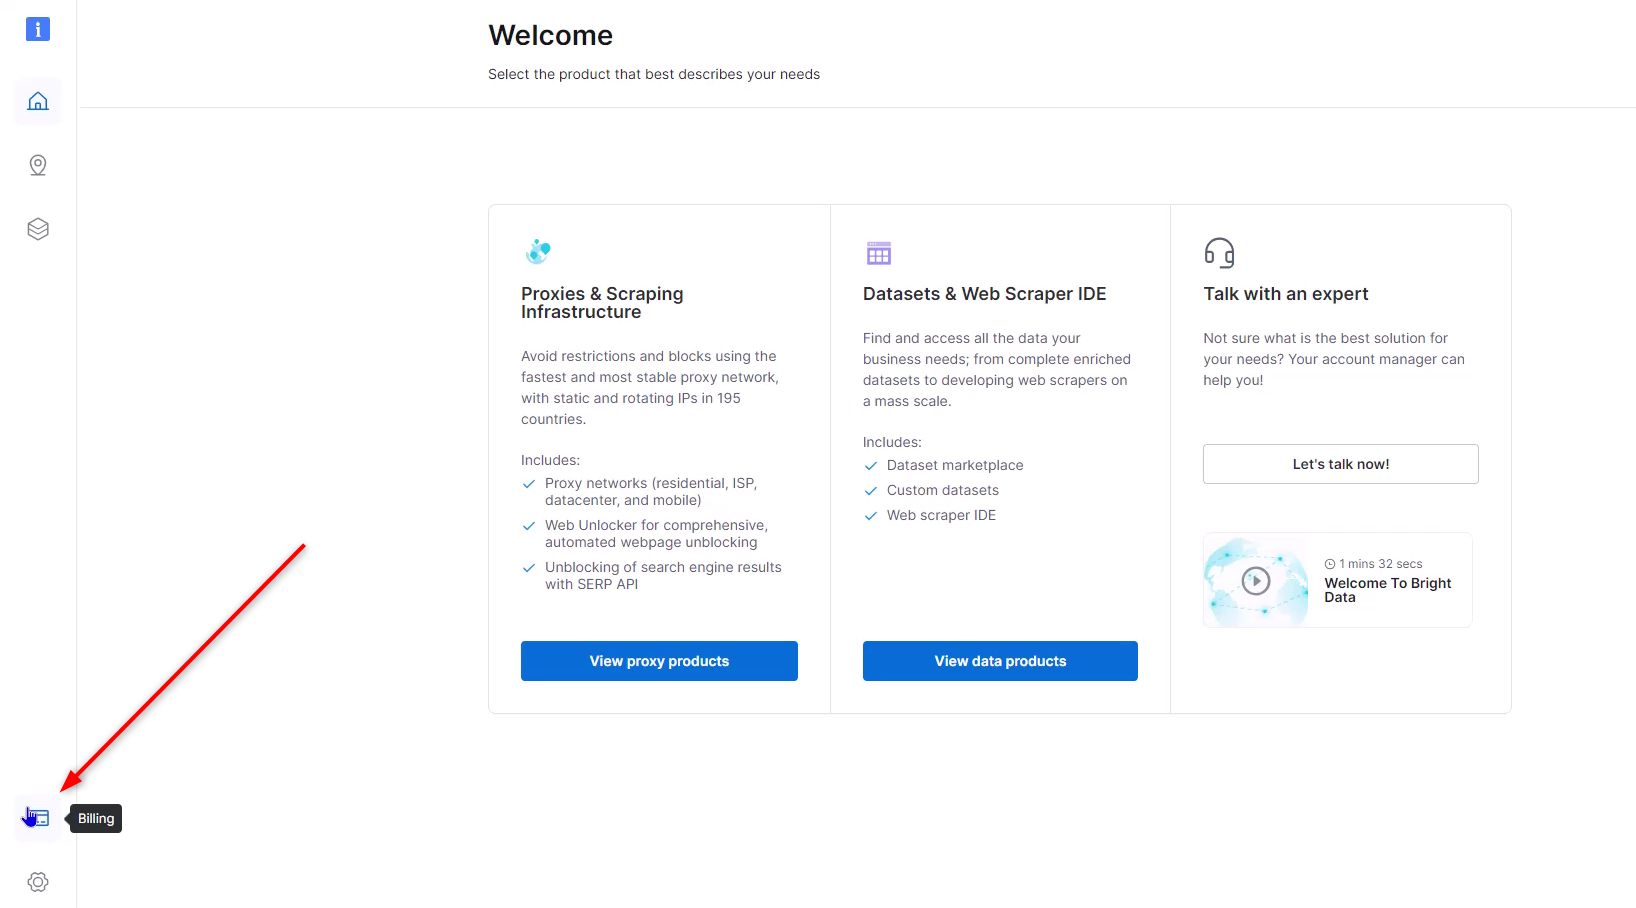


How can I invite users to my account?
How can I invite users to my account?
To add users to your account follow the instructions:
- Navigate to the Settings page
- Click the “New User” button to initiate the user addition process.
- Enter the details of the user you want to invite, such as their name and email address.
-
Choose a permission level for the user from the following options:
- Admin: Grants access to the entire account, including all settings and configurations.
- Finance: Limits access to billing and financial pages only.
- Ops: Provides access to the products but restricts billing access.
- Limit: Allows the user to modify zone passwords and manage IP allowlists/denylists.
- User: Grants API usage access without access to billing or product pages.
- Confirm and Send Invite: Review the details, confirm the permissions, and send the invite.