跳转到主要内容

Documentation Index

Fetch the complete documentation index at: https://docs.brightdata.com/llms.txt

Use this file to discover all available pages before exploring further.

正在构建 AI 初创公司?

您可能符合我们的初创计划资格。获得本文所介绍基础设施的全额资助访问权限(最高价值 $20,000)。

托管 MCP

1

获取您的 API 令牌

  1. 前往 Bright Data 用户设置
  2. 复制您的 API 令牌(格式如:2dceb1aa0***************************
2

设置您的 Cloudflare 环境

确保已安装 Node.js 20+,然后登录 Cloudflare:
npx wrangler login
3

安装 Agents 启动模板

npx create-cloudflare@latest mcp-demo --template cloudflare/agents-starter
cd mcp-example
npm install
4

配置环境变量

复制示例环境文件并添加您的 OpenAI API 密钥:
cp .dev.vars.example .dev.vars
编辑 .dev.vars
OPENAI_API_KEY=sk-...
5

在您的代理中连接 Bright Data MCP

src/server.ts 中,找到 onChatMessage 内默认被注释的 MCP 占位符:
// const mcpConnection = await this.mcp.connect(
//   "https://path-to-mcp-server/sse"
// );
将其替换为 Bright Data MCP 连接:
// 连接到 Bright Data MCP 服务器
const mcpConnection = await this.mcp.connect(
  "https://mcp.brightdata.com/mcp?token=<API_TOKEN>"
);

// 合并 MCP 工具和本地工具
const allTools = {
  ...tools,
  ...this.mcp.getAITools()
};
确保 mcp.connect()this.mcp.getAITools() 之前调用,以避免 jsonSchema not initialized 错误。
6

测试它是否工作

  1. <API_TOKEN> 替换为您实际的 Bright Data API 令牌
  2. 启动开发服务器:
npm start
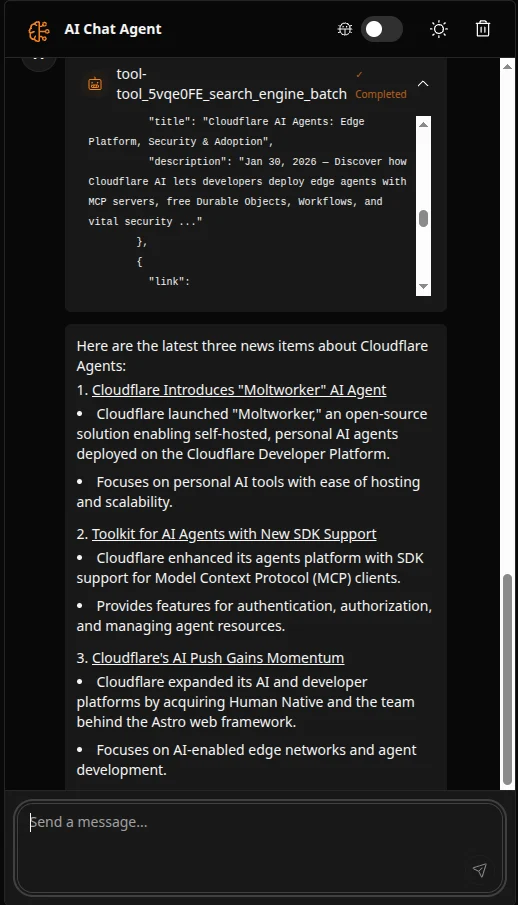
  1. 在浏览器中打开应用程序并向代理提问,例如:
Find the latest 3 news items about Cloudflare Agents and summarize them in bullets with links.
您应该会看到代理使用 Bright Data 的网页抓取工具来获取和总结实时结果:Screenshot 2026 02 10 At 11 10 50
7

监控使用情况

  1. 在 Bright Data 仪表板的 My Zones 中查看您的 API 使用情况
  2. 免费层每月包含 5,000 个请求