0
Prerequisites
- A Bright Data account (Sign Up → 2 min)
- An active API Key (How to get an API Key)
1
Pick the target site
- Go to the Scraper Library
- Browse the list and click the site you need.
- Can’t find it? Check out the Managed Services or Scraper Studio IDE products for a solution tailored to your needs!
2
Choose the scraper endpoint
Inside a site you’ll see multiple Scraper Endpoints, for example: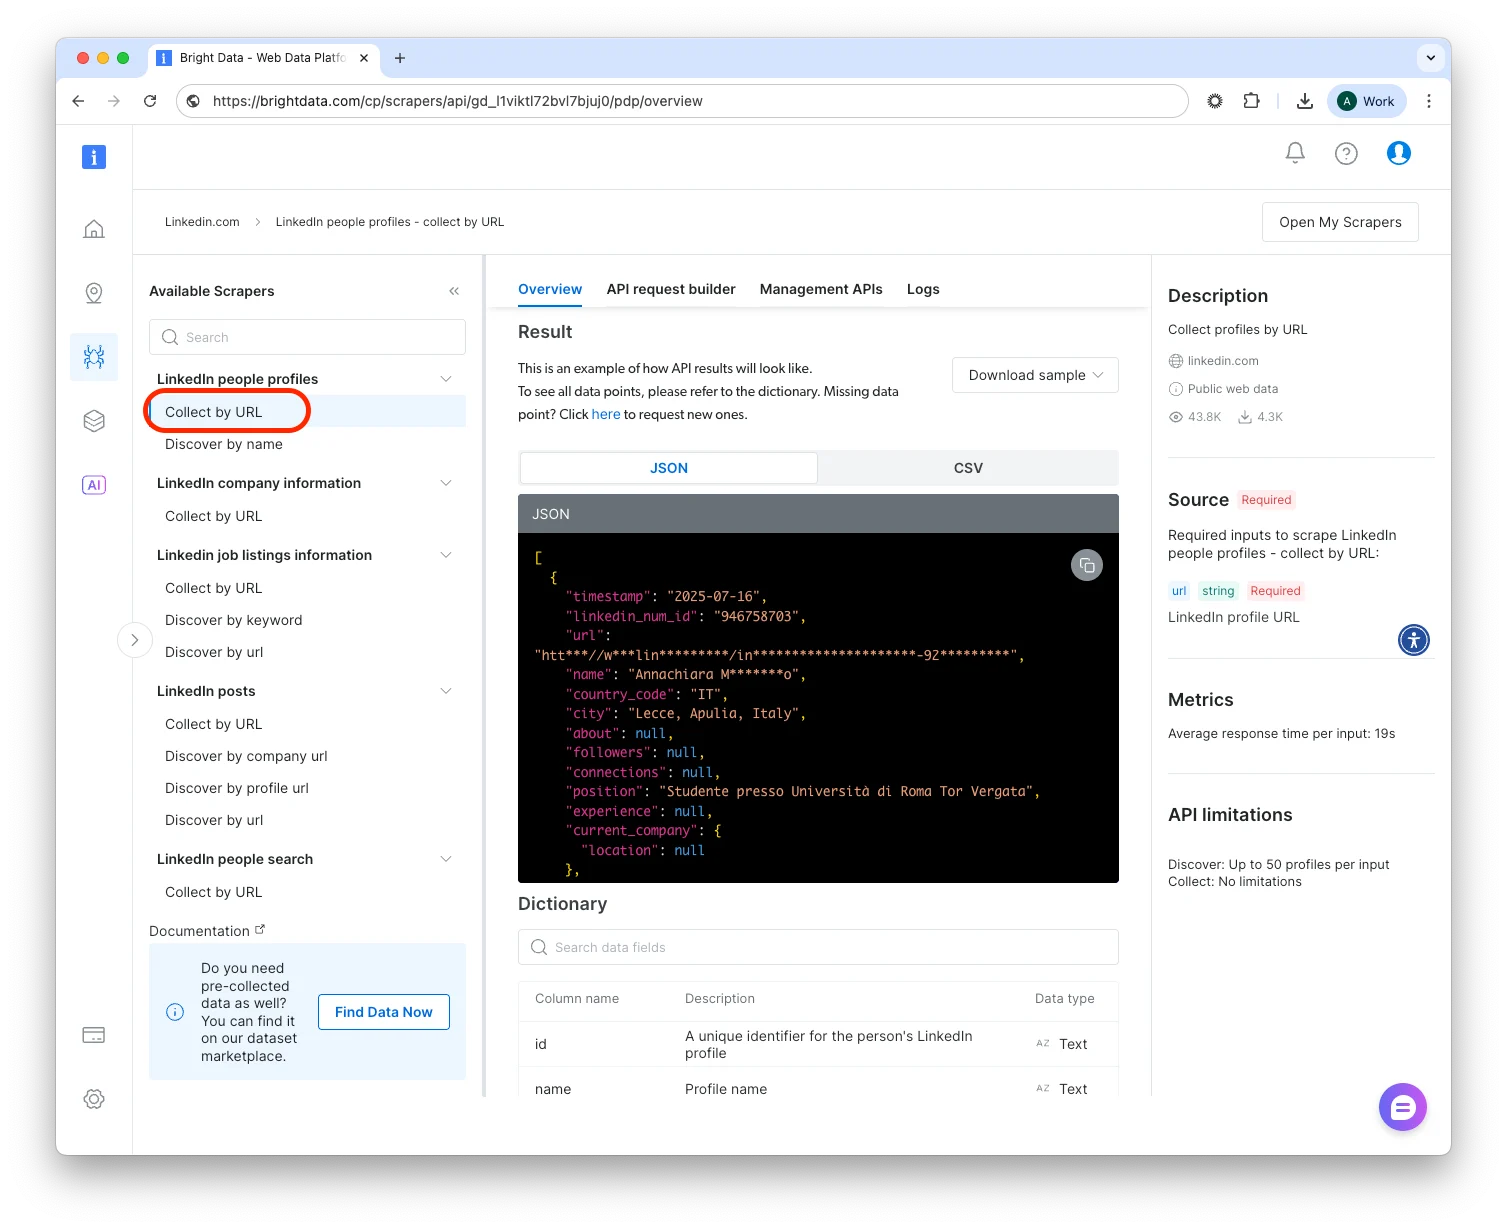
- LinkedIn
- Profile by URL – supply profile URLs, get public data fields.
- Profiles by Keyword – supply a search term, get matching profile URLs (+ optional full data).
- Company Jobs – collect job postings from a company page.
- Amazon
- Product by ASIN, Search Results, Reviews, “Frequently Bought Together”, etc.
3
Build the request
The central panel now shows a form. Work through top-to-bottom:A. Inputs
- “Single Input”: paste a URL/keyword right in the textbox.
- “Bulk CSV”: upload a CSV according to the input parameters of the scraper
- Output Schema – tick only the data fields you require (saves bandwidth & storage).
- External Storage – plug credentials for S3 / GCS / Azure / etc. Result files land there automatically.
- Webhook URL – we POST the job’s JSON to your endpoint once finished, great for real-time pipelines.
4
Pick run mode: /scrape vs /trigger
The Code Snippet panel (right side) updates live according to your configuration setup. To run the request you can choose between two endpoints:
5
Copy the Code
- Language selector – choose your preferred programming language using the code block dropdown.
- Snippet already contains: endpoint URL, your API key header, payload JSON (inputs + options).
- Paste it into a terminal / IDE / serverless function.
6
Monitor & Retrieve Results
- Scraper page → Logs tab
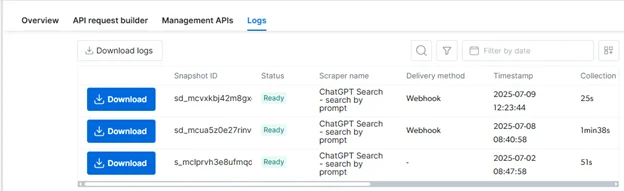
- Real-time state (running, ready, failed).
- Download JSON/CSV/etc with one click.
- Webhook (if set)
- Your server receives
{snapshot_id, status, result_url}payload.
- Your server receives
- External Storage
- The result file appears in the bucket path you configured.
- Snapshot Management API
- Use these endpoints to monitor the snapshot progress.