Verify your account and get $5 creditAdd a payment method to verify your account and receive a $5 credit. You won’t be charged at this stage.
Open the Create Proxy page
Navigate to Create Proxy under the Proxy section in the left menu.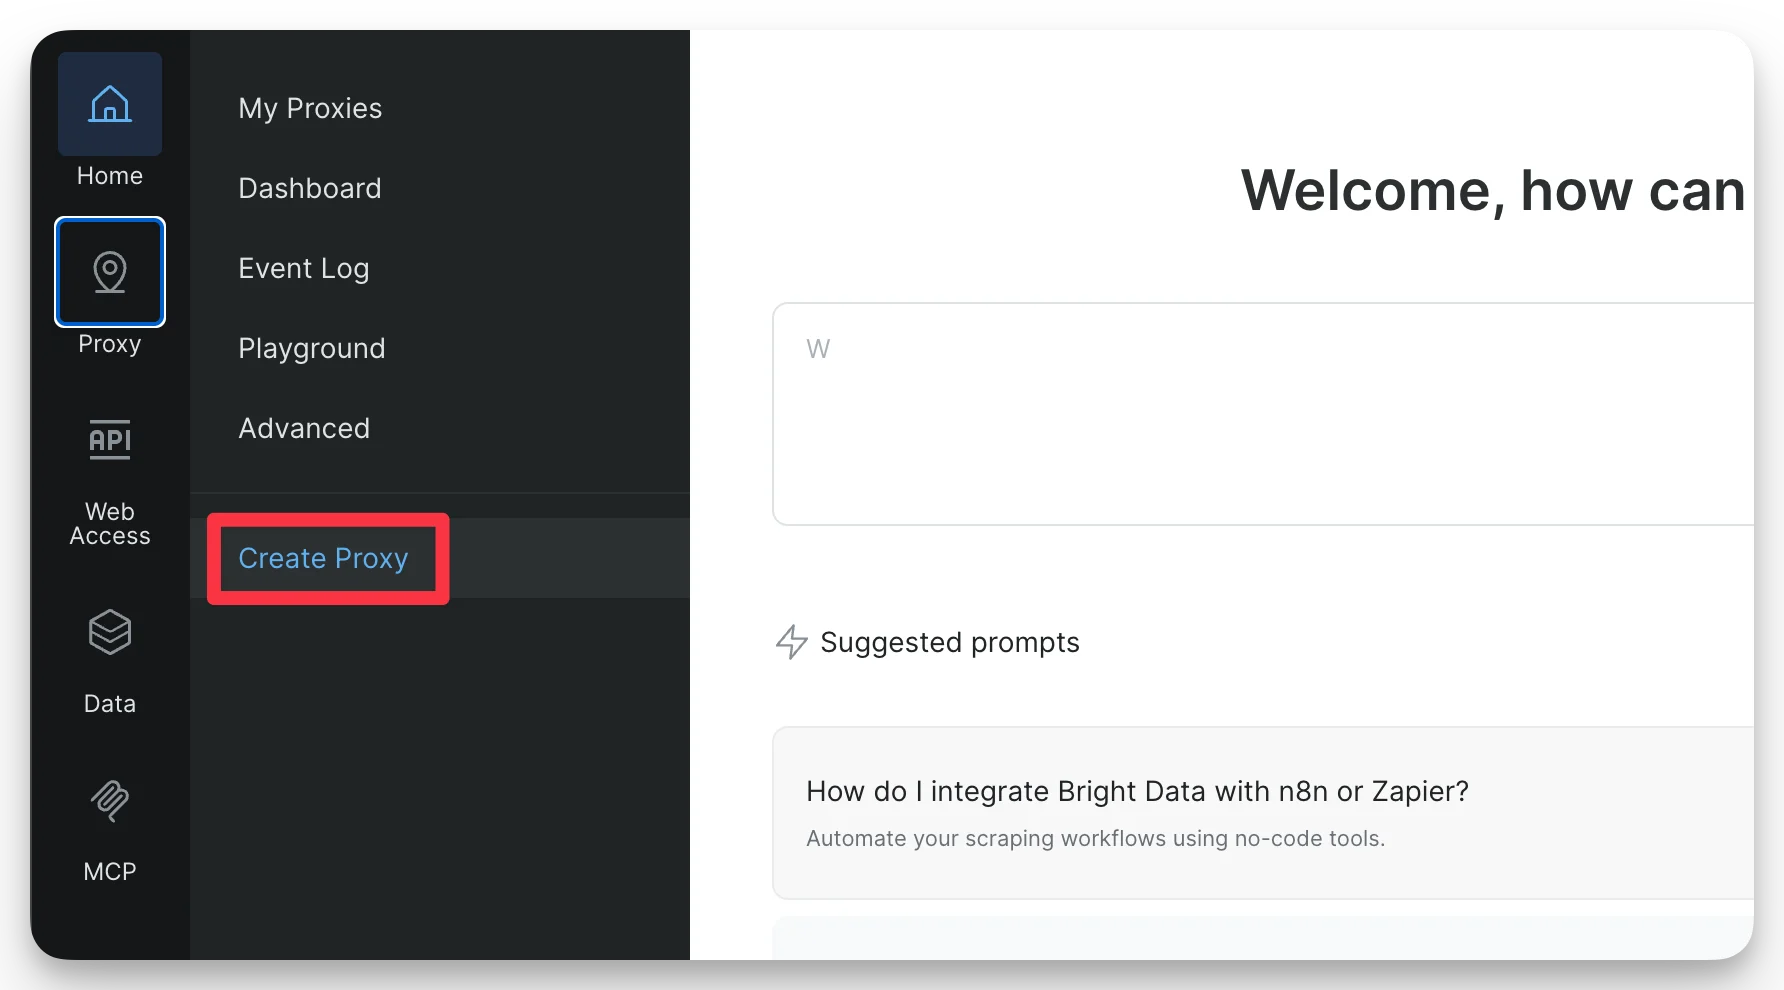
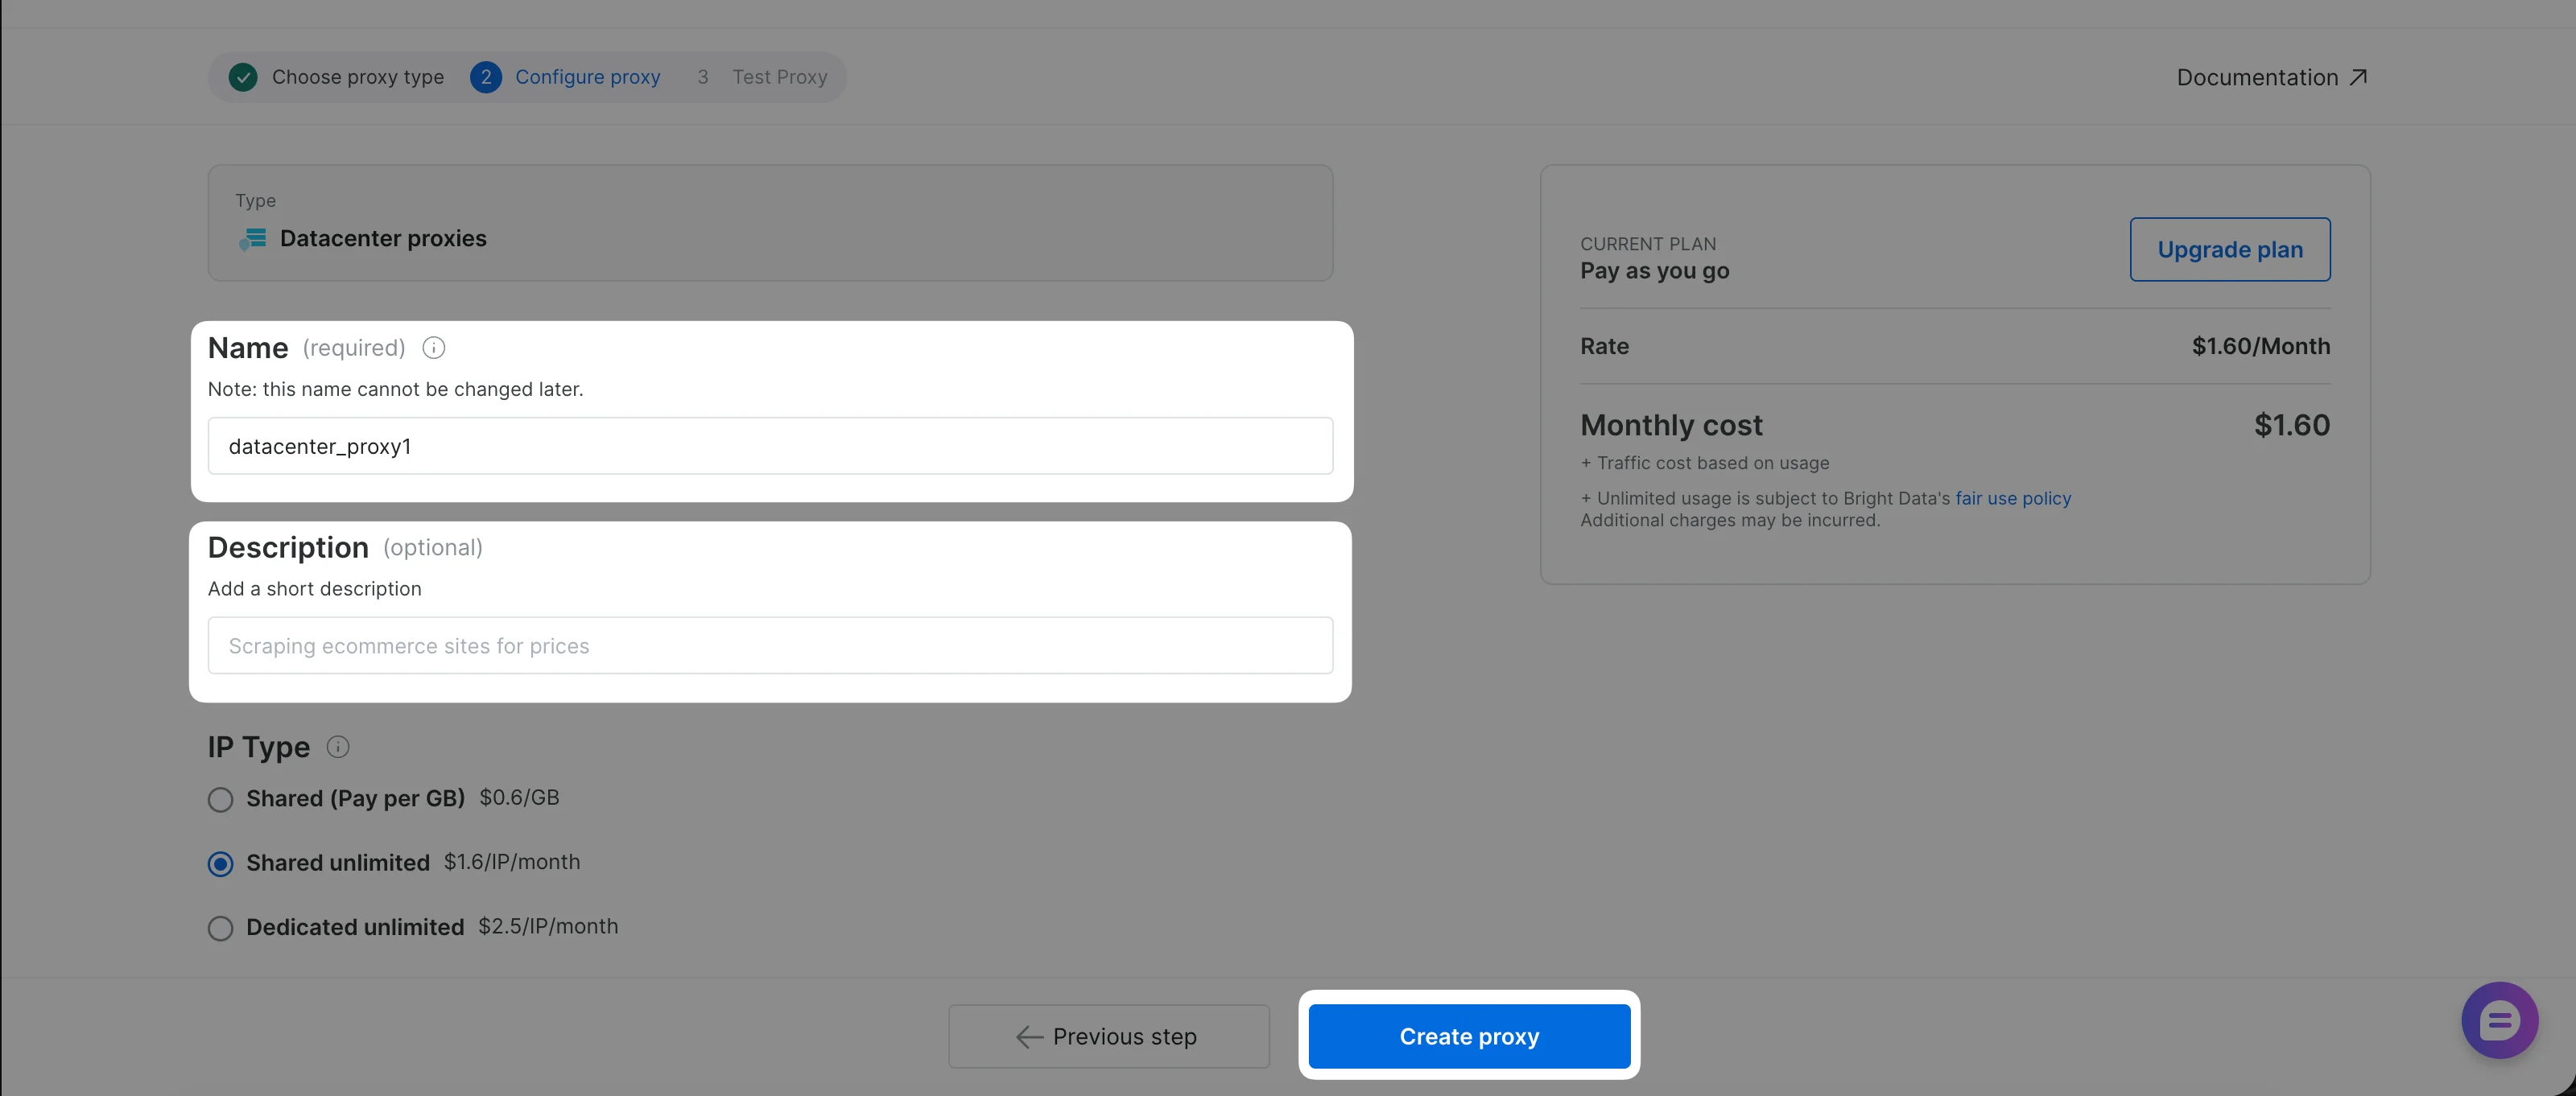
Add payment method (free trial users only)
If you signed up with a personal email (e.g., Gmail, GitHub) and have not yet added a payment method, the primary button will read Add payment method instead of Create Proxy.Click the button to open the payment verification form and complete the process. You will not be charged, this is for identity verification only.
Already have a payment method on file? This step is skipped automatically. For full details, see Payment Verification.