What exactly is a zone and how important is the zone name?
What exactly is a zone and how important is the zone name?
brd-customer-<customer_id>-zone-<zone_name>-country-usAs mentioned, you cannot change the name of the zone after you have saved it - if you want to change the name, simply create a new with a new name.Integration with 3rd party tools
Integration with 3rd party tools
- BrowserScan
- XLogin
- GeeLark
- Puppeteer
- Playwright
- Selenium
- AdsPower
- Dolphin Anty
- Incogniton
- Marketerbrowser
- SMLOGIN
- Hidemyacc
- OpenBullet
- Switchyomega
- PhantomBuster
- BitBrowser
- Maskfog
- Ghost Browser
- Postman
- NGINX
- StablerSOLO
- VMLogin
- GoLogin
- Windows
- Scrapy
- AEZAKMI
- Beautifulsoup
- WebHarvy
- Ubuntu
- Lalicat
- Multilogin
- Undetectable
- Apify
- iPhone
- MuLogin
- Changedetection
- Morelogin
- Proxifier
- Texau
- Android
- Kameleo
- Screaming Frog
- Foxy
- SessionBox
- Insomniac
- Helium Scraper
- SaleFreaks
- Postern
- Antik
- Easync
- ParseHub
- Sphere Browser
- Octoparse
- ixBrowser
- Shadowrocket
- Firefox
- Chrome
- MacOS
- ClonBrowser
- Octo Browser
- Genlogin
- Web Scraper
What are IP Types for Residential and Mobile Proxy?
What are IP Types for Residential and Mobile Proxy?
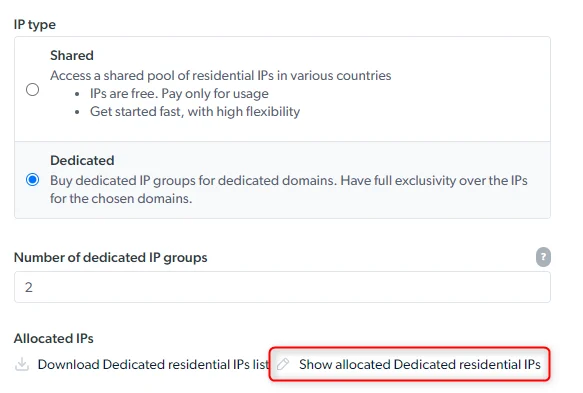
- Dedicated
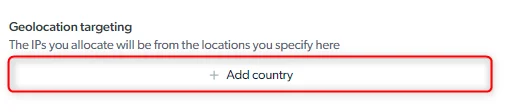
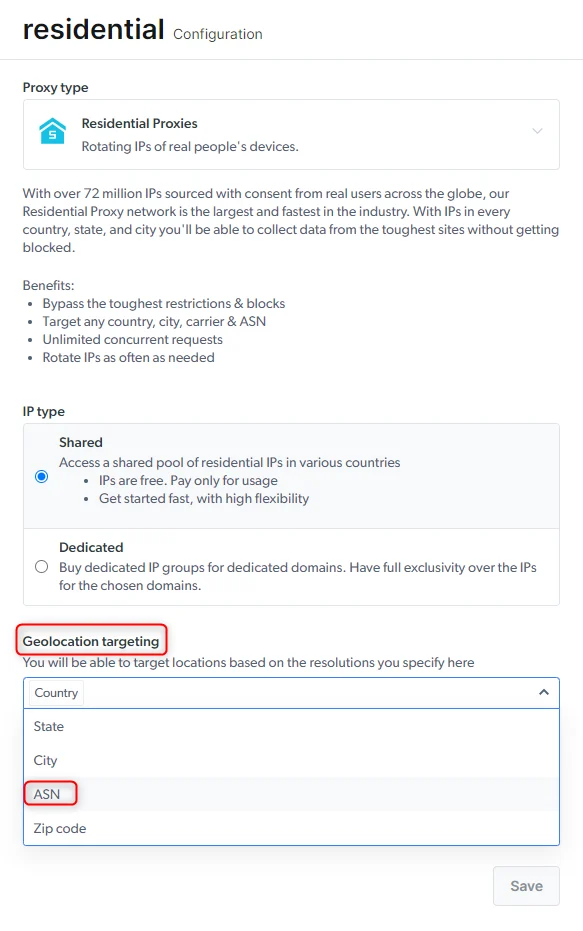
Geolocation targeting
The IP allocated to your zone will be from the selected country, city, ASN, or zip code. Select the needed parameter from the drop-down menu.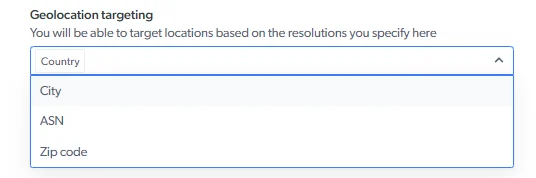
Sending a request with Geolocation:
- With a ‘Shared’ IP, you’ll be able to control your geolocation targeting when you send a request.
- To target a specific country, add the
-countryflag to your request,
What is a super-proxy?
What is a super-proxy?
-route_err-block flag to your proxy username:What are the proxy (IP) Types for Datacenter?
What are the proxy (IP) Types for Datacenter?
- Shared (Pay per usage): Access a shared pool of ~40,000 rotating proxies
- Shared unlimited: Access a set of specific proxies, shared with others with unlimited usage.
- Dedicated unlimited: Access a set of specific proxies, exclusive for you, with unlimited usage
What are IP Types for ISP?
What are IP Types for ISP?
- Shared (pay per usage)
- Shared unlimited (pay per proxy)
- Dedicated unlimited (pay per proxy)
Shared pay per usage
Rotating proxies from a pool of 10,000 proxies (IP addresses). Proxies are shared with others and charged by your usage: amount of GB you pass thru them.Shared unlimited
Set of proxies, shared with others, paid by proxy. The more you buy, the less you pay per proxy. See our fair use policy for unlimited zones.Dedicated unlimited
Set of proxies, exclusive to you, paid by proxy. The more you buy, the less you pay per proxy. See our fair use policy for unlimited zones.How to find and rotate thru my allocated IPs?
How to find and rotate thru my allocated IPs?
- Zone overview page: There are ‘Download’ and ‘View’ buttons below the code example.
- Main zone table: There are ‘Download’ and ‘View’ icons under the ‘Allocated IPs’ column.
- The view button will allow you to view, refresh and remove IPs from the pool.
- The download button will download a csv file with the full list in
host:port:username:passwordformat.
-ip or -gip options. Read more about it here: Controlling your proxies. For advanced proxy rotation control you will need to install and route your requests using Bright Data proxy manager.How to integrate a new proxy into your code?
How to integrate a new proxy into your code?
How can I test if my proxy is working?
How can I test if my proxy is working?
How to integrate a proxy into 3rd party software?
How to integrate a proxy into 3rd party software?
How do I configure proxy in a specific country or location?
How do I configure proxy in a specific country or location?
-country flag, after your zone’s name in the request, followed by the 2-letter ISO code for that country.If you use a third-party tool or application, simply use the username that includes the country-xx in the configuration. In other words, in the box where you need to put in the proxy username, enter the full string, including the country parameter, for example: brd-customer-<customer_id>-zone-<zone_name>-country-us - don’t forget to use your own credentials that you can find in the “Overview” tab.If you use your own code, see the example below: We added -country-us to our request, so we will send a request originating from the United States (“us”).How can I set default countries for zones with fixed IP pools?
How can I set default countries for zones with fixed IP pools?
-country-xx flag to your request and override the default country selection.Why can't I find a country in the list?
Why can't I find a country in the list?
How to target the EU region
How to target the EU region
How to target all countries except China?
How to target all countries except China?
- Data Center / ISP - Shared - Pay per proxy
- Data Center / ISP - Dedicated
How to target a Specific City?
How to target a Specific City?
Where does Bright Data have proxies?
Where does Bright Data have proxies?
- Iran
- Iraq
- Syria
- Lebanon
- Palestine
- North Korea
- Cuba
- Sudan
- Belarus
- Russia
How to view the proxy event log?
How to view the proxy event log?

- Date: Time and date of the request
- Zone: What Zone was used for the request
- Source IP: What IP the request was made from
- URL: The target site of the request
-
Result: Success or Fail of the request

How to enable automatic IP fallbacks? (formerly 100% uptime)
How to enable automatic IP fallbacks? (formerly 100% uptime)
- If a specific IP is targeted in your request we will not assign a fallback IP to it
- Automatic Failover will not interrupt a live connection. If the fallback is needed, it will play in once the next connection is established
How to enable Automatic Failover for proxies?
How to enable Automatic Failover for proxies?
How to keep using the same IP in multiple requests?
How to keep using the same IP in multiple requests?
- This can be done by adding the session flag to the proxy username:
- Session ID can be any random string/counter: requests with the same session string will use the same Proxy Peer (as long as possible); requests with different session strings will be assigned different Proxy Peers.
- To force an IP change, just modify the session ID
- If an assigned Proxy Peer(exit node IP) becomes unavailable, the Super Proxy will return an error “502 - No peers available” for the first request and then on the second request the super proxy will assign a new peer even if you do not change the session ID.
- The Session IP is kept persistent for up to 7 minutes of idle time. After 7 minutes with no requests, the IP is released back to the pool.
To keep this Session/IP for longer, send a tiny keep-alive request no longer than 7 minutes, to prevent this session from becoming idle for over 7 minute.
This request may be anything small, such as /favicon.ico, or even a request that returns 404 (as long as the web server does not disconnect the socket due to this request). - If you have multiple Clients and would like to ignore your Clients source IP (which is used together with your session ID to create a session), then you want to use a global session then add
glob_as a prefix to your session:
Where do I find is my proxy address and port?
Where do I find is my proxy address and port?
How to allowlist/denylist IPs and domains?
How to allowlist/denylist IPs and domains?
- Via the control panel:
 Add all the relevant IPs and domains you’ll allow access to with your proxy zone.
- Go to any of your zone’s settings, and click the “Configuration” tab.
- Scroll down to the “Security settings” section, as they are both responsible for white/denylisting IPs and domains, respectively:
- Via API endpoints:
Important tips re allowlist:
- Example for adding domains:
- Example for adding IPs:
- IPs that should be allowlisted are your machine’s IPs that you’ll be sending requests with, not the proxy IPs in your zones.
- We strongly recommend allowlisting your IPs wherever possible, since when the allowlist is empty, you run the risk of getting your non-allowlisted IPs temporarily blocked in the case where our automatic security blocking system detects any irregular activity. See more info within this video.
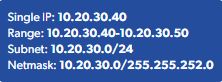
- There is no limit on how many IPs/domains you can add to the allowlist and we also support ranges of IPs.
How to see supported Ports & Protocols?
How to see supported Ports & Protocols?
HTTP and HTTPS Protocols
ProtocolsHTTP & HTTPS are supported by default.SOCKS5 Protocol
Bright data supportsSOCKS5 protocol, with a default port 22228 assigned for SOCKS5 communication.SOCKS5 is supported for all Bright Data’s proxy networks: Datacenter, ISP, Residential, and Mobile.See here for full SOCKS5 configuration instructionsTarget Ports
We distinguish between two kinds of ports: Bright Data proxy & scraping services ports and using specific ports when targeting hosts (websites). This FAQ refers to target ports ; by which the proxy peer should communicate with the target website.Ports 80 and 443 are available by default in all zones, for HTTP and HTTPS protocols.In zones of proxies of type Datacenter or ISP, all ports higher than 1024 are supported by default.In zones of proxies of type Residential or Mobile, the following ports wills be available by default: 8080, 8443, 5678, 1962, 2000, 4443, 4433, 4430, 4444 and 1969.Bright Data can support additional ports by request. Every request to support a new port will be followed by a dedicated and additional compliance process with the Bright Data compliance team.Examples of ports that require Bright Data compliance review before activation:To make a request to add a port permission to your zone:
- Go to your zone’s settings (it will open on the “configuration” tab by default, if not, please click it)
- Scroll down to “advanced options” and click it
- Enable “ports”
- Input the port numbers you would like to get approved
-
Fill out the form and wait for our compliance team to contact you and approve the request
How to target specific OS?
How to target specific OS?
How to refresh IPs Allocated to Your Zone?
How to refresh IPs Allocated to Your Zone?
How to use a specific IP?
How to use a specific IP?
- Send a test request with a ‘—verbose’ or ‘-v’ option added (this will turn on verbose logging)
-
Locate the x-brd-ip response header and copy its value

- Add the -ip- flag to your request, after your zone’s name and use the hashed IP value copied in the previous step
- Send a test request, and review the response
How to targeting an ASN specific IP?
How to targeting an ASN specific IP?
and be integrated when using the Residential proxies. For example:
How to Target Residential IP groups (gIPs)?
How to Target Residential IP groups (gIPs)?

a list of hash values that represent group IPs.
How to review usage stats for proxy products in the control panel
How to review usage stats for proxy products in the control panel
Proxy Dashboard
Access the Main Proxy Dashboard here- Data Usage per Network: Shows total bandwidth and number of requests for each proxy product over the selected timeframe.
- Usage Overview: Displays a graph where you can select timeframe, data point (bandwidth, requests, average bandwidth per request), and filter by zone, product, or target domain. You can also compare usage between timeframes using the “Compare to” option.
Zone Overview Page
- In the zone ‘Overview’ section you can view stats for a specific zone, with options to compare timeframes, choose data points (bandwidth, requests, bandwidth per request), and view additional metrics in a table below the graph.
How to browse Chinese sites by using Chinese Residentials IPs
How to browse Chinese sites by using Chinese Residentials IPs
Targeting Chinese Residential IP peers is enough:
Carrier-specific Proxy peer IP
Carrier-specific Proxy peer IP
- You can choose to use a specific carrier from this list:
- For Example
About geolocation databases, and how to check the proxy IP information?
About geolocation databases, and how to check the proxy IP information?
Which Bright Data products are best for scraping search engines (SERPs)?
Which Bright Data products are best for scraping search engines (SERPs)?
For single-step scraping:
SERP API is the ideal product for targeting SERPs as it has a guaranteed success rate (pay only for success) with active unlocking, automatically chooses the best proxies, customizes headers, fingerprinting, solves CAPTCHAs, and more.For multi-step scraping (playwright/puppeteer/selenium):
Browser API is the ideal product as it is our fully cloud-hosted browser designed to help you easily focus on your multi-step data collection while we take care of the full proxy and unblocking infrastructure for you, including CAPTCHA solving.Can I target Google SERPs from the Residential, Datacenter, or ISP Proxy network?
Can I target Google SERPs from the Residential, Datacenter, or ISP Proxy network?
Residential & Mobile networks
Residential & Mobile networks
Can I Send requests to IPs and not domain name?
Can I Send requests to IPs and not domain name?
Requests using URL format such as 1.1.1.1:443 will be executed using the super proxy server, not the proxy peer IP.Example of a request using the super proxy:
Can I use port 25 or any other SMTP port, or send an email by using the proxy IP?
Can I use port 25 or any other SMTP port, or send an email by using the proxy IP?
Does Bright Data support the Socks5 protocol
Does Bright Data support the Socks5 protocol
SOCKS5 protocol, with a default port 22228 assigned for SOCKS5 communication.See here for full SOCKS5 configuration instructions or visit the SOCKS5 proxies page.How do I control from where the request is performed?
How do I control from where the request is performed?
- You can choose to perform the request from the super proxy directly instead of the IP of the peer. In that case the IP of the request will be the one of the Super proxy. You will need to add ‘-direct’ to your request authorization string.
brd-customer-<customer_id>-zone-<zone_name>-direct
How do I refresh session (IP)?
How do I refresh session (IP)?
How to browse Chinese sites by using Chinese residential IPs?
How to browse Chinese sites by using Chinese residential IPs?
country-cn flag in your credentialsHow to use the same IP for an extended period of time and how long can I keep it? (long session)
How to use the same IP for an extended period of time and how long can I keep it? (long session)
- Target a specific IP with the
-ipflag: View your proxy list in your zone’s pool (can be found in the control panel in the zone’s ‘overview’ tab) choose one IP and target it using the-ipflag. This will route all your requests to the same IP. You can use the same IP as long as it is allocated to your zone. - Keep same session IP: By utilizing the
-session-<SESSION_ID>flag your requests will be routed to the same IP. To make sure that the same IP is kept bound to your session ID, you need to ensure that the session is not kept idle for more than . You can have multiple parallel sessions at the same time - each one with a different IP allocated to it.
What is Error code 502?
What is Error code 502?
What is Error code 403?
What is Error code 403?
How do I redirect `curl` ourput to a file?
How do I redirect `curl` ourput to a file?
curl output, you may want to redirect the output to a file. In order to do so add --output [filename] to your curl command options.How can I allow/block targeting specific domains in my zone?
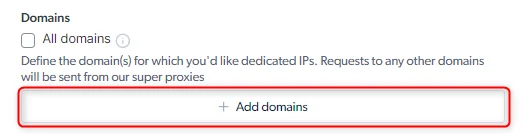
How can I allow/block targeting specific domains in my zone?
- Visit the Zones Page Go to the Zones Page in your dashboard.
- Select Your Desired Zone Choose the zone you wish to configure for domain access.
- Navigate to the ‘Configuration’ Tab Once in your selected zone, locate the Configuration tab, then scroll down to Security Options.
- Allowing or Blocking Domains
- To allow specific domains, add them to Allowed Target Hosts.
- To block specific domains, add them to Blocked Target Hosts.
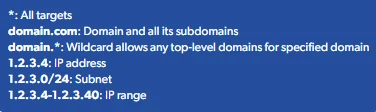
- Domain Wildcard Options
- Root Domain Inclusion: Adding a root domain (e.g., example.com) will automatically include all its subdomains (e.g., sub.example.com).
- Wildcard Use: Utilize the * wildcard to cover all subdomains and suffix variations. For instance, adding example.* will include sub.example.* and various domain suffixes like example.com, example.co.uk, etc.
How do I target government websites?
How do I target government websites?
.gov or .gov.[country_code] , yet those domains still qualify as government domains and getting blocked. When you get this specific reason block, check your response headers for x-brd-err-code : if the value is policy_20000 - this is a government website block. To gain access to government website, Bright Data will require you to identify your business and usecase via our KYC process. Read more about KYC process or start the KYC here. Why am I getting errors about robots.txt?
Why am I getting errors about robots.txt?
- Keep your KYC use case current with the Bright Data compliance team, so your approved Residential access covers the sites you target. Residential access requires KYC approval. To start or review the process, see the KYC form.
- Use our other products that do not require KYC verification, such as ISP proxies and Datacenter proxies.
- Avoid navigating to the web paths that the website is blocking in the robots.txt file.
Do you offer IPv6 Proxies and how do I get IPv6 proxies?
Do you offer IPv6 Proxies and how do I get IPv6 proxies?
How to understand why I am getting a certain error?
How to understand why I am getting a certain error?
-v or -verbose flag to the request (for cURL), this will ensure you receive the response headers which contain important information regarding the source of the error and will guide you to a solution.If the response headers include x-brd- then the error originates with BrightData and you should check the BrightData Error Catalog for further adviceOtherwise, there has not been a failure on our side - and you should instead check the article regarding Website BlockingIt could also be that the error originates from issues with your integration, you should check if you’ve integrated correctly, for help with integration - please see our Integrations SectionDoes Bright Data have any request limits?
Does Bright Data have any request limits?
Why cant I access (blocked) google, bing.com, youtube.com with proxies?
Why cant I access (blocked) google, bing.com, youtube.com with proxies?
Why am i getting wrong geolocation when checking proxy IP?
Why am i getting wrong geolocation when checking proxy IP?
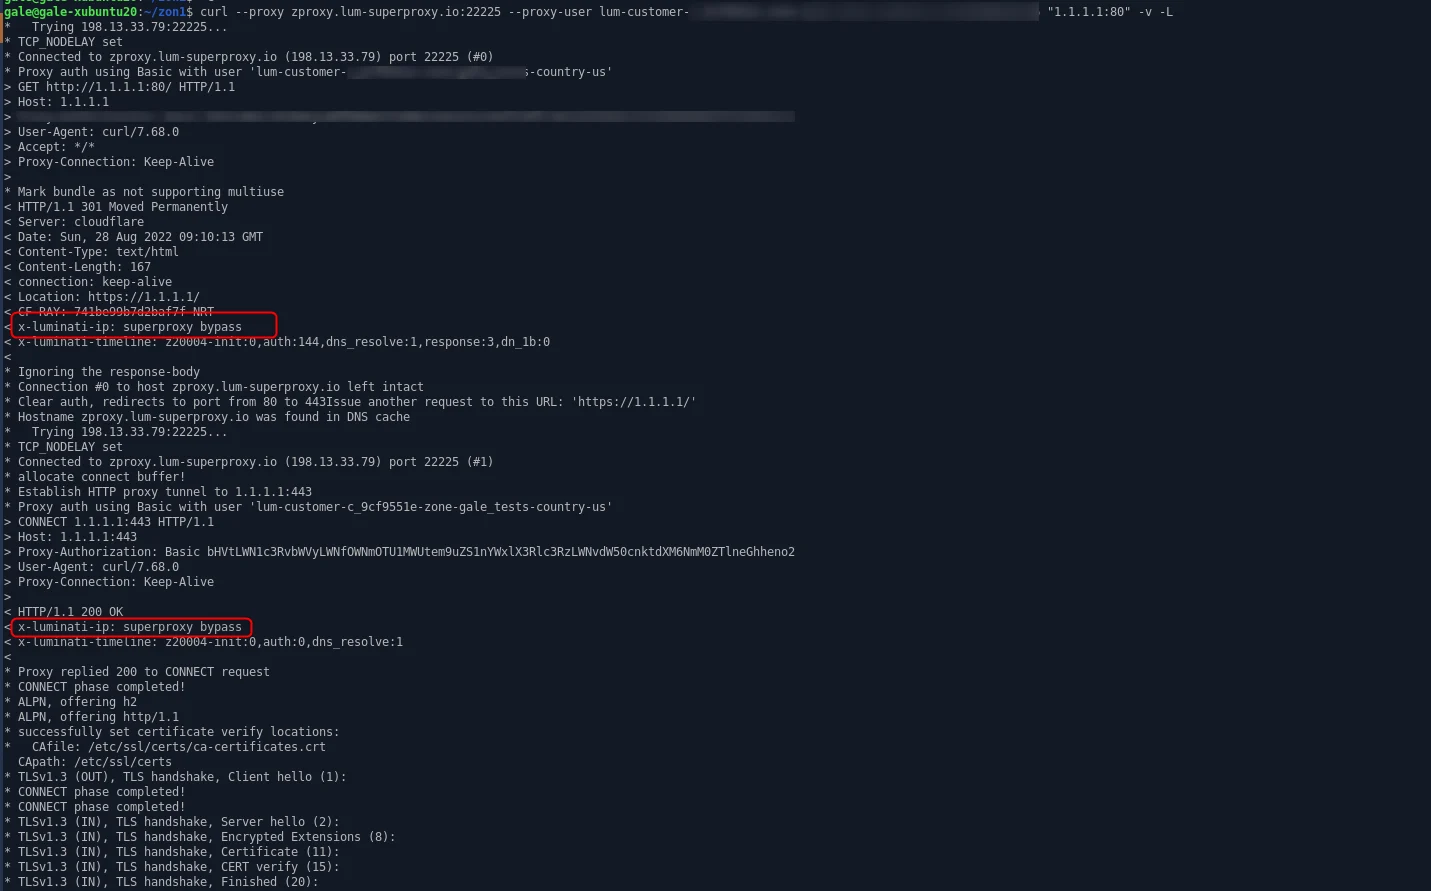
- Geolocation Databases: Geolocation databases (GeoDB) are used by internet websites to query information about the IP address used by the users. Bright Data monitors and maintains correct records for MaxMind GeoDB. There are many other smaller GeoDBs, most of which are using outdated records or flawed testing methods, and so the information they present is not accurate or is presented to lure their viewers to buy VPN or proxy products from them.
- Super Proxy Bypass: For third party IP checkers we may perform a superproxy bypass instead of completely blocking the request, this is done in order to retain our IP’s reputation. When this is done, you may see the location of our superproxy not of your proxy peer. Dont worry - for other regular websites your real proxy peer will be used. What is a superproxy bypass?
How can I use Bright Data proxies in IP:PORT format?
How can I use Bright Data proxies in IP:PORT format?
IP/HOST:PORT:USERNAME:PASSWORD. If your integration method does not support this format and requires IP:PORT only, you can use Bright Data Proxy Manager, a free, open-source tool that allows you to route requests to our proxies using the IP:PORT format.For more details on configuring Proxy Manager for this setup, refer to our guide: Port Targeting ConfigurationWhy has my IP address been added to the zone denylist?
Why has my IP address been added to the zone denylist?
Handling IP Restrictions on Your Account
If Bright Data detects unusual or suspicious activity originating from a particular IP address on one of your zones, the automated security measures will denylist that IP to protect your account. While this system effectively prevents most malicious activity, it occasionally may block legitimate users, resulting in anip_forbidden error message.How to Resolve This Issue
If you encounter this error, you can quickly resolve it by:- Go to the **‘Proxy’ **tab
- Navigate to the affected Proxy/Zone from the list
- Select ‘Security Settings’ in the configuration panel
- Find theIP allowlist option
- Add your current machine’s IP address to the allowlist
How to get your Bright Data connection information?
How to get your Bright Data connection information?
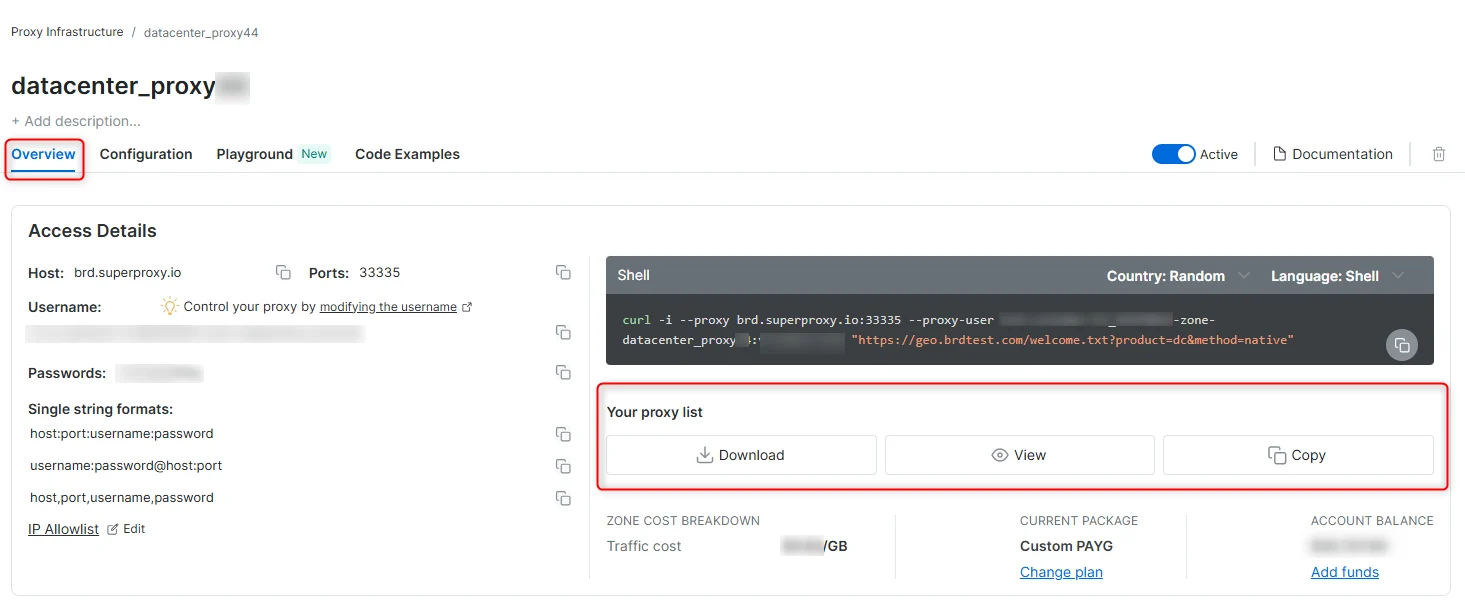
Your proxy access information
Bright Data proxies are grouped in “Proxy zones”. Each zone holds the configuration for the proxies it holds.To get access to the proxy zone:- Login to Bright Data control panel
- Select the proxy zone or setup a new one
- Click on the new zone name, and select the Overview tab.
- In the overview tab, under Access details you can find the proxy access details, and copy them to clipboard on click.
- You will need: Proxy Host, Proxy Port, Proxy Zone username and Proxy Zone password.
- Click on the copy icons to copy the text to your clipboard and paste in your tool’s proxy configuration.
Access Details Section Example
Residential proxy access
To access Bright Data’s Residential Proxies you will need to either get verified by our compliance team, or install a certificate. Read more…Targeting search engines?
If you target a search engine like google, bing or yandex, you need a special Search Engine Results Page (SERP) proxy API. Use Bright Data SERP API to target search engines. Click here to read more about Bright Data SERP proxy API.Avoid PROXY ERROR in your tool
Some tools use search engines as a test target for proxy: if your proxy test fails, this is probably the reason. Make sure that your test domain is not a search engine (this is done in the third-party tool’s configuration, and not controlled by Bright Data).Does Bright Data proxies support HTTP3?
Does Bright Data proxies support HTTP3?
What should I know to work with HTTP3 with Bright Data proxy network?
What should I know to work with HTTP3 with Bright Data proxy network?
How do I know if my target domain supports HTTP3?
You can tell if your target domain advertises on HTTP3 by sending acurl request checking the response header for alt-svc header. If this header exists in the response it means the domain is offering access over HTTP3.Can I use my installed curl to query over HTTP3?
Yes - but you need a specifically built curl utility which is supporting HTTP3. Most popular released of curl does not support HTTP3.Why should I use HTTP3?
Some websites expect HTTP3 traffic ; so by accessing with target’s expected protocols you may experience smoother unblocked access. For some use cases, HTTP3 access is faster than HTTP2, so your throughput can be higher.Do I need to perform special setup on my proxies?
No. All the proxies provided by Bright Data can relay HTTP3 traffic without special setting or modifications.Do I need to modify my operations or access to use HTTP3?
Consult your IT, Network and Security administrators on enabling HTTP3 from your network. Some network or firewall settings may be required to allow this traffic to flow from/to your organization’s network.How can I see if my chrome browser is utilizing HTTP3 for traffic?
Open your chrome browser in development mode, and open the network tab. Inprotocol column, if you see h3 it means requests are sent and received over HTTP3.How can I join the beta trial of HTTP3 of Bright Data?
In order to gain access to our HTTP3 beta, contact your account manager in Bright Data. We authorize currently only selected enterprises to join our beta trial of HTTP3.Can I export my logs?
Can I export my logs?