Quick Start
Follow these steps to start using the Bright Data Browser Extension:Set up an active zone in your account
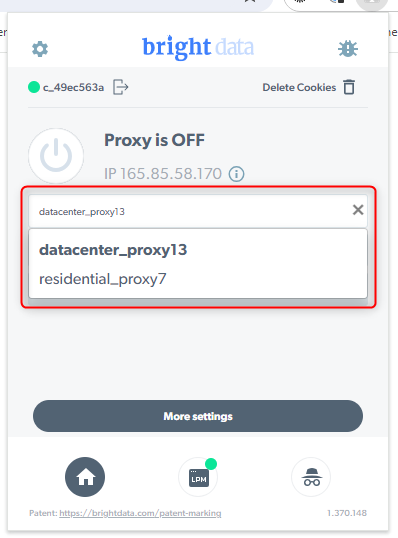
To start using the extension, you need at least one active zone in your Bright Data account.
- Check your existing zones on the My Proxies page.
- If you don’t have a zone yet, click Add to create a new zone.
Install SSL certificate for Residential zones (if required)
If you select a Residential zone and see the message “Certificate or approved KYC are required to use residential zone”, you need to install our SSL certificate in Chrome.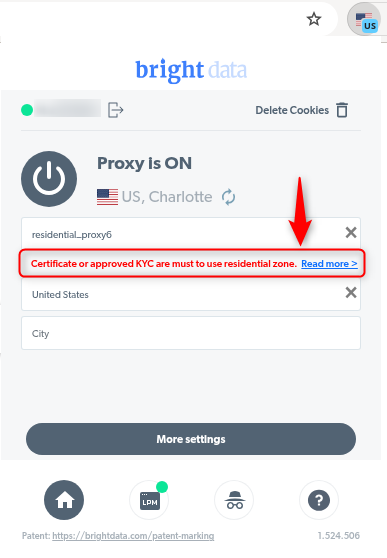
- Follow the Chrome certificate installation guide.
- To learn more about Residential network access modes, see the Residential access guide.
Select country and city
Choose the country and, if available, the city you want to use for your zone.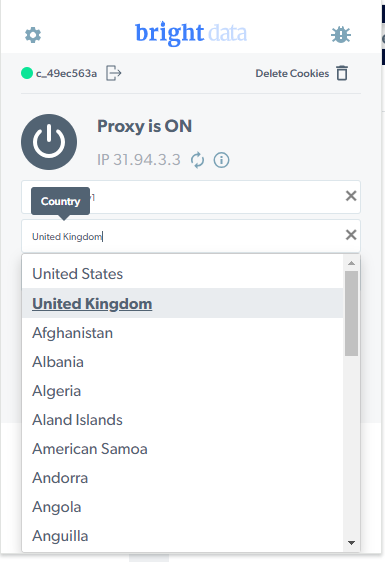
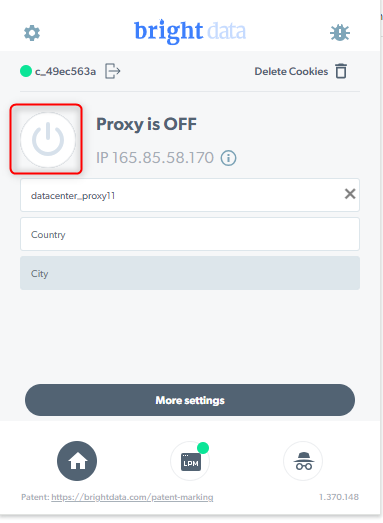
City-level targeting is only available for Residential and Mobile zones.For setup instructions, see How to enable city selection.
How to enable city selection
- In your Control Panel, go to the My Proxies page
- Open the Residential or Mobile zone where you want to enable city selection.

- Under Geolocation targeting, choose City.
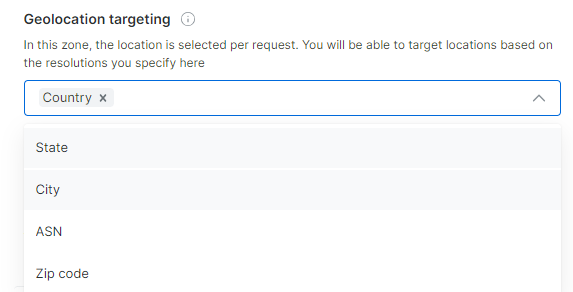
- Save your changes.