Expand to get your Bright Data Proxy Access Information
Expand to get your Bright Data Proxy Access Information
Your proxy access information
Bright Data proxies are grouped in “Proxy zones”. Each zone holds the configuration for the proxies it holds.To get access to the proxy zone:- Login to Bright Data control panel
- Select the proxy zone or setup a new one
- Click on the new zone name, and select the Overview tab.
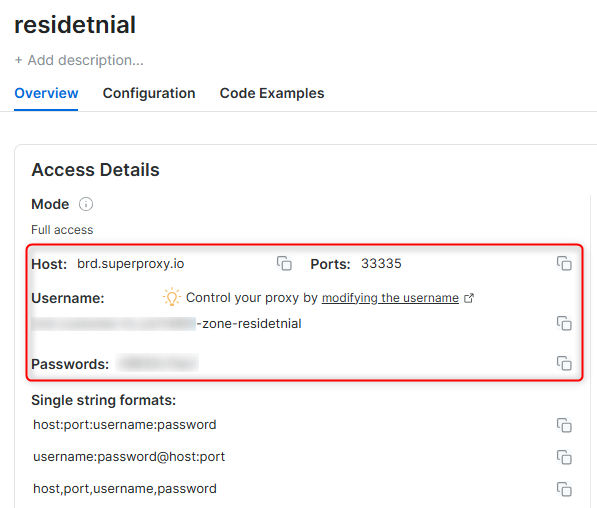
- In the overview tab, under Access details you can find the proxy access details, and copy them to clipboard on click.
- You will need: Proxy Host, Proxy Port, Proxy Zone username and Proxy Zone password.
- Click on the copy icons to copy the text to your clipboard and paste in your tool’s proxy configuration.
Access Details Section Example

Residential proxy access
To access Bright Data’s Residential Proxies you will need to either get verified by our compliance team, or install a certificate. Read more…Targeting search engines?
If you target a search engine like google, bing or yandex, you need a special Search Engine Results Page (SERP) proxy API. Use Bright Data SERP API to target search engines. Click here to read more about Bright Data SERP proxy API.Correct setup of proxy test to avoid “PROXY ERROR”
In many tools you will see a “test proxy” function, which performs a conncectivity test to your proxy, and some add a geolocation test as well, to identify the location of the proxy. To correctly test your proxy you should target those search queries to:https://geo.brdtest.com/welcome.txt .Some tools use popular search engines (like google.com) as a default test target. Bright Data will block those requests and you tool will show proxy error although your proxy is perfectly fine.If your proxy test fails, this is probably the reason. Make sure that your test domain is not a search engine (this is done in the tool configuration, and not controlled by Bright Data).Changing Proxy Settings in Chrome
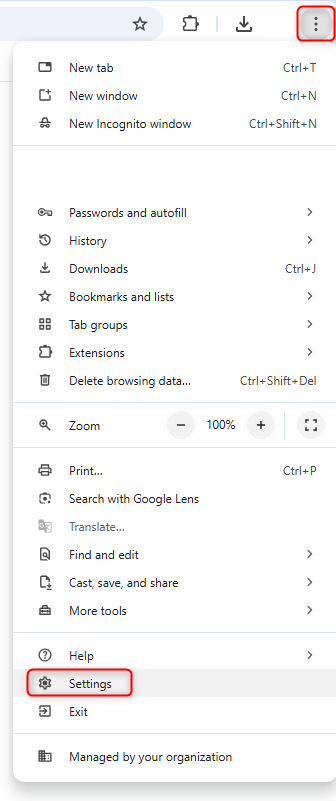
Ready to unlock the power of proxies in Chrome? It’s simple—just follow these steps and you’re good to go:Step 1. Access Chrome Settings.
Open Chrome, click on the three-dot menu in the top-right corner, and choose Settings from the dropdown.
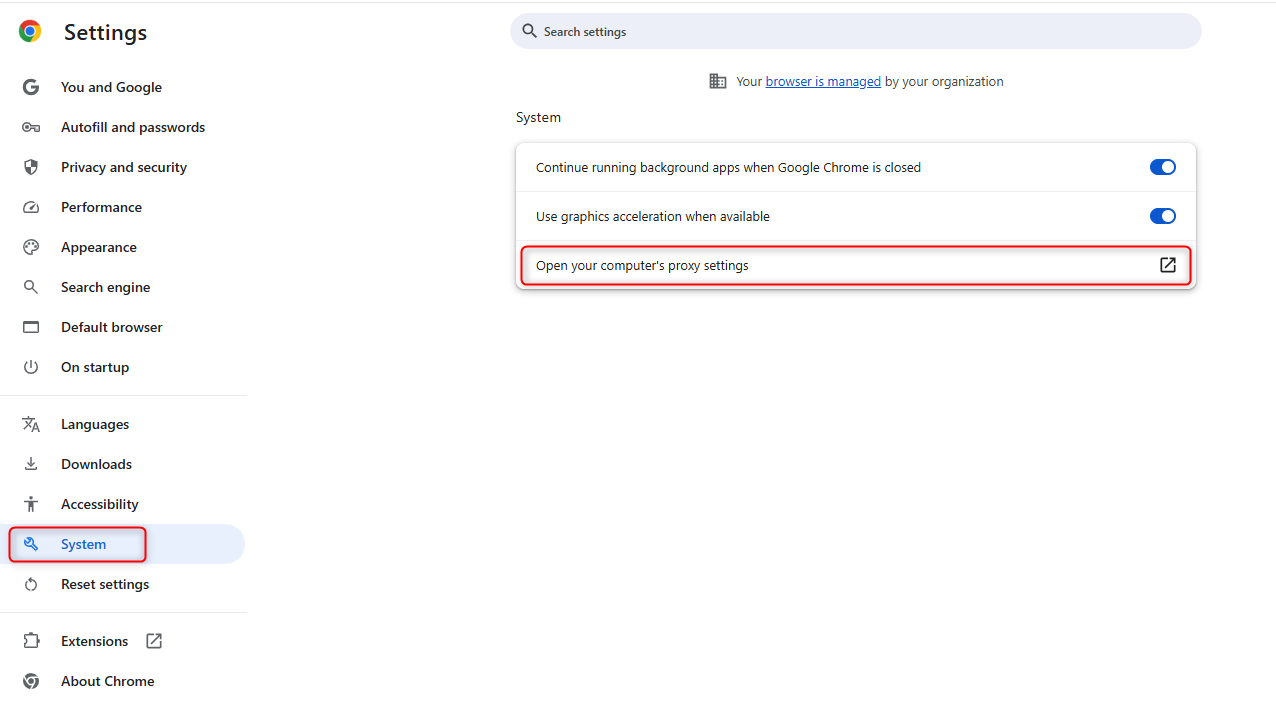
Step 2. Open System Proxy Settings.
Navigate to the System section and select Open your computer’s proxy settings to proceed.
Step 3. Configure Proxy in Your Operating System.
Since Chrome uses your operating system’s proxy settings, you’ll be redirected to the system configuration screen. Follow these steps based on your OS:- On Windows: Enable “Use a proxy server,” then enter the proxy address and port provided in your Bright Data dashboard.
- On macOS: Select the appropriate protocol (like HTTP or SOCKS5) and input the proxy address, port, and credentials. It’s quick and straightforward!