Expand to get your Bright Data Proxy Access Information
Expand to get your Bright Data Proxy Access Information
Your proxy access information
Bright Data proxies are grouped in “Proxy zones”. Each zone holds the configuration for the proxies it holds.To get access to the proxy zone:- Login to Bright Data control panel
- Select the proxy zone or setup a new one
- Click on the new zone name, and select the Overview tab.
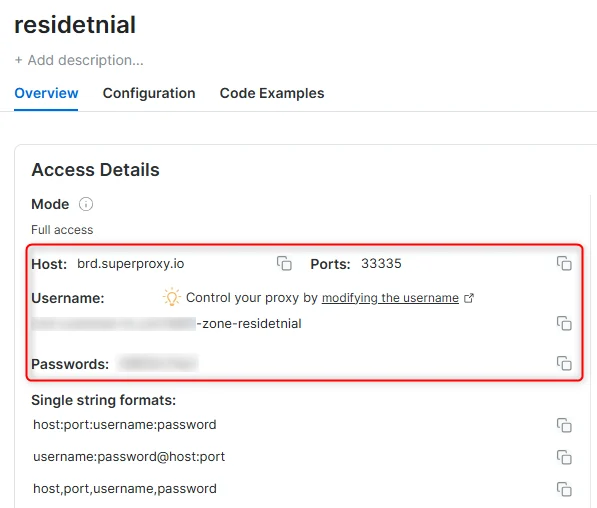
- In the overview tab, under Access details you can find the proxy access details, and copy them to clipboard on click.
- You will need: Proxy Host, Proxy Port, Proxy Zone username and Proxy Zone password.
- Click on the copy icons to copy the text to your clipboard and paste in your tool’s proxy configuration.
Access Details Section Example
Residential proxy access
To access Bright Data’s Residential Proxies you must be a KYC-verified business account. Complete KYC verification with the Bright Data compliance team; there is no automatic or no-KYC path. Without KYC, use ISP or Datacenter proxies. Read more…Targeting search engines?
If you target a search engine like google, bing or yandex, you need a special Search Engine Results Page (SERP) proxy API. Use Bright Data SERP API to target search engines. Click here to read more about Bright Data SERP proxy API.Correct setup of proxy test to avoid “PROXY ERROR”
In many tools you will see a “test proxy” function, which performs a conncectivity test to your proxy, and some add a geolocation test as well, to identify the location of the proxy. To correctly test your proxy you should target those search queries to:https://geo.brdtest.com/welcome.txt .Some tools use popular search engines (like google.com) as a default test target. Bright Data will block those requests and you tool will show proxy error although your proxy is perfectly fine.If your proxy test fails, this is probably the reason. Make sure that your test domain is not a search engine (this is done in the tool configuration, and not controlled by Bright Data).What is HideMyAcc?
HideMyAcc is an advanced anti-detect browser designed for managing multiple accounts securely. It helps users bypass restrictions, maintain anonymity, and avoid detection by offering a private browsing environment. Integrating Bright Data enhances HideMyAcc’s capabilities, providing secure and geo-targeted connections.How to Integrate Bright Data With HideMyAcc
Download and Install HideMyAcc
- Visit the HideMyAcc website and download the software compatible with your operating system.
- Install the application and log in with your account credentials.
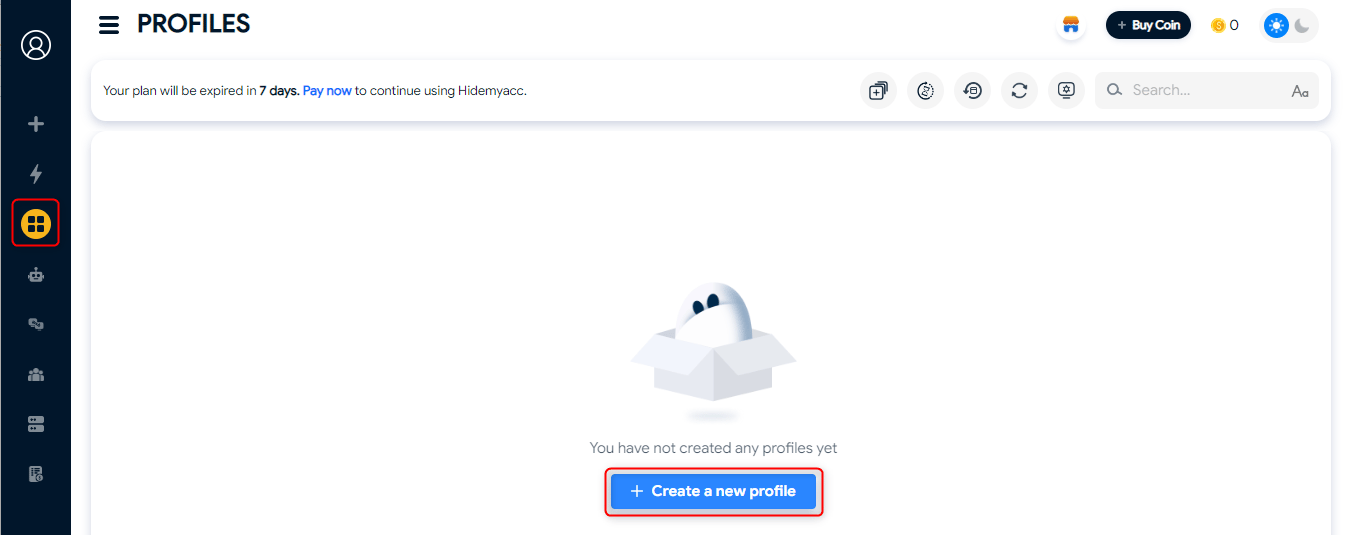
Create a New Profile
- Open HideMyAcc and navigate to the Profiles tab.
- Click Create a new profile to set up a new browsing instance.
Enable Proxy Configuration
- Locate the Proxy section within the profile creation page.
- In the profile settings, enter a Profile Name to easily identify it later.
- Toggle Your Proxy to activate the configuration options.

Add Your Bright Data Proxy Details
- Go to your Bright Data dashboard and click the proxy zone you would like to use.
- Under the Overview tab, copy the proxy access details code provided in the required format:
host:port:username:password. - Paste this code into the Quick add field in HideMyAcc .
- Use the Check Proxy option to verify the connection.
- Once the proxy configuration is verified, click Create to save your proxy settings.
For geo-specific proxies, format your username as
your-username-country-XX (e.g., your-username-country-US) to target a specific region.