Expand to get your Bright Data Proxy Access Information
Expand to get your Bright Data Proxy Access Information
Your proxy access information
Bright Data proxies are grouped in “Proxy zones”. Each zone holds the configuration for the proxies it holds.To get access to the proxy zone:- Login to Bright Data control panel
- Select the proxy zone or setup a new one
- Click on the new zone name, and select the Overview tab.
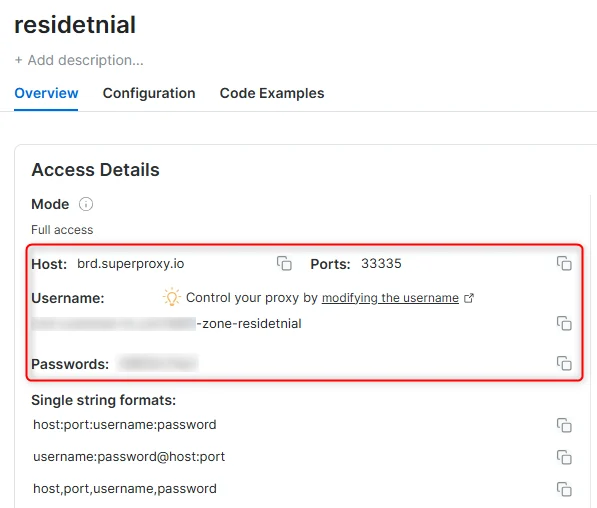
- In the overview tab, under Access details you can find the proxy access details, and copy them to clipboard on click.
- You will need: Proxy Host, Proxy Port, Proxy Zone username and Proxy Zone password.
- Click on the copy icons to copy the text to your clipboard and paste in your tool’s proxy configuration.
Access Details Section Example
Residential proxy access
To access Bright Data’s Residential Proxies you must be a KYC-verified business account. Complete KYC verification with the Bright Data compliance team; there is no automatic or no-KYC path. Without KYC, use ISP or Datacenter proxies. Read more…Targeting search engines?
If you target a search engine like google, bing or yandex, you need a special Search Engine Results Page (SERP) proxy API. Use Bright Data SERP API to target search engines. Click here to read more about Bright Data SERP proxy API.Correct setup of proxy test to avoid “PROXY ERROR”
In many tools you will see a “test proxy” function, which performs a conncectivity test to your proxy, and some add a geolocation test as well, to identify the location of the proxy. To correctly test your proxy you should target those search queries to:https://geo.brdtest.com/welcome.txt .Some tools use popular search engines (like google.com) as a default test target. Bright Data will block those requests and you tool will show proxy error although your proxy is perfectly fine.If your proxy test fails, this is probably the reason. Make sure that your test domain is not a search engine (this is done in the tool configuration, and not controlled by Bright Data).What is VMLogin?
VMLogin is a powerful anti-detection browser designed to help you manage multiple online accounts securely without the risk of detection. By creating virtual browser profiles with unique digital fingerprints, VMLogin ensures that websites treat each profile as a distinct, unrelated user. VMLogin is perfect for industries that require high levels of anonymity and flexibility, such as market research, competitive intelligence, and web scraping. With robust anti-detection features and user-friendly tools, it’s an excellent choice for both teams and solo professionals looking for safe, efficient browser profile management.VMLogin Proxy Integration
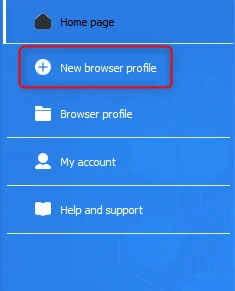
Follow these steps to set up Bright Data proxies in VMLogin: Step 1. Install VMLoginDownload and install VMLogin. Launch the application and log in to your account. Step 2. Create a New Browser Profiles
From the main menu, click on the New browser profile button to open the setup page.
Enter a name for the browser profile in the Display name field. Next, click on the Setting proxy server button to configure your proxy settings.
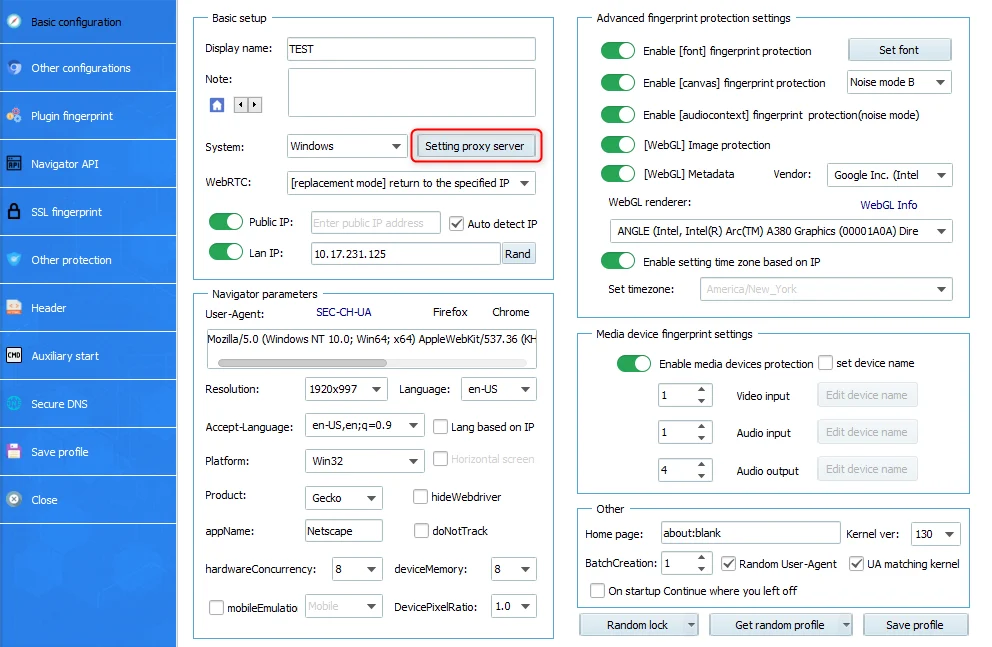
Enable the Proxy server toggle and fill out the fields with your Bright Data proxy details:
- Proxy type: Choose from
HTTP,HTTPS, orSOCKS5(based on your proxy type). - IP address: Enter
http://brd.superproxy.io/. - Port: Use the port number provided in your Bright Data dashboard.
- Username: Enter your Bright Data proxy
username. - Password: Enter your Bright Data proxy
password.
For country-specific proxies, you can enter a format like
your-username-country-US to receive a US exit node.Click Test Proxy to test the connection. If the test is successful and displays detailed IP information, click Confirm. To finalize the proxy setup click Save. Step 6. Save the Profile
Once you’ve configured the proxy and set up other preferences, click the Save profile button to finalize your browser profile. That’s it! You’ve successfully integrated your Bright Data proxy with VMLogin.