Expand to get your Bright Data Proxy Access Information
Expand to get your Bright Data Proxy Access Information
Your proxy access information
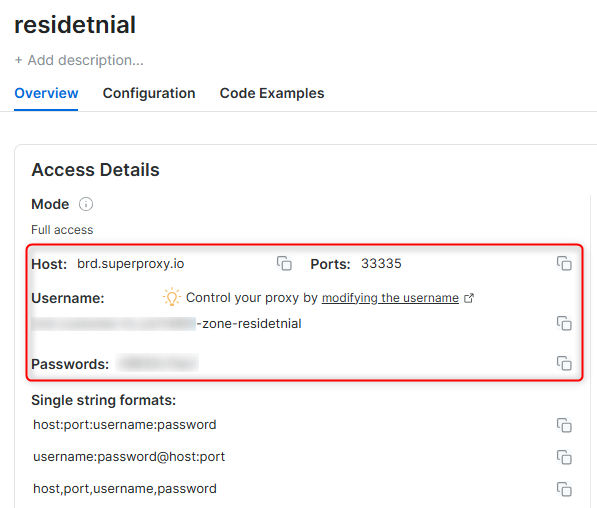
Bright Data proxies are grouped in “Proxy zones”. Each zone holds the configuration for the proxies it holds.To get access to the proxy zone:- Login to Bright Data control panel
- Select the proxy zone or setup a new one
- Click on the new zone name, and select the Overview tab.
- In the overview tab, under Access details you can find the proxy access details, and copy them to clipboard on click.
- You will need: Proxy Host, Proxy Port, Proxy Zone username and Proxy Zone password.
- Click on the copy icons to copy the text to your clipboard and paste in your tool’s proxy configuration.
Access Details Section Example

Residential proxy access
To access Bright Data’s Residential Proxies you will need to either get verified by our compliance team, or install a certificate. Read more…Targeting search engines?
If you target a search engine like google, bing or yandex, you need a special Search Engine Results Page (SERP) proxy API. Use Bright Data SERP API to target search engines. Click here to read more about Bright Data SERP proxy API.Correct setup of proxy test to avoid “PROXY ERROR”
In many tools you will see a “test proxy” function, which performs a conncectivity test to your proxy, and some add a geolocation test as well, to identify the location of the proxy. To correctly test your proxy you should target those search queries to:https://geo.brdtest.com/welcome.txt .Some tools use popular search engines (like google.com) as a default test target. Bright Data will block those requests and you tool will show proxy error although your proxy is perfectly fine.If your proxy test fails, this is probably the reason. Make sure that your test domain is not a search engine (this is done in the tool configuration, and not controlled by Bright Data).What is AdsPower?
Take control of your multi-account management with AdsPower! This versatile browser is perfect for marketers, e-commerce businesses, and social media managers who need a secure, efficient way to handle multiple accounts at once. Each profile runs in its own isolated environment, keeping your activities discreet and safe from account suspensions or flags. With AdsPower, you get unique digital fingerprints for every profile—things like IP address, device type, and user agent—ensuring your actions stay under the radar. Whether you’re scaling your e-commerce business, running social media campaigns, or working with affiliate marketing, AdsPower makes managing multiple accounts smooth and secure.AdsPower Proxy Integration
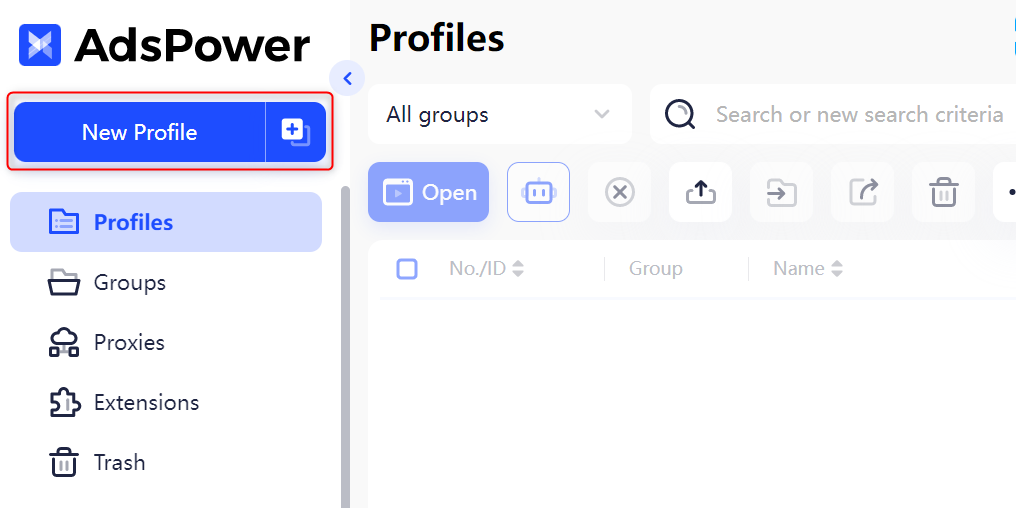
Integrating Bright Data proxies with AdsPower is quick and easy. Let’s set you up in a few simple steps: Step 1. Download AdsPower. Head over to the AdsPower website to download and install the app. Step 2. Create a New Profile. Once the app is installed, open it and click New Profile to create your first browser profile.
-
Proxy Type: Choose from
HTTP,HTTPS, orSOCKS5(based on your proxy type). -
Proxy Host: Enter
http://brd.superproxy.io/. - Proxy Port: 33335
-
Proxy Username: Enter your Bright Data proxy zone
username. -
Proxy Password: Enter your Bright Data proxy zone
password.
Some versions of AdsPower use
google.com as their default test site. Bright data proxies are blocking google.com. Validate this is not a search engine website.If you chose either Residential or Mobile proxies you must install Bright Data SSL certificate to secure your end to end communication. Otherwise you will encounter Errors.
SSL installation instructions can be found here
Alternatively, you can ignore SSL verification on AdsPower: Go to advanced settings when setting up a profile and paste:
--ignore-certificate-errors in launch args.For country-specific proxies, you can enter a format like
your-username-country-us to receive a United States exit node.Click Open under Tags to launch your browser with the configured proxy.
