Expand to get your Bright Data Proxy Access Information
Expand to get your Bright Data Proxy Access Information
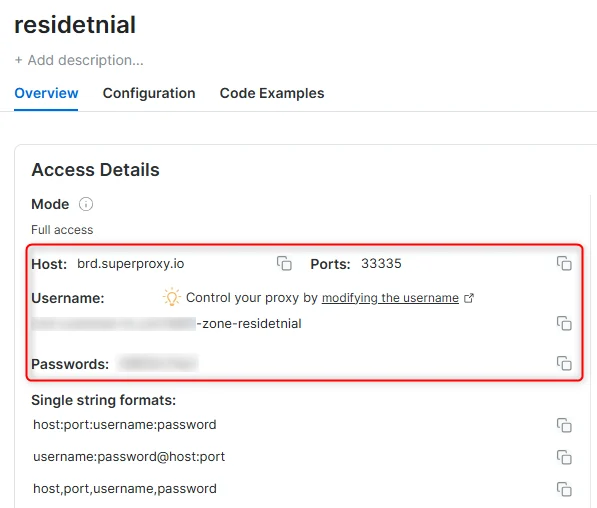
Your proxy access information
Bright Data proxies are grouped in “Proxy zones”. Each zone holds the configuration for the proxies it holds.To get access to the proxy zone:- Login to Bright Data control panel
- Select the proxy zone or setup a new one
- Click on the new zone name, and select the Overview tab.
- In the overview tab, under Access details you can find the proxy access details, and copy them to clipboard on click.
- You will need: Proxy Host, Proxy Port, Proxy Zone username and Proxy Zone password.
- Click on the copy icons to copy the text to your clipboard and paste in your tool’s proxy configuration.
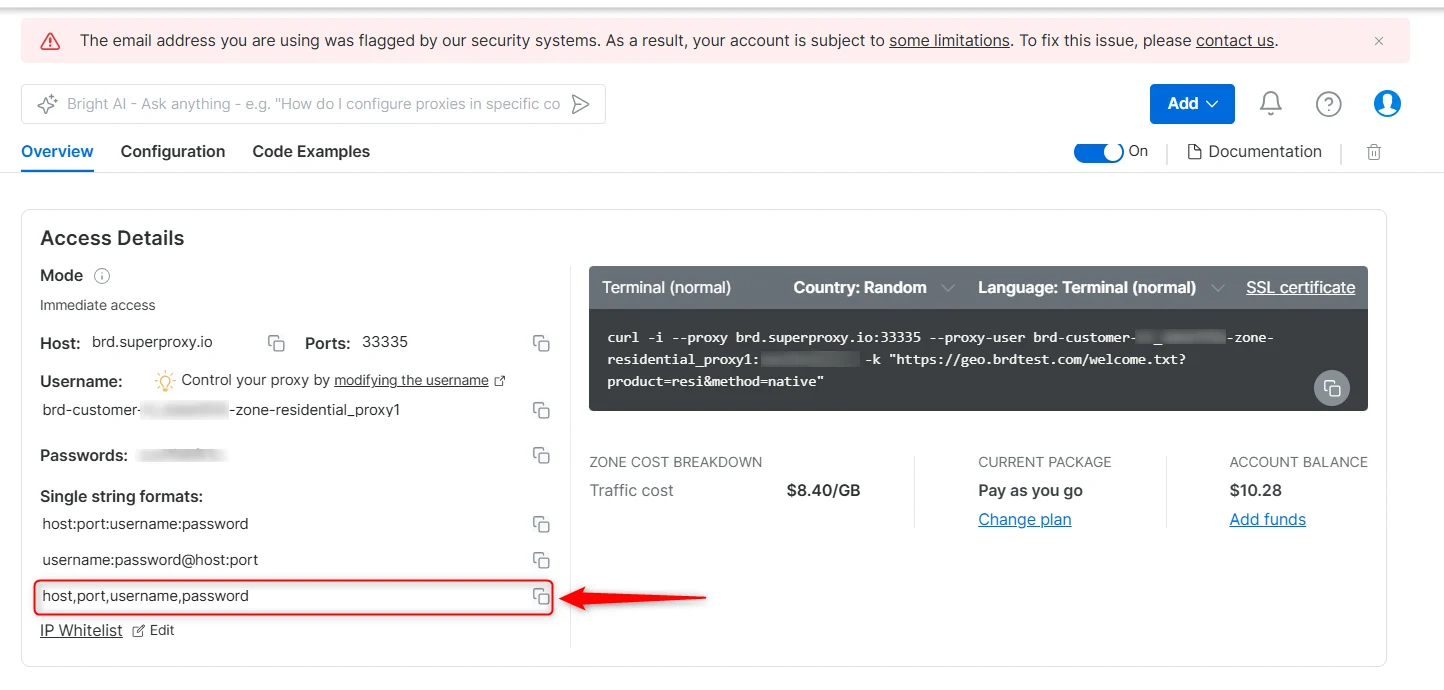
Access Details Section Example
Residential proxy access
To access Bright Data’s Residential Proxies you must be a KYC-verified business account. Complete KYC verification with the Bright Data compliance team; there is no automatic or no-KYC path. Without KYC, use ISP or Datacenter proxies. Read more…Targeting search engines?
If you target a search engine like google, bing or yandex, you need a special Search Engine Results Page (SERP) proxy API. Use Bright Data SERP API to target search engines. Click here to read more about Bright Data SERP proxy API.Correct setup of proxy test to avoid “PROXY ERROR”
In many tools you will see a “test proxy” function, which performs a conncectivity test to your proxy, and some add a geolocation test as well, to identify the location of the proxy. To correctly test your proxy you should target those search queries to:https://geo.brdtest.com/welcome.txt .Some tools use popular search engines (like google.com) as a default test target. Bright Data will block those requests and you tool will show proxy error although your proxy is perfectly fine.If your proxy test fails, this is probably the reason. Make sure that your test domain is not a search engine (this is done in the tool configuration, and not controlled by Bright Data).What is Insomniac?
Insomniac is an online purchasing tool allowing you to hide your digital footprint through its multi-session browser. Insomniac browser allows you to apply one proxy per tab and hide your online footprint by applying a different IP address for every tab you open.How to setup Insomniac with Bright Data proxies
Using the same proxy repeatedly or rotating with new proxy every time?
Bright data offers access to two main kinds of proxies:- A rotating pool of proxies
- A set of fixed proxies (shared with others or dedicated to you)
Set-up for Insomniac browser
- Download and install the Insomniac browser
- Open Insomniac browser
- Click on “Global sess.” :

- Click on “Proxy List”
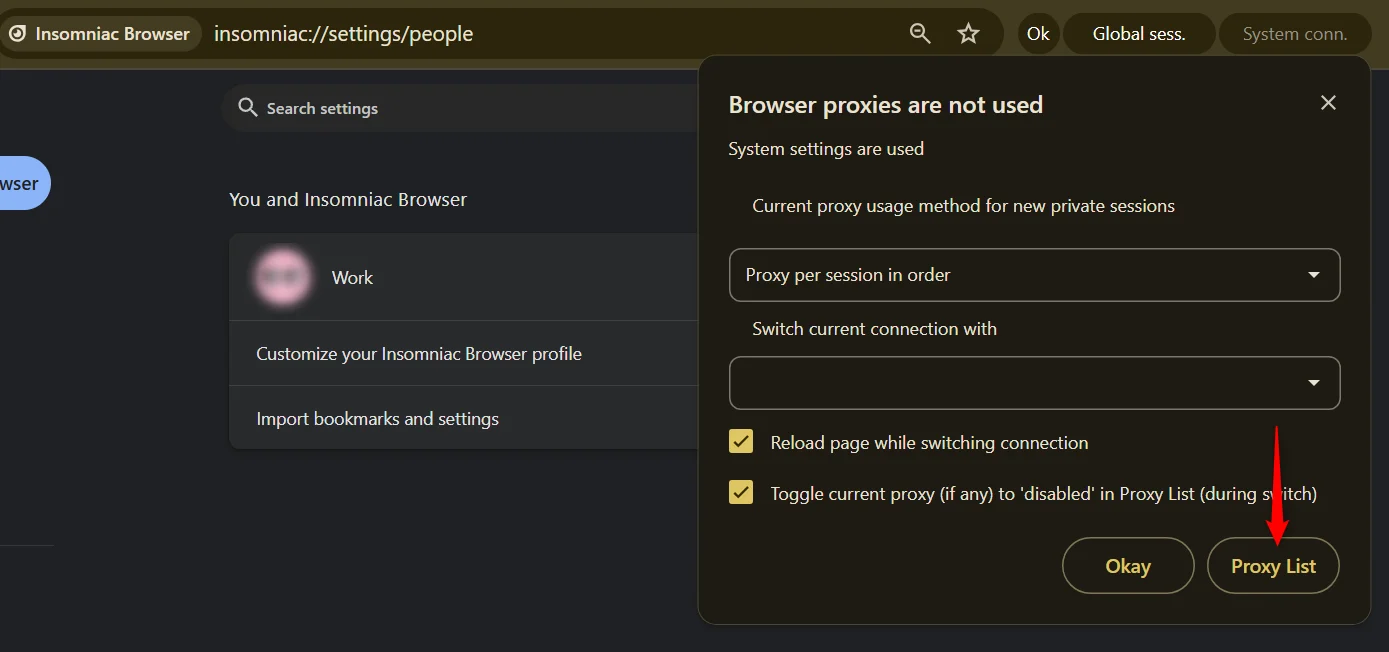
- This setup window will open, requiring you to paste your proxy configuration here.
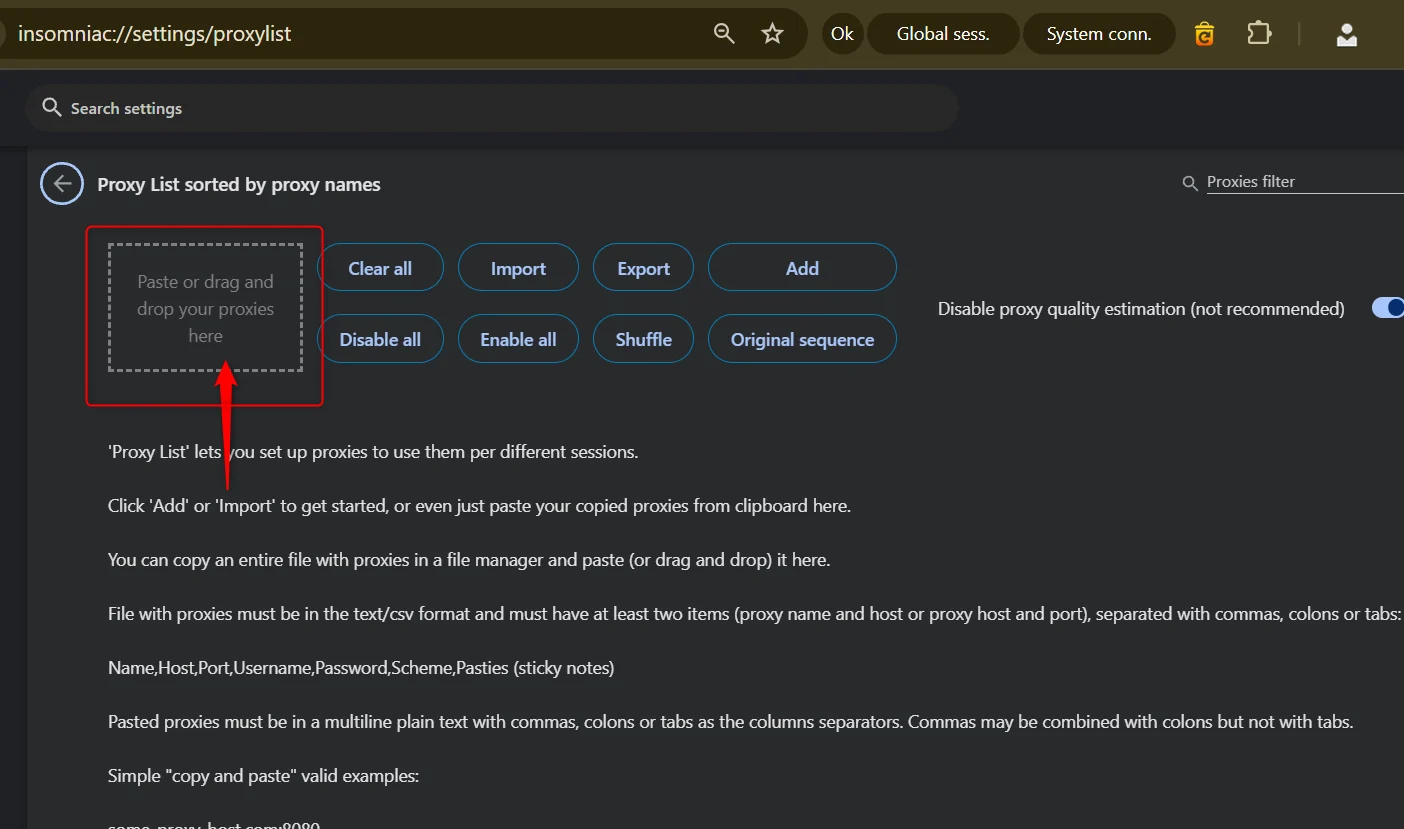
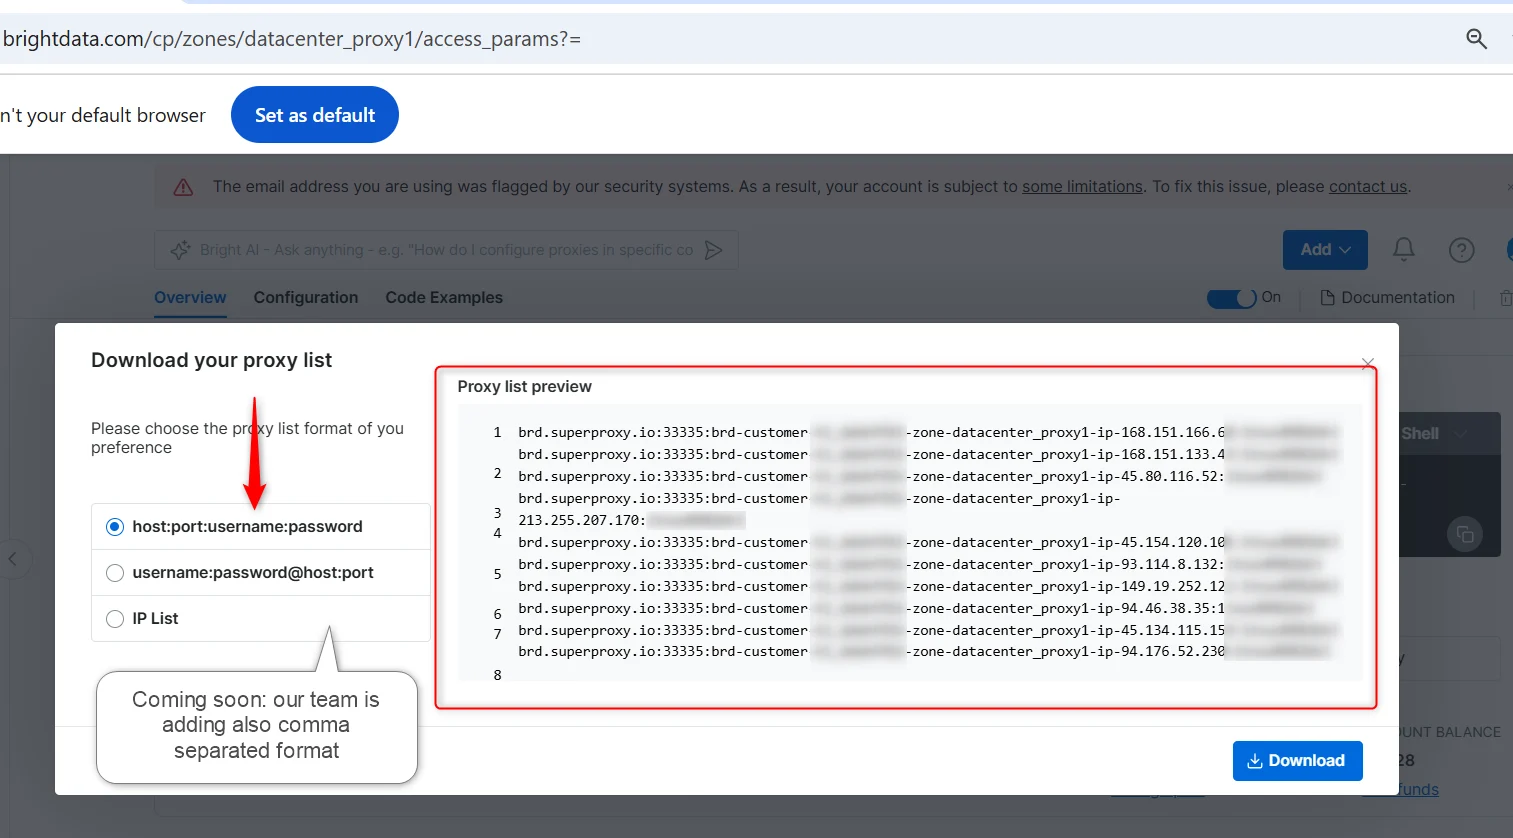
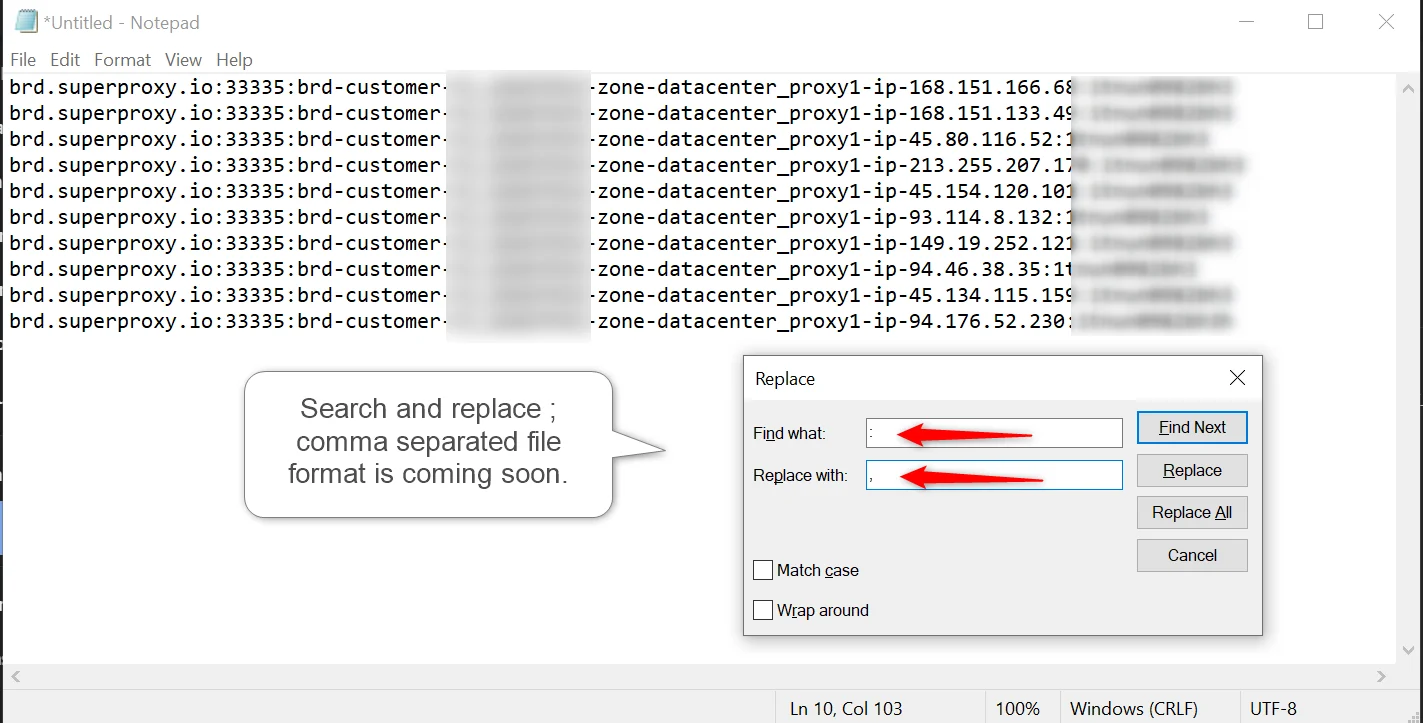
host,port,user,password .
Integrating Insomniac with Bright Data Proxies
- Go to your Bright Data Dashboard and click Create a Zone
- Choose your configuration
- Click Save
- The zone now includes your proxy setup and in the access details you have the connection information.
Ctrl+H to open the Search and replace function):
Integrating Multiple Proxy Manager ports with Insomniac
- Download Proxy Manager
- Click Add new Proxy to create a new port
- Select the new port (24XXX)
- Go to the General tab in the port settings
- In the Multiply proxy port field select the number of proxy ports to create. This will create multiple proxy ports with the same settings
- Your Spreadsheet Contains the following columns:
- Custom Name: Add a name for each proxy
- Host: 127.0.0.1
- Port: 24XXX
- Username, Password, and Tags: leave EMPTY(the Proxy Manager has already been authenticated with the Super Proxy)
- Save the file as a CSV and not as an XLS or XLSX
- In Insomniac Proxy per tab extension select Manage Proxy list, and select Add bulk proxies
- Select Import proxy list and upload the CSV file